In January 2015, a user posted a photo on Twitter that went crazy on social media. It was a gorgeous photo of a hill with a warped, circular perspective. The photo was captioned, “Panoramic picture taken while rolling down a hill.” It was a funny explanation of the photo, but it wasn’t at all true to how the photo was taken.
The photo was made by Randy Scott Slavin, who now has a whole portfolio of these “alternative perspective” photos.
Panoramic picture taken while rolling down a hill. pic.twitter.com/UJbtcTnrED
— Into The Wild (@Wild_Outdoors) January 28, 2015
The picture was actually made by taking a normal panoramic picture and then stitching the photos into a circle and bending them around a point in Photoshop. I tried it and came up with a pretty sweet shot, and want to share with you how I did it.
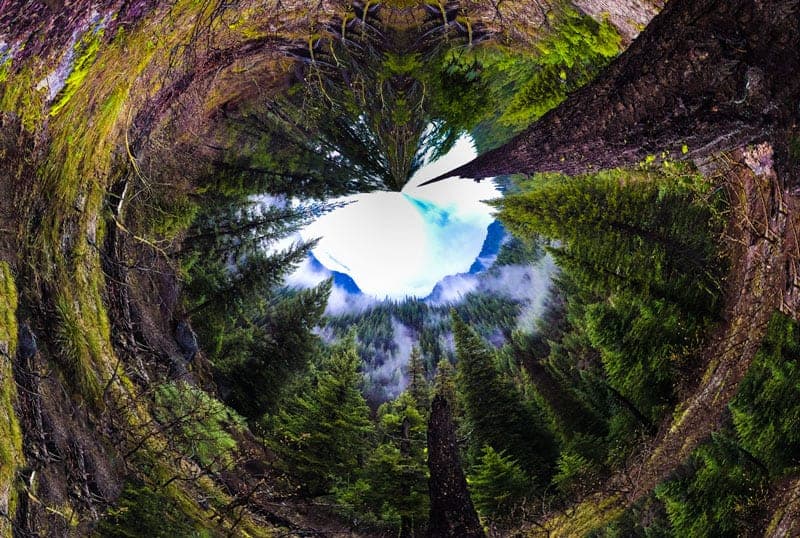
Thanks to MCP for pointing me in the right direction on how to do this. Their tutorial is worth a read. I’ve taken what I learned there and built on it with some extra steps that give it a bit of an improvement.
Step 1: Find a panoramic photo in your portfolio, or crop one
The first thing you’ll need to do is take a normal panorama. You can go take one, or you can just look through your portfolio and find one you already have. I just searched through my Lightroom library for the word “panorama” and found many that I’ve taken over the years.
You’ll want a panorama that includes lots of things close up to the camera, since that would be the perspective if you were rolling on a hill. If you don’t include enough ground up close to the lens, the illusion is destroyed.
If you don’t have a panorama like this, you could find a high resolution image and simply crop the top and bottom to make it very wide.
There isn’t a specific width the panorama needs to be to do this, but you want to go REALLY wide. The photo should probably be at least twice as wide as it is tall. The wider the photo starts out, the less square your final photo will be.
Step 2: Make a loop
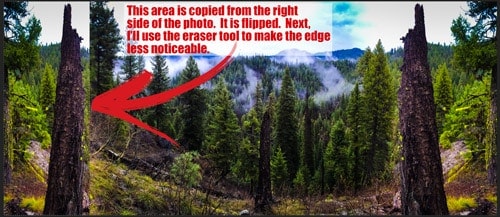
Now you’ll need to grab the rectangular marquee tool and select the last 30% of the photo on the right or left side. Press Control C (Command and C on a Mac) and then move it to the opposite end of the panorama. Flip the pixels using the move tool.
Now you need to mask the edge of the area you copied. Grab the eraser tool and use a soft brush to blend the two photos together. It doesn’t have to be perfect.
Step 3: The merge
Okay, I’m a Survivor fan, so just mentioning “the merge” makes my heart skip a beat. Anyway…
Click on both layers and highlight them. Now right click on the right side of one of the layers in the layer palette and click Merge layers.
Step 4: Squish it!
Go to image > image size. You need to make the photo square. On the left hand side of the image size boxes, you’ll see a little chain link. Make sure this is NOT highlighted. This makes it so the proportions are not constrained.
Take the height of the photo (the smaller number) and copy and paste it into the width box. This will create a square photo that is completely squished. If the resulting photo looks terrible, you’re doing it right.
Step 5: Warp speed
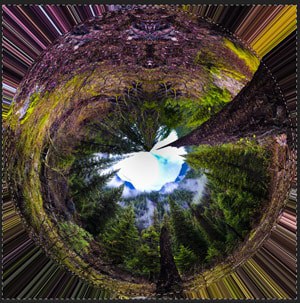
Now to go to filter > distort > polar coordinates. Make sure “rectangular to polar” is selected.” Press okay.
Boom! You have your photo.
Step 6: Content Aware Fill and Crop
Now use the circular marquee tool and select the center circle of the image (the part that looks good, not the weird disco lines on the outside). Now click control i (command and i on a Mac). That makes the inverse selection. Go to edit > fill > content-aware fill. Press okay.
That last step uses the computer to attempt and draw in some of the ground around the edges.
Now crop in a tight rectangle. Done!
Step 7: You’re missing out
Every Tuesday, I send out a free email newsletter called “Behind the Photos.” I share tutorials just like this one, and we have over 100,000 photographers that subscribe to the newsletter each week.
The readers love it because I share a finished professional photo, and then I share the ORIGINAL unretouched photo so you can see what was done in Lightroom/Photoshop and what was done in camera. I also share the exact gear I used and my camera settings.
If you aren’t reading Behind the Photos, you’re missing out. Subscribe for free here.