
Here are the 3 key things you have to do for cold weather photography
 Being cold and wet is miserable; don’t let the cold, wind, and rain or snow limit your photography experience. Doing a little research and employing a few simple strategies can keep you comfortable, warm, and dry to capture those frozen landscape shots that less prepared photographers will not get.
Three keys to getting it right:
- Know the conditions for your shoot — what are the average temperatures you are likely to encounter; how about rain or snow; what wind might you expect to encounter? Knowing this will aid in determining the right gear.
- Know your own thermostat — do you tend to run hot or cold? This will guide you in selecting the right weight and amount of clothing for you and the conditions you are likely to encounter.
- Get the right gear – find an outdoor cold weather gear store with knowledgeable staff or a trusted website to guide your choices in cold weather gear.
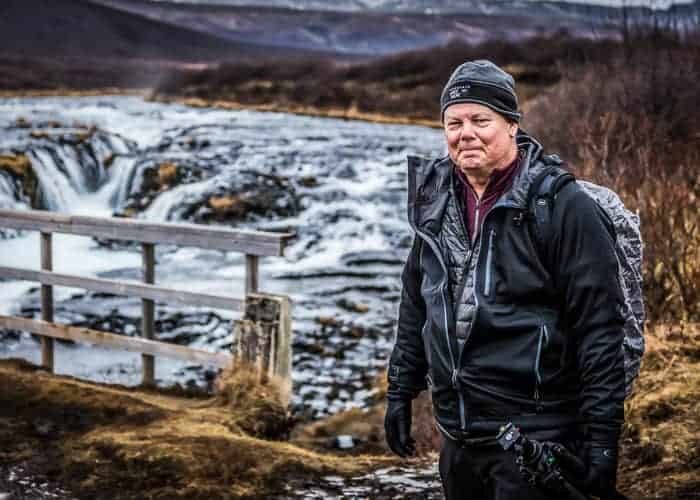
Landscape photography is both an active and passive activity. The car will usually keep you warm until you arrive at your photo site, the work of getting yourself and your equipment to that perfect vantage point can help keep you warm, but once you get to that perfect spot, composing and taking photos is a lot less strenuous and your cold weather gear will have to protect you from the elements.
Layering your cold weather gear allows you to adapt to differing conditions. There are two primary insulating layers, base and mid, that trap air warmed by your body to keep you comfortable. The shell layer, often thought of as wind and/or rain gear, is a third layer, a critical factor in staying warm if conditions are wet or windy but not considered an insulation layer.
Base Layer
The base layer should fit snug to your body. Synthetic, wool, or silk are the primary materials of today’s base layers. These materials, combined with the snug fit, wick perspiration from your body so you stay dry and avoid that cold, damp, sensation. Avoid using cotton against your skin — it retains moisture, keeping you damp, and increases the rate of heat loss from your body.
Base layers come in three weights. Choose one suitable for your body’s thermostat and the environment you will be shooting in. This mid-weight synthetic shirt, Mens Patagonia Midweight Zip-T, served well in Iceland with temps near freezing and fairly minimal exertion to reach photo sites. These conditions did not require the use of the base layer pants — again, your thermostat may be different so decide what is right for you.
Other base layer examples are: Mens Patgonia Midweight Bottoms; Womens REI Heavyweight Zip Top; Womens Heavyweight Bottoms.
Mid-Layer
Mid layers provide insulation with multiple thin layers that can be put on or removed easily to adjust for conditions, usually made of wool or fleece, these come in varying weights as well. Again, your body and conditions need to dictate what is right for you; however, a long sleeve cotton shirt such as Womens Longtail Long Sleeve Shirt or Men's Longtail Long Sleeve Shirt is relatively inexpensive and worked well as a first mid-layer on the Iceland trip where temperatures were, at the lowest, near freezing.
Fleece, wool, or a combination of the two are the usual materials of mid-layers. The Windbrake Fleece Jacket serves as an ideal mid-layer that can double as an outer layer if temperatures are not too low. It is a mid-weight polyester fleece with a windproof membrane and kept a 25 mph (40 kph) wind at bay in Iceland. Wool sweaters and jackets are natural fiber mid-layers that retain insulating properties even when wet and may be an especially good option if rain or snow is anticipated.
For more frigid adventures add a “puffy jacket” that provides its warmth by keeping a fairly large volume of warm air trapped between you and the outside world. This will likely be the most expensive of your purchases but also will provide the most protection when temperatures drop. Several options include
Women's Nano Puff Jacket or Men's Thermo-Ball Jacket and can come with a hood or not.
Pants that are water and wind resistant, rugged, and easy to move in are ideal for the mid-layer. If conditions are not brutal these REI Mistral Pants, or Taclite Pro Pants can serve as the only pants you will need.
Shell Layer
Staying dry is essential to staying comfortable — and safe — in cold environments. Do NOT short change yourself on rain or snow protection and put it on relatively quickly once rain or snow start. It is much easier to stay dry than to get dry! These REI Crestrail Rain Pants and the REI Motility Rain Jacket are options that work well. The shell layer also will stop wind and should be used whenever wind is a problem.
Footwear
Polyester or merino wool liner socks as the base layer in your boots will help wick moisture from your foot and help prevent blisters. A good Wool Sock then provides the insulating layer to keep your feet warm and to dissipate the moisture.
Waterproof boots with good hiking characteristics are a must have. You want to be able to rock hop into the river to capture that shot from a unique perspective. Options include: Insulated/Waterproof Boots. Carry a spare set of socks just in case — wet feet are to be avoided!
Head-Wear
Keeping your head warm is critical. Get a hat that, at a minimum, covers your ears and stops the wind – and wear it! Balaclava style headwear will provide protection by covering your face and neck but not all are “wind-stop” materials so use care when shopping for one. Fleece Hat – Windproof and Balaclava will give you some options.
Gloves
Now the tricky part. How to operate your camera and not lose fingers to frostbite. Layering is your answer – a lighter weight glove for camera operation with mittens that fit over them for frigid times along the trail or during those time-lapse star shots.
The Seirus Lightweight Liner Glove is wind and waterproof, provides warmth and dexterity to operate all but the most fine buttons on most cameras. Consider something like Seirus Touch Screen Compatible Gloves if you want to operate touch screens on cameras or phones without removing your gloves. Outdoor Research “Lobster Claw” Gloves have proven to provide dexterity and good warmth, being a cross between gloves and mittens, the only drawback is that you look like a mutant ninja turtle.
Extras
Hot Hands Products are light weight and good to throw in your bag. These are air activated heat-generating materials that provide warmth without batteries. You can drop them into mittens, pants pockets, boots, or even under your hat for that bit of extra warmth.
Getting amazing shots sometimes means you have to be willing to do things other photographers are not. Now is the perfect time to get out in the cold and do something a lot of others are not willing to do. If you can stay warm, dry, and safe out there in the elements then you have a great chance at setting yourself apart from others. The three keys to being prepared then are knowing yourself, your environment, and your gear.
Here are my tips…
Cold fingers will severely camera operations. I found some very thin worker gloves at a local gas station that were ideal for the Icelandic conditions. They were much better at keeping the wind out than the standard touchscreen gloves I had with me, allowed me to push all the buttons and even worked with my touchscreen. They were thin enough to fit inside my regular gloves when I needed to warm up a bit.
Also, batteries lose their charge in low temperatures. Keep your spare batteries warm and cosy inside your clothes near your body.
Finally, temperature swings between the warm car and cold outside air can cause condensation. Put your camera and lenses in the trunk/boot while driving.
I’m trying to find your directions to directions to Bruarfoss waterfall – but the link is missing
I am very anxious to see your directions to Bruarfoss waterfalls
Will you be posting them?
thanks!!
I am very anxious to see your directions to Bruarfoss waterfalls
Will you be posting them?
Thanks!!
Lots of broken links on the post.
có dấu hiệu bởi các hiện tượng như là xuất tinh sớm tinh dịch ít loãng giảm ham muốn chăn gối cơ thể hao gầy mặt khuôn
Tình trạng cương cứng khi bạn mới thức dậy là dấu hiệu cho thấy cơ thể bạn đang hoạt động tốt. Nhưng điều này không phải luôn luôn đúng.