
Shooting in low light sometimes means making compromises: slower shutter speeds introduce blur, higher ISO result in sensor noise, and lifting shadows may results in overexposure in highlights. In other scenarios, a photo can look fine on your camera screen and disappoint you once imported on a computer.
For old photos without a chance to reshoot, mobile shots in dark scenes with small-sensor limitations, or camera RAWs taken in manual mode with less ideal settings, to what degree can post-processing help?
This post analyzes quality problems caused by low light scenes, improper camera settings, and tricky scenarios, offering solutions to improve photo quality and reduce noise. Depending on the specific issues, the processing involves using a standalone photo enhancer or following an editor-plus-enhancer workflow.
You can follow the steps below and get a free trial of Aiarty Image Enhancer to test it out with your own images. It runs safely offline on both Windows and Mac.
Scenario 1: Enhance a Low Light Indoor Photo and Reduce Noise
For this portrait photo from an indoor cocktail party, distracting image noise and dark, muted colors make the image look flat. To provide a cleaner foundation for color and lighting adjustments, it’s beneficial to restore image quality and reduce low light noise in the first place.
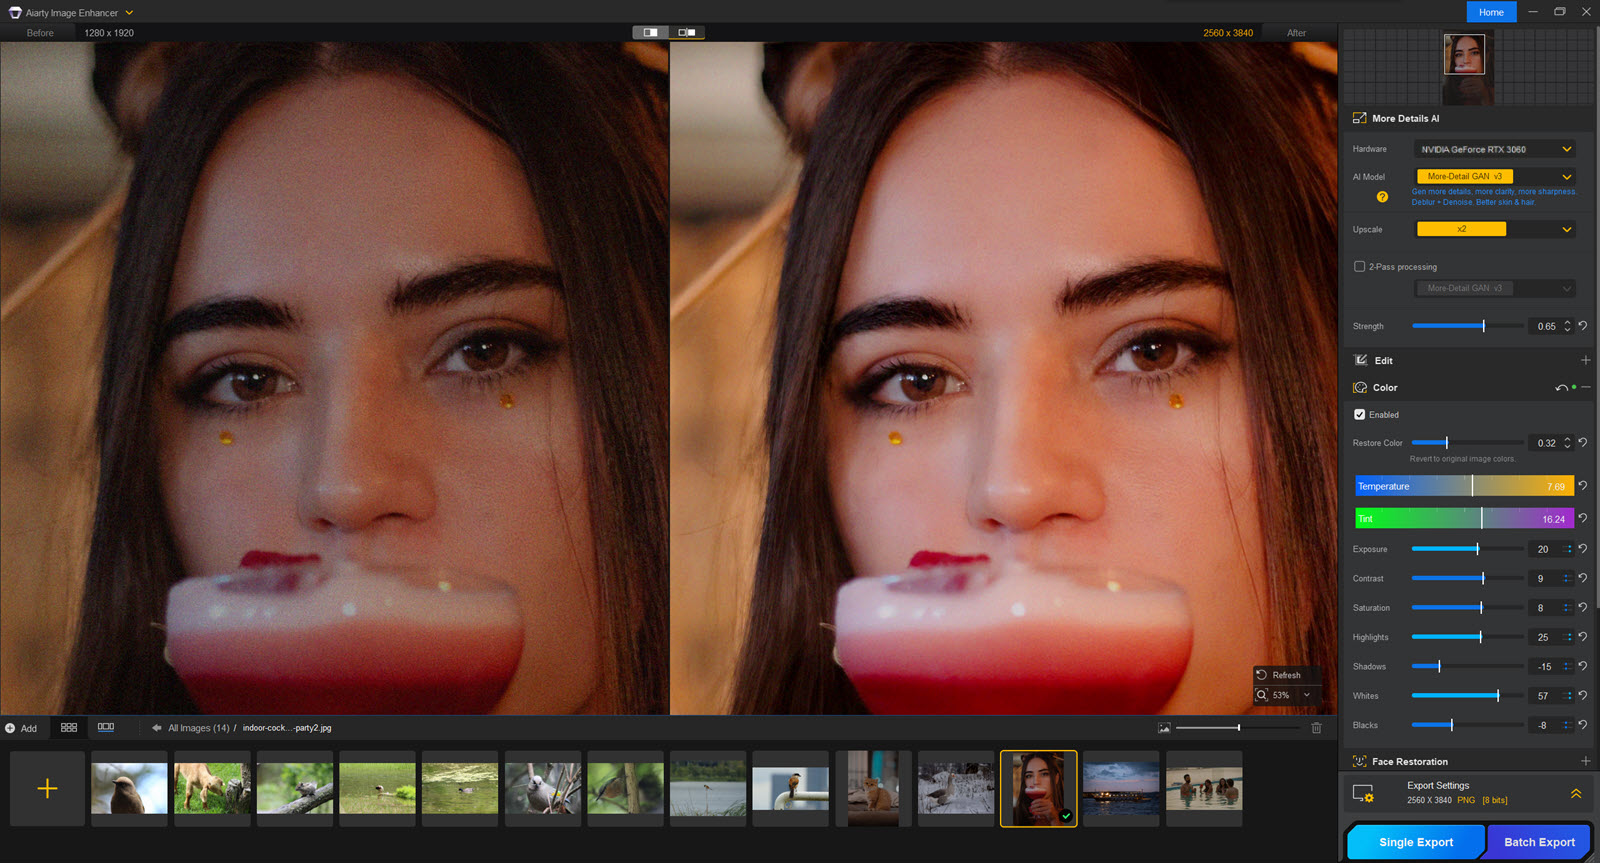
Settings: MoreDetail model, 0.65~0.85 strength, restore color, adjust exposure, and more in steps below.
The deep-learning models in Aiarty Image Enhancer automatically analyze image quality and apply noise reduction, detail restoration, and sharpening. With the real-time preview, you can switch between models to compare their results, adjust the enhancement strength, and stay with settings that deliver natural results without over-smoothing skin and hair details.
With a cleaner base, you can brighten up this low light portrait, adjust colors, and preview the results. If the adjustments affect the fine details or reveal some noise, you can return to the enhancement settings and fine-tune the model strength.
The steps further below provide detailed comparisons at each stage.
Scenario 2: Enhance an Underexposed Photo in Snowy Scenes
In snowy scenes with large areas of bright snow, exposure can be tricky, especially for beginners shooting in Manual mode. The camera’s metering can be misleading, causing you to choose a conservative exposure to protect the highlights. If you don’t expose sufficiently to the right (ETTR), you may only notice that the image is underexposed after importing it to your computer.
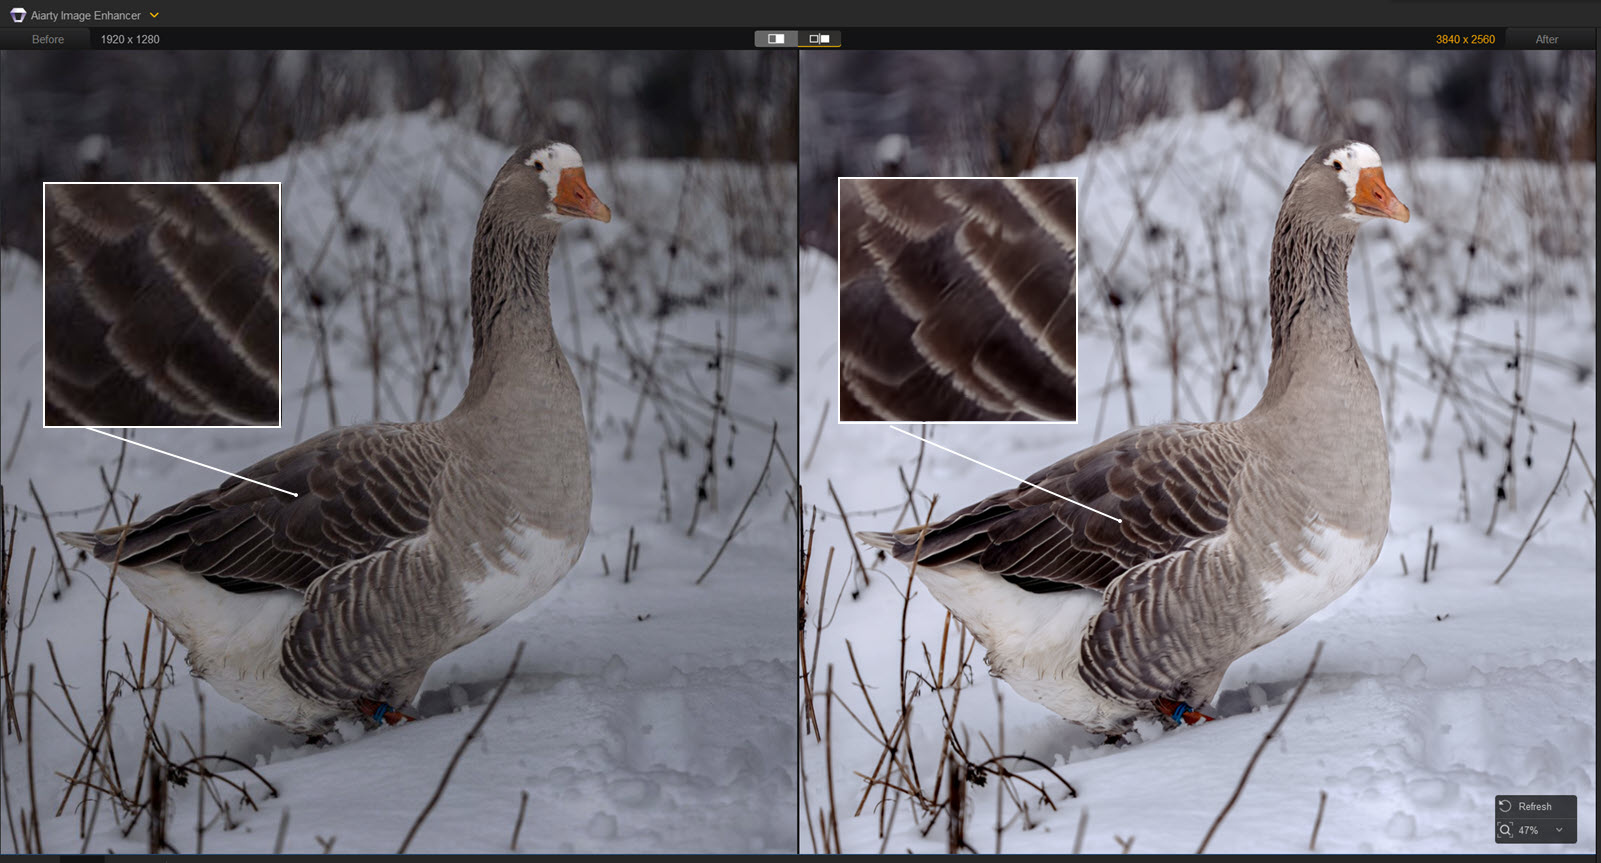
Settings: Real-Photo model, x2 upscale, 0.95 strength, plus basic color editing to fix underexposed scene.
For quick processing, Aiarty Image Enhancer provides one-stop image enhancement and color correction. Alternatively, you can incorporate Aiarty into your existing workflow alongside other photo editors, giving you more flexibility over exposure and color adjustments. It works for RAW files, DNG, TIFF, PNG, JPG, and more formats.
As shown above, after lifting the shadows and overall exposure, the Real-Photo model in Aiarty helps recover and preserve fine feather details in the goose without introducing excessive noise or an overly processed look.
Scenario 3: Brighten Up a Pet Photo and Restore Fur Details
It can be frustrating to capture the cutest moment with a cat, only to find the photo underexposed and noisy in dim indoor light. To brighten the image while preserving realistic fur details, we tested Aiarty’s More Detail model with manual tweaks of enhancement strength and quick color correction.
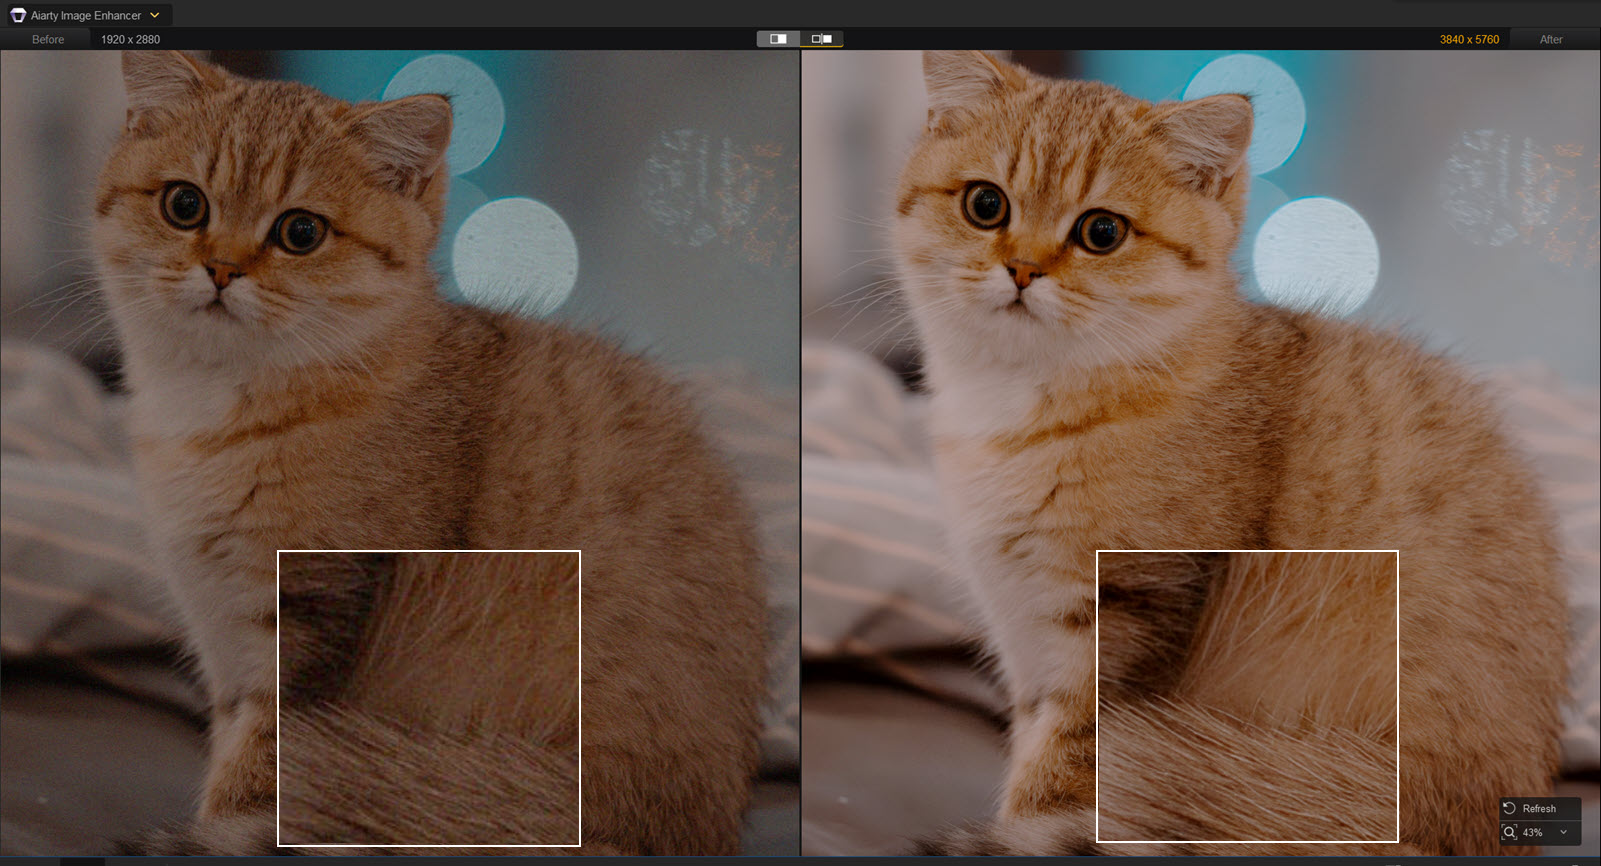
Settings: MoreDetail model, 2-pass processing to reduce noise and upscale x2. Brighten up the image.
As shown in the comparison above, the original image has noticeable color speckles in the background, while the cat’s fur and whiskers appear soft and lack definition. The overall image also looks dark and somewhat flat.
With the More Detail model set to an enhancement strength of around 0.75~0.85, the cat’s whiskers and fur become more defined while retaining a natural texture. We then increase exposure and restore the natural color and brightness.
For more vibrancy and contrast, you can further refine the tone curve and HSL in Lightroom or other editors, while using Aiarty’s deep-learning noise reduction to clean up remaining low-light noise.
Steps to Enhance Low Light Photos with Aiarty Alone
Designed for both beginners and professionals, Aiarty Image Enhancer can be used alone to enhance camera photo quality, or included as part of your existing workflow. It is not made to replace a photographer’s effort and aesthetic choices.
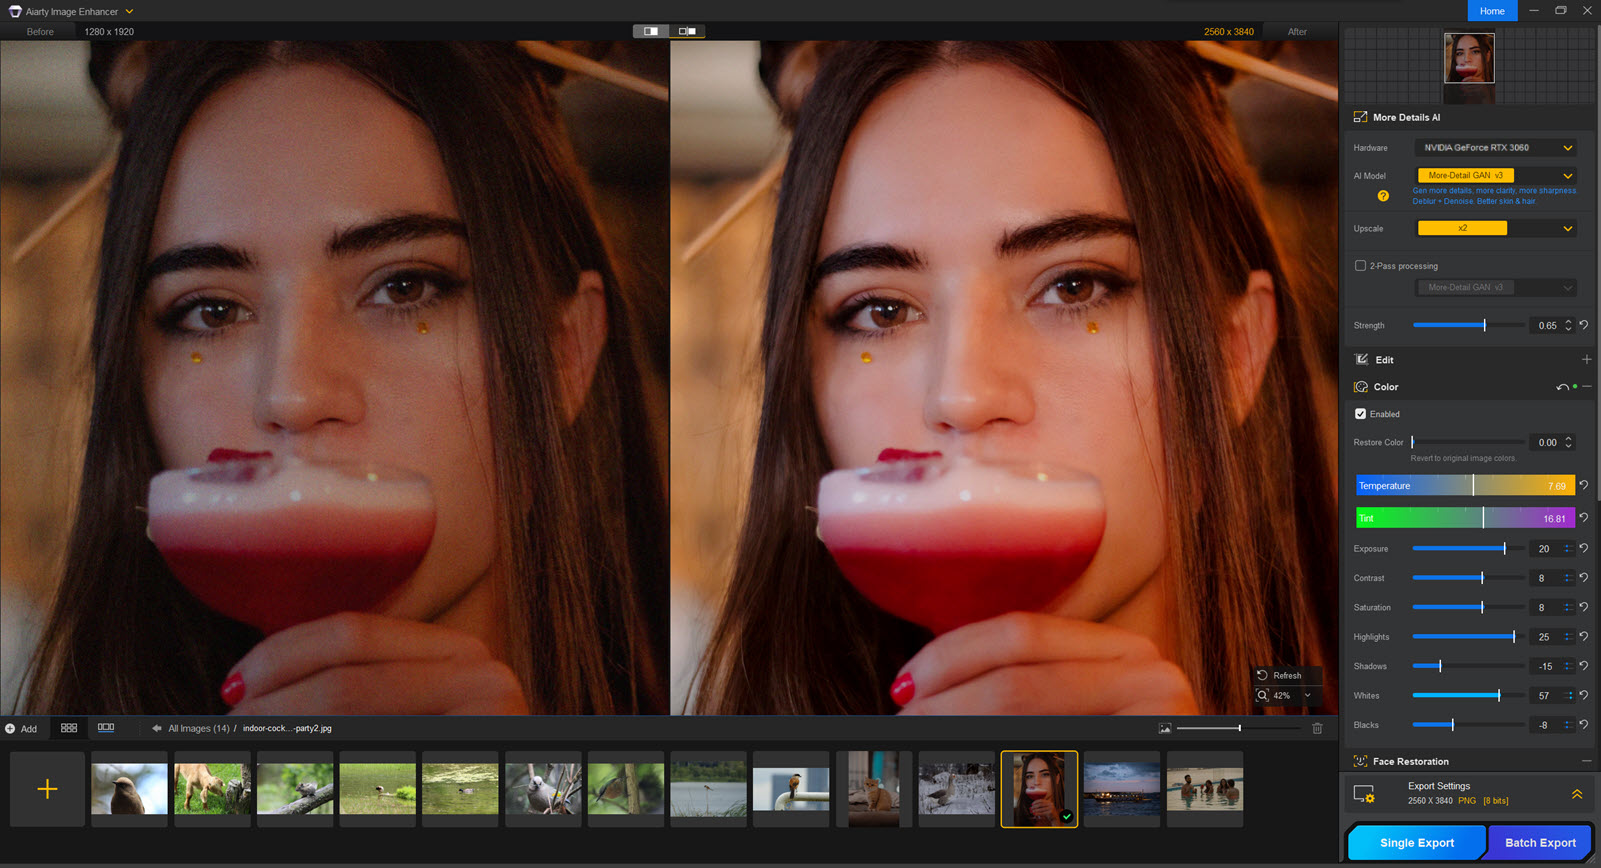
Below are detailed steps to enhance a low light photo from Scenario 1 using Aiarty from start to finish. We also included comparisons of different models, strength, and color settings, and why we choose certain setting over others.
Step 1. Import the image into Aiarty Image Enhancer, run AI inference with a model.
You can try different models for comparisons. It also supports adding multiple images for bulk tasks.
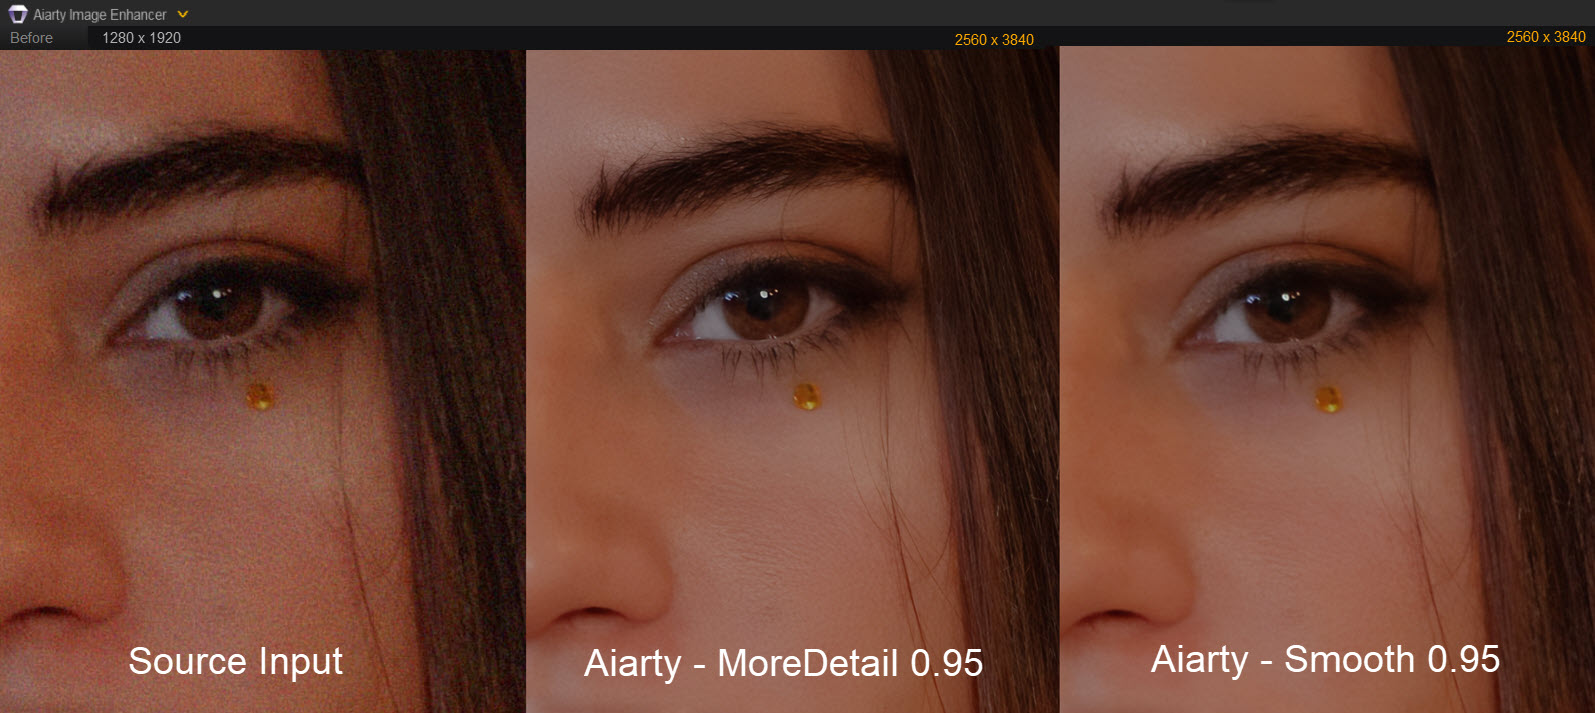
After testing the MoreDetail and AIGCsmooth model in Aiarty, with enhancement strength at 0.95, we choose to stick with the MoreDetail model for details in skin and enhanced clarity in her eyelashes and hair.
Tips: For other photos, digital drawing, or graphic designs when you prioritize a smooth finish, you can use the AIGCsmooth model. It’s dependent of specific scenarios and personal preferences.
Step 2. Enhance the low light photo and adjust colors.
To brighten up the photo and enhance the vibrancy of color and lighting, we continue adjusting color directly inside Aiarty.
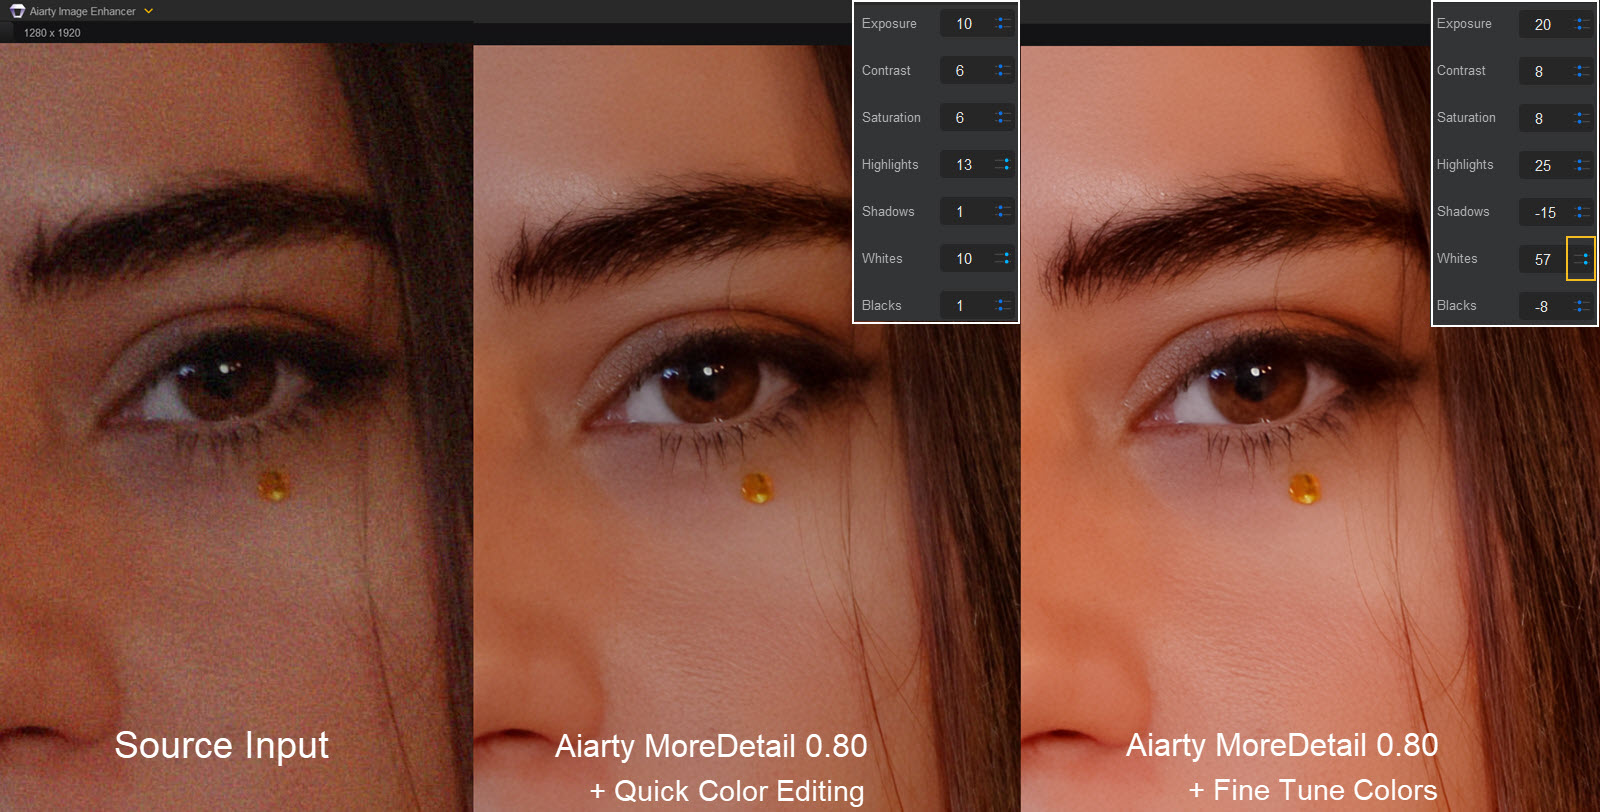
As shown in the comparison above, for color and lighting parameters within a more controlled range, the skin still looks somewhat flat and lacks the natural glow and dimensionality of a well-lit portrait.
• Left: Source image before processing.
• Middle: MoreDetail model, strength lowered to 0.80, color: exposure +10, contrast+6, saturation+6, highlights+13, shadows+1, whites+10, blacks+1.
• Right: Same model and strength, color: exposure +20, contrast+8, saturation+8, highlights+25, shadows-15, whites+50~60, blacks-8~5.
We then fine-tune the color parameters further. Exposure and saturation are increased to brighten the portrait and restore color richness, while highlights and whites add a more luminous quality to the skin. Meanwhile, slightly lowering shadows and blacks preserves depth and contrast, preventing the brighter image from looking flat.
Tips: By default, color adjustments range from 1~30 for fine-tuning in Aiarty. Click the range toggle to switch to 1~100 for broader adjustments.
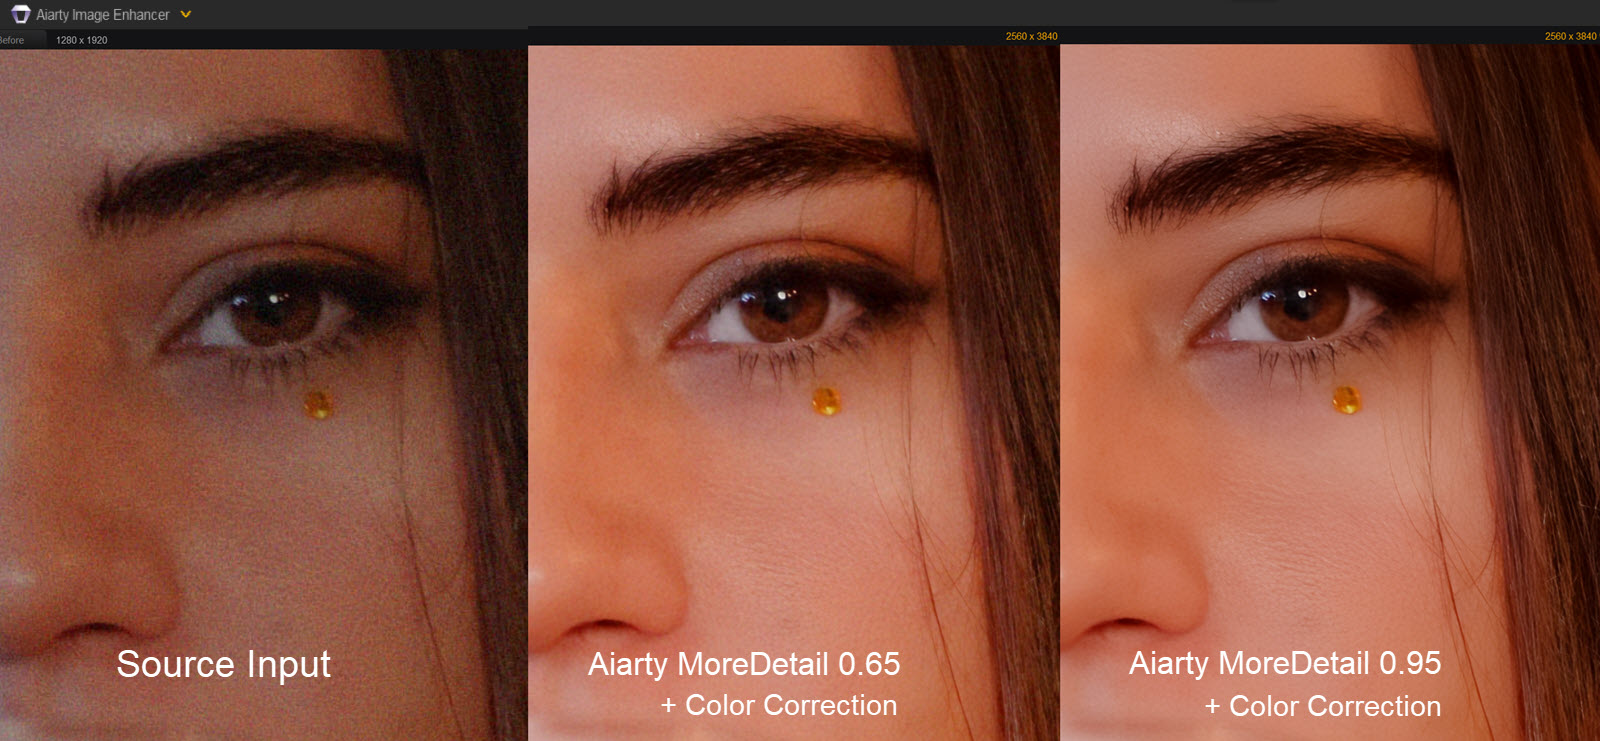
Step 3. Go back and adjust enhancement strength if needed.
For example, lifting the highlights too much can soften subtle skin details. Experiment with different enhancement strength values and use the real-time preview to compare the results.
For the image tested above, while keeping the color editing settings from Step 2, we lowered the enhancement strength to 0.65 and increased the Color Restoration value to around 0.20~0.25. This helps retain the original feel of the source image with some good grains.
Use Aiarty with Your Existing Photo Editing Workflow
If you are culling and managing a collections of photos with RAW viewers and photo editors, you can also include Aiarty Image Enhancer when the workflow calls for it. It helps reduce image noise, brighten up low light shots, enhance sharpness, and restore natural details without over-processing.
Optionally, you can upscale images to 2K, 4K, 8K, and higher resolutions, with its deep-learning models to enhance quality or restore artifacts alongside upscaling.
For instance, below is an optional workflow with Lightroom and Aiarty.
Step 1. Cull and make basic adjustments in Lightroom.
After rating and culling photos, you can make quick corrections and adjust white balance in Lightroom.
Step 2. Use Aiarty Image Enhancer for the enhancement stage.
If noise reduction in Lightroom is sufficient for a specific photo, you can still resort to Aiarty for detail restoration and super resolution up to 16K or 32K. Alternatively, you can also handle noise reduction to Aiarty’s tailored models.
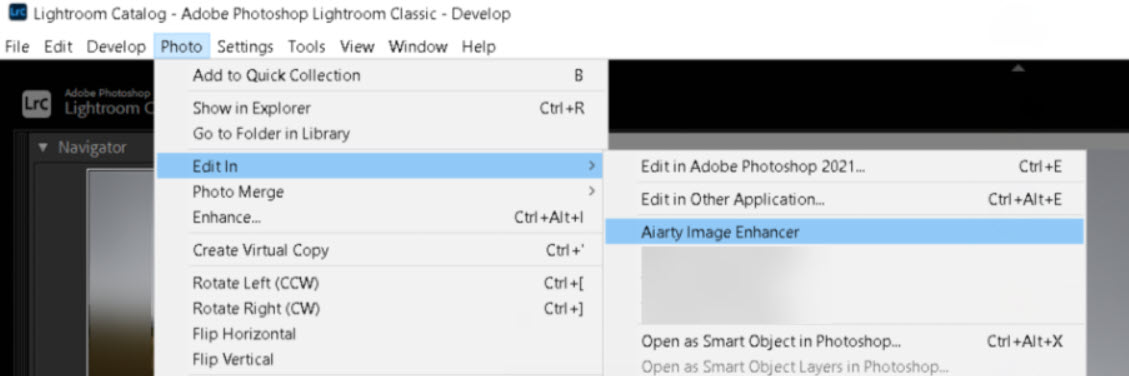
Tips: Inside Lightroom, go to Photo > Edit In > Aiarty Image Enhancer for a seamless workflow.
Step 3. Optionally, you can bring the image back into Lightroom for selective adjustments.
Lightroom will receive the adjustments from Aiarty’s enhanced results. You can export the photo or keep editing in Lightroom. For portrait editing in Lightroom, you can use masks to brighten the face while keeping the background under control. Then refine the overall contrast with curves, fine-tune skin tones, or edit individual colors with HSL.
Final Thought
It’s no surprise that AI agents are all the buzz these days, with prompt-based generation for 1-click photo brightening or restoration. Still, photo editing and restoration take effort and aesthetic decisions, reflecting how a photographer interprets color, lighting, and the character of an image.
Shooting technique and camera settings largely determine image quality technically, and when a shot doesn’t come out as planned, combining photo editors and deep-learning photo enhancers can help restore image quality while preserving the original look.
Aiarty Image Enhancer offers free trials for you to test out the features. If you find Aiarty fits your workflow, for causal projects, family photos, or professional tasks, you can also unlock a lifetime license with free unlimited updates.