
If you’ve accidentally deleted or lost photos from your DSLR’s memory card, stop shooting and don’t save anything else to the card. New files can overwrite the missing images and make them impossible to recover.
Start by checking whether copies exist on a second card, your phone, or a backup drive. If you can’t find them, you can connect the card to a computer and scan it with recovery software. Below, we’ll walk through both options and explain what to do if the card was formatted or shows an error.
Can You Recover Deleted Photos From a DSLR Camera?
Yes, deleted photos can often be recovered from a DSLR memory card. Deleting a photo usually removes its file entry and marks the space as available rather than immediately erasing the image data. Recovery software can find that remaining data, provided it hasn’t been overwritten. The chances of recovery also depend on what caused the photos to disappear:
- Accidental deletion: You deleted individual shots or selected “Delete all” in the camera menu.
- Formatting: You formatted the wrong card or cleared it before confirming that the photos had been backed up.
- Card error: A file system problem made photos inaccessible, even though their data may still be on the card.
Before You Start
Before attempting recovery, take a moment to prepare the card and a place to store your photos:
- Check whether the card is safe to scan. If it has visible physical damage, repeatedly disconnects, or reports an incorrect capacity, stop using it and consider a qualified data recovery service rather than repeated DIY scans. If the photos are irreplaceable, consult a recovery specialist before scanning the card.
- Remove the card from the camera. Wait for the card activity light to turn off, then switch off the camera and take the card out. Use a spare if you need to keep shooting.
- Decline any formatting prompts. If your camera or computer asks you to format the card, cancel the prompt. Don’t attempt repairs before recovering your photos.
- Prepare a different drive for the recovered files. Choose a folder on your computer or an external drive with enough free space. Saving recovered photos back to the source card could overwrite other images you still want to retrieve.
Method 1. Check Other Places and Backups
You may already have a copy of the missing photos without realizing it. Check these locations before scanning the memory card:
- The second memory card. If your DSLR has two card slots and was set to record a backup to both, check the other card through a card reader. If it saved RAW files to one card and JPEGs to the other, you may still have the JPEG versions.
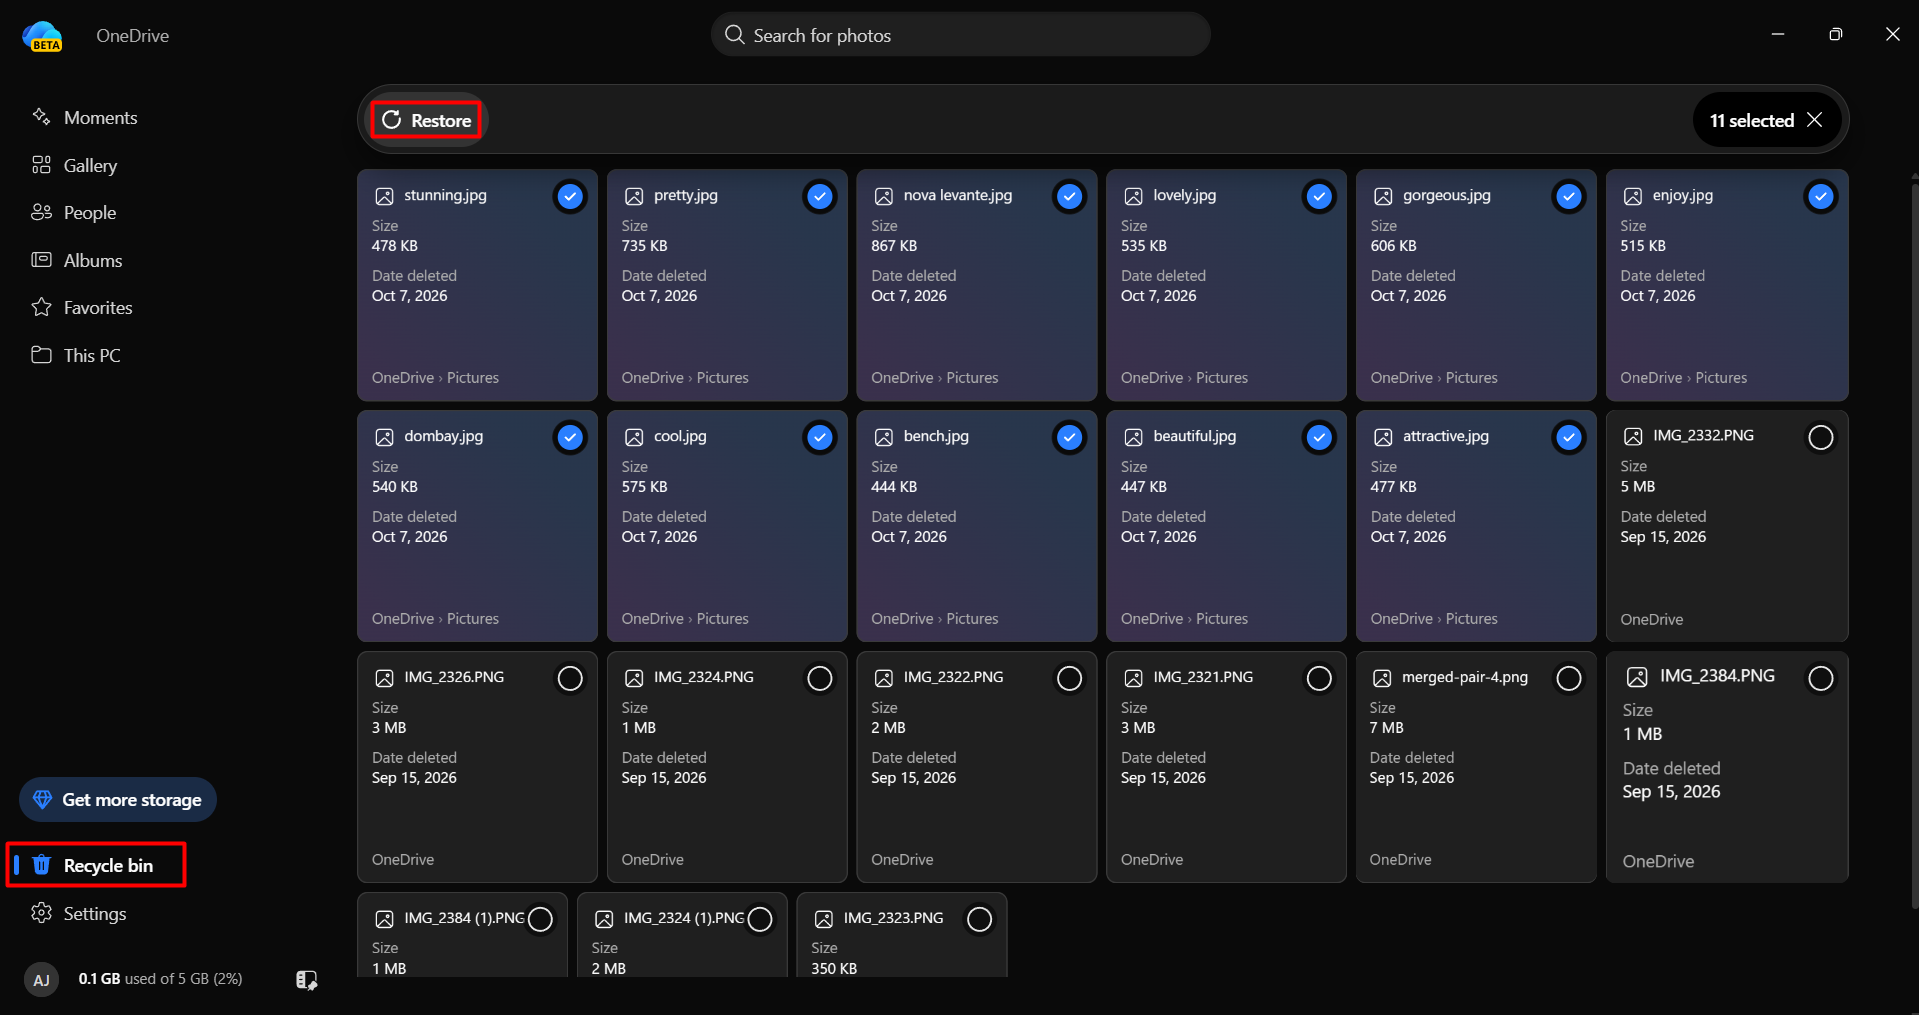
- Your phone and cloud storage. Look in your phone’s photo library if you transferred images through the camera’s companion app. If you backed up photos to Google Drive, OneDrive, Dropbox, or iCloud, check there too, including the trash or recently deleted folder. For example, in OneDrive, open Recycle bin, select the photos you want to recover, and click Restore to return them to their original location.

Restoring photos from the OneDrive Recycle bin. - Previously imported photos. Browse the folders where you normally import shoots on your computer. Search by the shoot date or check your photo editor’s library. Confirm that the original files open; thumbnails alone aren’t a backup.
- External drive backups. Connect your backup drive and look for the shoot’s folder. Copy any photos you find to your computer, then check whether any shots are still missing.
Method 2. Use Data Recovery Software
The walkthrough below uses Disk Drill for Windows, photo recovery software for camera memory cards that supports JPEG and many RAW formats.
Scanning and previewing are free on both platforms. Windows users can recover up to 100 MB for free; larger recoveries require a paid license. Ordinary deleted-file recovery on Mac generally requires a paid license. Check that your photos preview correctly before purchasing.
Note: The screenshots show Disk Drill running on Windows 11, using a USB flash drive as a representative interface example. To recover DSLR photos, select your camera’s memory card instead.
Here’s how to recover deleted photos from a DSLR SD card:
Step 1. Connect the card and install Disk Drill
Insert the memory card into your computer’s built-in card slot or a compatible USB card reader. Use a reader that matches your card type; some DSLRs use CompactFlash rather than SD cards.
Download Disk Drill from the official CleverFiles website and install it on your computer. Open the application once the card is connected.
Step 2. Select the card and scan it
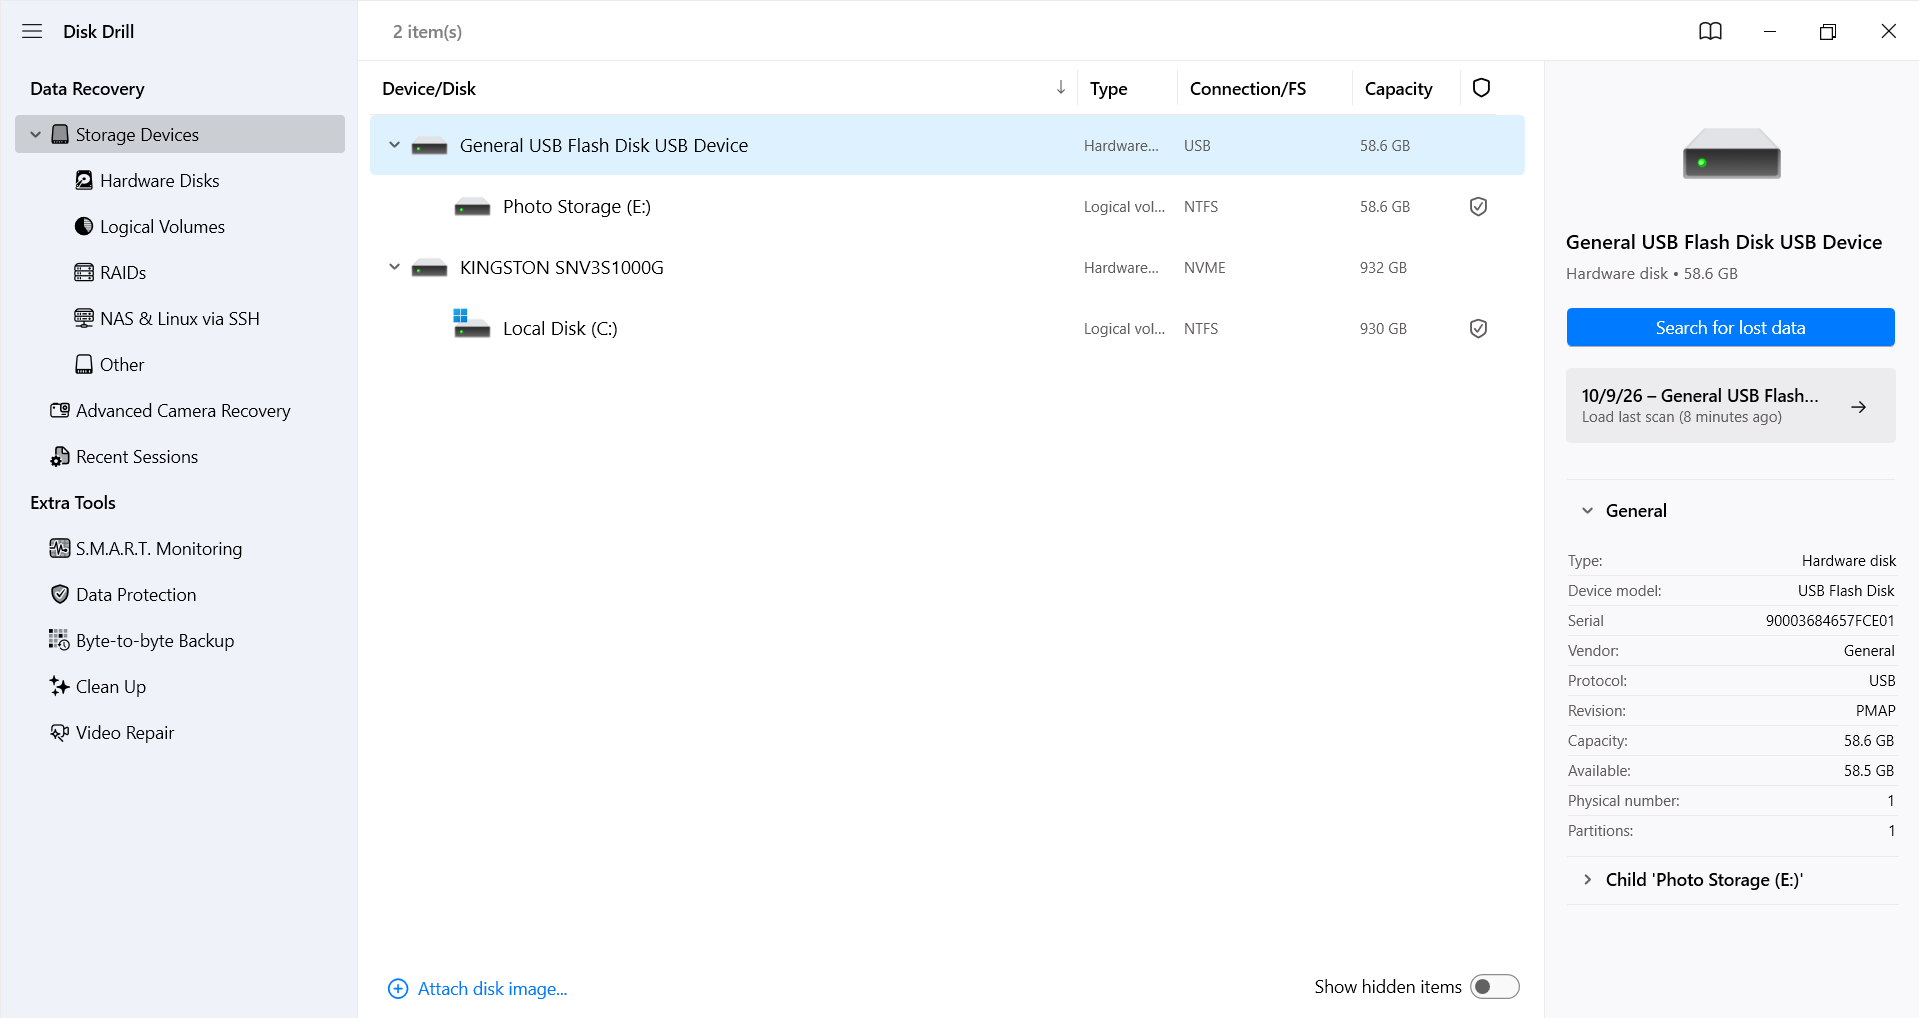
In Storage Devices, find your memory card by its device name and capacity. Select the physical card – the device entry representing the entire card – rather than an individual partition listed beneath it. If the partition is missing or damaged, select the physical card to scan the whole device.
Click Search for lost data, then choose Universal Scan if prompted. Allow the scan to finish before making your final selection. The time required depends on the card’s capacity, speed, and condition.
Step 3. Find and preview your photos
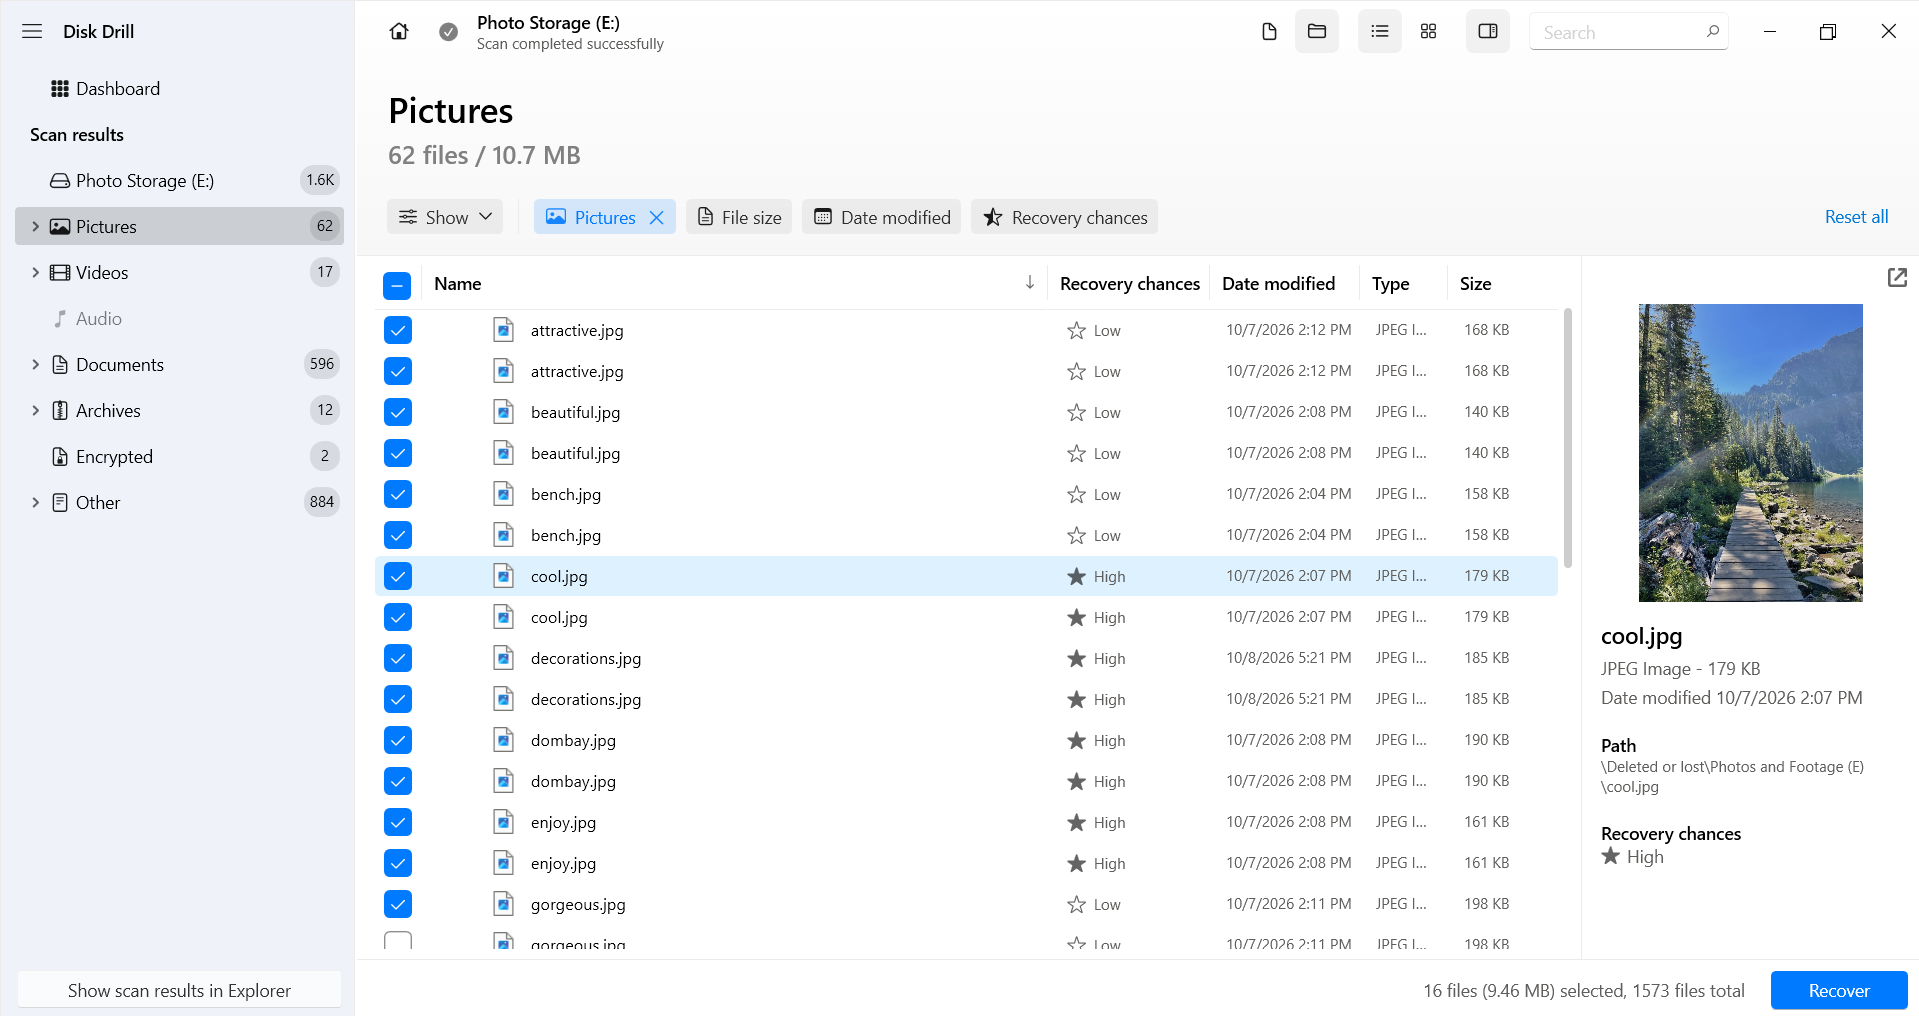
Click Review found items and open the Pictures category. If the results contain files from several shoots, use the available filters or search for an extension such as JPG or NEF to narrow the list.
Select a photo and open its preview using the eye icon. Look for recognizable subjects and check whether the image appears complete. This helps you identify the shots you need, even when their original filenames are missing. Mark the photos or folders you want to recover.
Step 4. Save the recovered photos
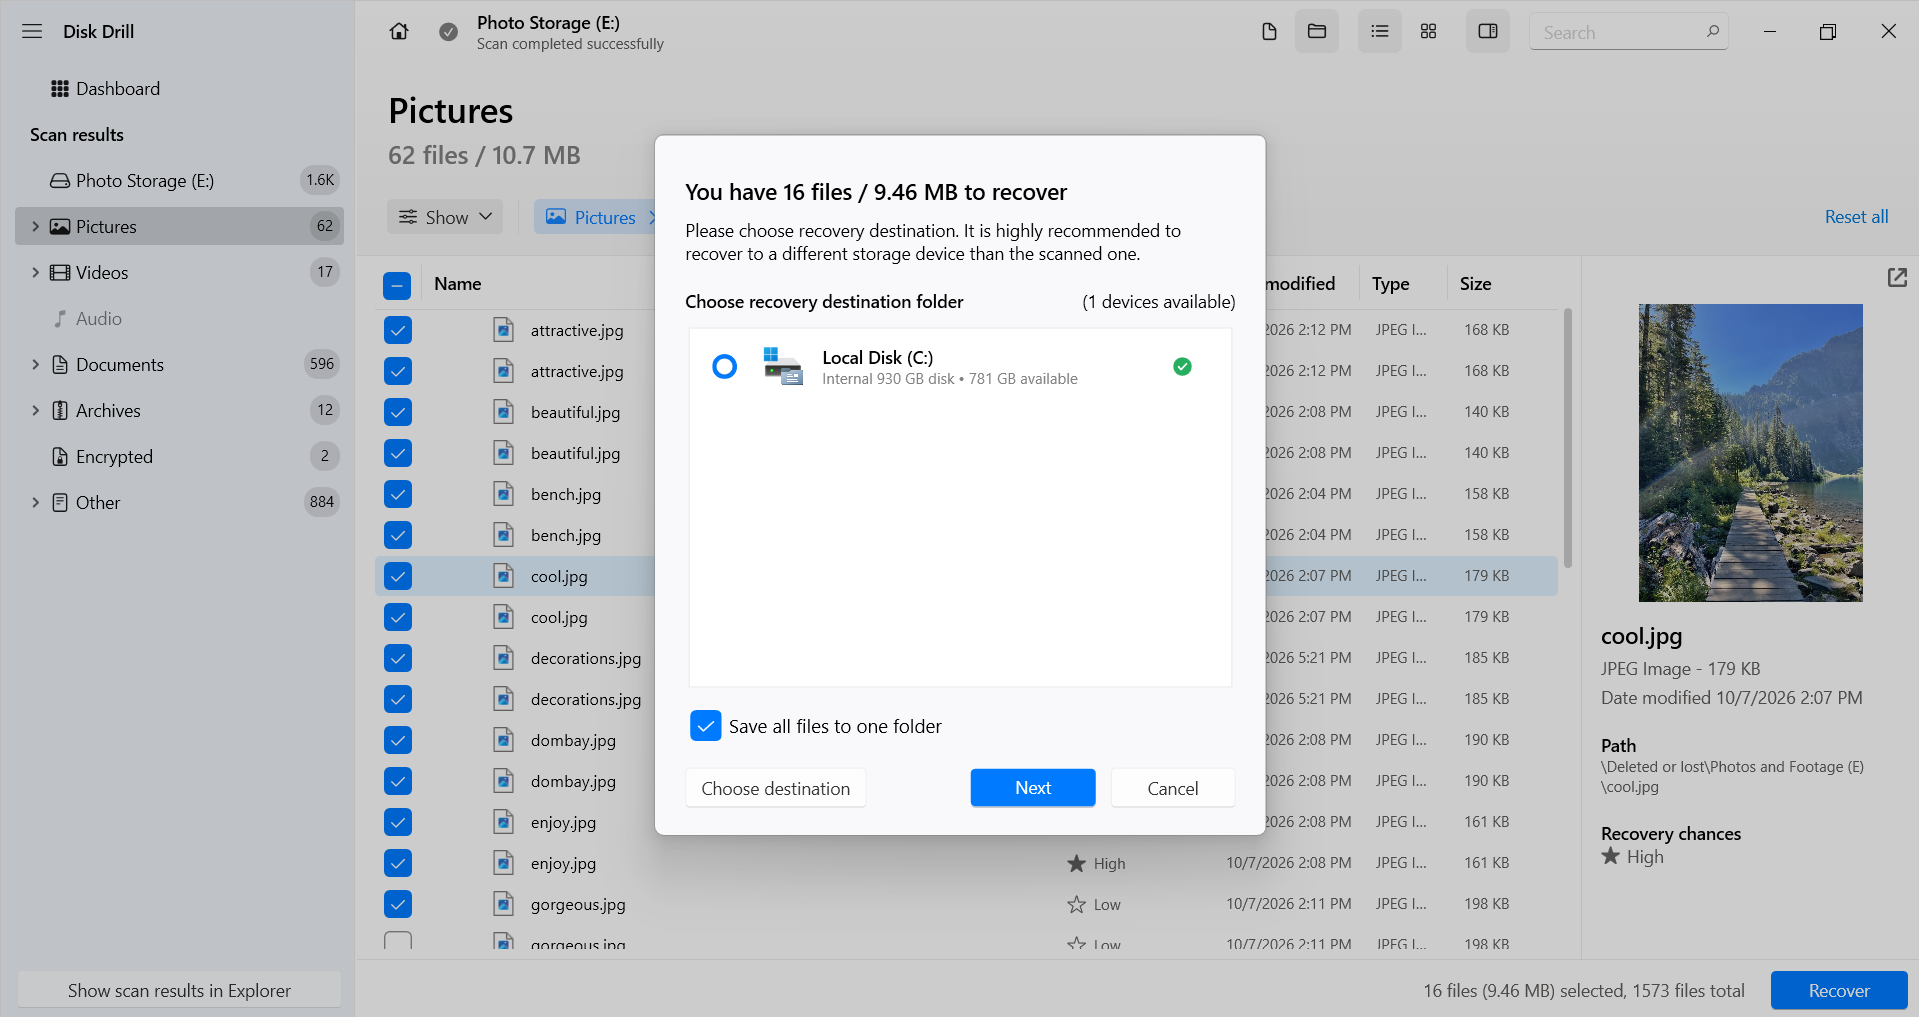
Click Recover and choose a destination on your computer or an external drive, separate from the source memory card. Confirm the destination and let Disk Drill save the selected files.
Open the destination folder and check the recovered images in your usual photo viewer or editor. For RAW files, use an application that supports your camera’s format. Check the files themselves rather than relying only on thumbnails, particularly for important shots.
Method 3. Recover Photos From a Formatted or Corrupted Card
If you formatted the card, follow the scanning steps in Method 2. A quick format typically replaces the file system information without erasing all photo data. However, a full overwrite or a camera’s erase command can make recovery impossible, even if you haven’t taken any new pictures.
For corrupted cards, the next step depends on whether the computer can detect the device. A card that appears in Disk Drill with its correct capacity may still be scannable, even if you can’t open it in File Explorer or Finder. Recover the photos before attempting file system repairs.
If the card remains stable and readable, Disk Drill can also create a byte-to-byte image and scan that copy, preserving the original card for any further recovery attempts.
Recovering Photos From Canon, Nikon, and Sony
The recovery steps are much the same across Canon, Nikon, and Sony cameras; the main difference is the RAW format you’re looking for. Canon DSLRs commonly save CR2 files, Nikon uses NEF, and Sony Alpha models use ARW. Filter scan results by your camera’s extension, but also check for JPEG copies if you shot in RAW+JPEG mode. For Nikon-specific instructions and backup options, see this Nikon photo recovery guide. Whichever camera you use, keep recovered RAW files in their original format so you retain the editing flexibility they offer.
How to Avoid Losing Photos Again
- Back up each shoot before clearing the card. Keep copies in two separate locations, such as your computer and an external drive or cloud storage. Open several files to check the backup.
- Use both card slots for backup recording. If your DSLR supports it, select the setting that saves each shot to both cards rather than using the second only when the first fills up.
- Let the camera finish writing. Don’t remove the card or battery while the activity light is on, and swap low batteries before they run out.
- Replace unreliable cards. Repeated read errors or interrupted transfers are reasons to retire a card, even if formatting temporarily makes it usable again.
FAQ
Can deleted photos be recovered from a DSLR memory card?
Yes, you can often recover deleted photos from a camera SD card if their data hasn’t been overwritten. Check existing backups first. If no copies are available, connect the card to a computer and scan it with recovery software.
Can photos be recovered after formatting the SD card?
Often, yes, after a quick format. Recovery depends on how the camera or computer formatted the card and whether it erased the underlying data. Avoid taking new photos before attempting recovery.
Is it possible to recover deleted RAW files?
Yes, recovery software that recognizes your camera’s RAW format can retrieve files that remain intact on the card. Open recovered RAW images in a compatible photo editor to confirm they’re usable.
Conclusion
Lost DSLR photos may still be on your memory card or in a backup you’ve overlooked. If no backup is available, the Disk Drill walkthrough above shows how to scan the card, preview photos, and save recoverable files to another drive. Once your photos are restored, keep an additional backup before using the card again.