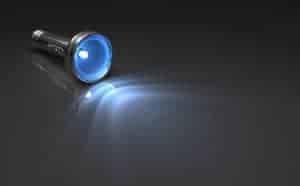
Light painting is an incredibly fun technique in which photographers use flashlights, camera flashes, and spotlights to literally paint light into a scene. It's one of the most fun night photography techniques. Many photographers have attempted it, but only a few have mastered it (and I'm admittedly NOT one who has mastered it). Nevertheless, I want to share a few things that I have learned while trying out light painting.
#1. Don't try to paint everything with the same light. It will look really odd and flat. Would a painter use only one brush? Neither should you! The whole purpose of light painting is to create different and unique lights on each different part of the landscape.
#2. Choose a dimmable flashlight with an adjustable beam for best results. Many flashlights have adjustable beams, such as Mag-lights, but few flashlights can be dimmed so that you can use just the right amount of light on every part of the photo. I'm eying this dimming flashlight on Amazon.
#3. Be careful with noise. Taking your pretty little time painting in light is convenient, but long exposures also create more noise. For more tips on reducing noise in your night photography, check out this post.
#4. You'll need to take more than one photo. In fact, some light paintings, like the incredible light paintings featured in the video below, require dozens of photos so that each part of the photo can be treated separately.
#5. Choose a flashlight that doesn't have a hot spot. As long as you move the flashlight around enough, it won't make a difference if the flashlight has a bright circle in the middle of the beam, but for doing little fine details in the scene, you'll want without a hot spot. A cheap DIY option for removing the hot spot is to tape wax paper or tissue paper over the flashlight lens.
#6. If you don't have a dimmable flashlight like I mentioned before, you can create a snoot out of a cereal box. It actually works quite nicely and nobody will be able to see your ghetto photo gear since it's dark outside. If you want to look fancy, then buy this snoot on Amazon.com.
#7. Just because you're light painting doesn't mean you should forget all your typical night photography techniques. Remember to use mirror lockup, long exposure noise reduction, a cable release, etc.
#8. Make sure to mix in ambient light to make the photo look more natural. For example, include the moon, street lights, etc. This adds a lot to the mood of a photo.
#9. It's okay to walk into the scene. Remember that your camera only records LIGHT, so if you wear dark clothing and don't allow light to shine on you, there will be no problem with walking through the scene, adjusting things, and painting in the fine details. Just don't accidentally answer your cell phone or its light will show up in the photo 🙂
#10. It's okay to focus each picture on the specific area you're working on. This will improve the sharpness in the overall shot. Just make sure to get one wide-angle shot of the scene so you can put all the little pieces together.
For some light painting photography inspiration, check out this incredible video made by Eric William Curry. Some day I'll be that good… some day.

excellent work…
which software did u use to blend the different exposures and how?…can u give the details please.
I just discovered this technique on the Nikon website and I’m in LOVE. These are great tips Jim! If you’re interested, here is a tutorial I did for a shot I just took yesterday: http://lightpaintingphotos.wordpress.com/2012/05/08/light-painting-photography-photo-editing-technique/
Very nice article will use these, thanks so much.
i was wondering how you merged all those photos together ? did you use a couple layer masks? photomerge? clone stamp tool ?? i love the technique, but i couldn’t figure out how to merge the photos together. if i could get a lil help that would be awesome thanks. 😀
first off thanks for the post. Jeremy to merge them together is easy, you start with a base layer in photoshop, then bring another layer in, change that blend mode to lighten and then you mask out what you dont want with black, or as i do it, I msk bsck in ehst I want with white in the layer mask.
Did you ever purchase the dimmable flashlight from Amazon that you mention in the article? If so, how did it work out?
this helped me take amazing photos of all the soccer kids and i got all the other Suburban moms Jealous lol I am so proud