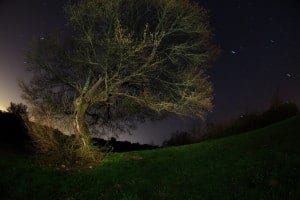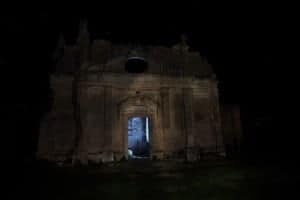
This is a guest post by Silvio de Pecher, an Italian photographer who runs a website in which he frequently teaches night photography (in Italian).
- Shoot low ISO. There is a special value called natural ISO that transmits the minimum possible amplification on the sensor. It is generally 100 ISO for Canon and 200 ISO for Nikon. Shooting at this level greatly reduces the noise on the sensor.
- Shoot RAW, definitely. This way you have a wider latitude for adjusting exposure and you can non-destructively adjust the white balance after the shoot. You can try the difference shooting RAW+JPG and see later if it was important to have the “RAW insurance” or not.
- Use camera noise reduction for long exposure. Most cameras have the ability to shoot a second “blind” shot after a long exposure in order to measure the noise. The sensor is active but the curtains are closed. So every thing recorded on the image is noise! This noise is the subtracted form the previous real shot and a cleaner photo is produced. This is very annoying when the shoot exposure is 5-10 minutes long because standing in the dark with the camera doing “nothing” for the necessary time. To understand more about this, check out this post on long exposure noise reduction.
- New moon. Shooting the stars with even a crescent moon is difficult. The moon reflects so much light on the scene that it can be difficult to see the stars.
- Cold night. The maximum exposure time for your camera depends on how much heat is produced by your sensor. Heat increases the digital noise in the resulting photo, so shooting on a cooler night can slightly improve your night photography.
- Use a tripod, well, this tip was easy.
- Flash and light. You can try to light the area with multiple flash shot (open flash technique) or to light paint with a Maglite. Remember to balance the temperature of the light with gels to have a uniform light temperature throughout the scene.
- White balance. If you shoot RAW this can be done non-destructively at home. If you prefer to adjust the white balance in the field, then you might consider a tungsten setting to achieve a beautiful blue look. For a more natural result, moon light closely resembles an incandescent white balance.
- Star trails. Depending how close the North Star (South Cross on south hemisphere) is, there is a limit to how long an exposure can last before the stars begin to look oblong rather than circular. For a 35mm camera the formula depends on the focal length of the lens (in mm) and is: 600 ÷ (focal length) = maximum exposure Thanks to Lance Keimig to show this formula in his great book: Night Photography: Finding your way in the dark.
- Try HDR. Multiple exposures can produce stunning photos. Remember if you are using open flash or light painting technique, the light needs to be consistent between the exposures or the result can be quite strange looking.

Pictures: Silvio de Pecher, [email protected],

Night photography is challenging and your tips are making it sound easy 🙂 – I was just wondering should photographers take into account the relationship between objects when taking night photos? I know it’s a bit specific but how aware should you be of that to get the perfect shot? What do you think?