
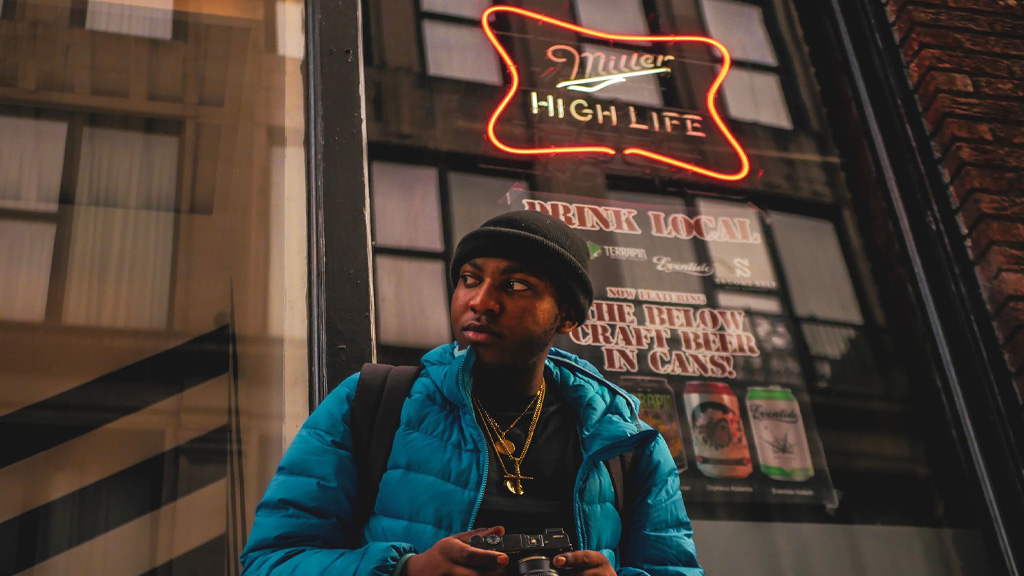
A neon sign never looks better than it does a second before you add flash. To your eye, the letters are rich and saturated, and a soft glow spreads across the wall around them. Fire a speedlight at your usual portrait settings, though, and the sign often comes back thin and dull on a black wall. Meanwhile, your subject looks cut out and pasted in front of it.
The problem is timing. A flash fires in a tiny fraction of a second, while a neon sign glows the entire time the shutter is open. Treat those as two separate exposures living inside one photo, and balancing them gets predictable fast.
This method works for neon portrait photography on a bar wall or in your own studio. To balance flash and neon signs in either place, you mainly need to know which camera setting talks to which light.
Why Your Neon Sign Goes Dim the Moment the Flash Fires
Shoot a neon portrait like a normal flash portrait: set your shutter to your camera’s flash sync speed (about 1/200 or 1/250 second on most bodies) and use a fairly small aperture, then push the ambient light down so the flash does the work. That’s exactly what you want on a sunny afternoon, and exactly what you don’t want when the ambient light is a glowing sign you chose on purpose.
Each light reacts to shutter speed differently. At or below sync speed, the whole flash burst lands while the sensor is fully uncovered, so changing the shutter speed barely changes how bright your subject looks. The sign is continuous light. Every extra fraction of a second the shutter stays open records more of its glow.
That gives you a clean split of controls:
- Shutter speed sets the brightness of the neon sign and the rest of the room.
- Flash power and flash distance set your subject’s brightness.
- Aperture and ISO change both at once, so pick them first and then leave them alone.
High-speed sync is the one exception. Above sync speed, the flash pulses rapidly and behaves more like a continuous light, so shutter speed starts affecting it too, and you lose a good share of flash power. You’ll rarely need it for neon portraits, since the sign usually pulls you toward slower shutter speeds anyway.
How to Balance Flash and a Neon Sign, Step by Step
This is the same method you’d use to balance flash and ambient light at dusk, with one advantage. The “ambient” here is a sign that sits still and doesn’t fade every five minutes like a sunset. Shoot in manual mode, put your off-camera flash on a stand (or hand it to a patient friend), and work in this order:
- Set aperture and ISO for the look you want. f/2.8 to f/4 softens the background while keeping bold lettering readable. Open up much wider, and thin script fonts start to melt into blur. ISO 400 is a sensible starting point in a dim room.
- Turn the flash off and expose the sign. Start at your sync speed and slow the shutter down one stop at a time until the sign and the glow around it look right on your screen.
- Judge the color before the brightness. If the tubes turn white or pastel, the sign is overexposed. Go back to a faster shutter speed until the color returns.
- Turn the flash on at low manual power. About 1/16 power through a small softbox or umbrella is a reasonable first test.
- Adjust only the flash for your subject. If the face is too bright, lower the power or move the light back. If it’s too dark, raise the power or bring the light closer.
- Fine-tune the sign with shutter speed alone. Every change to aperture or ISO moves both lights, and you’ll end up chasing your own tail.
Expect to land it within a handful of frames. After a couple of sessions, the routine feels about as automatic as setting white balance.
Where to Place Your Subject, Flash, and Neon Sign
Placement fixes a lot of what people blame on settings. Start with the gap between your subject and the sign. Stand someone right against it and their face picks up a heavy color cast, while the sign sits in sharp focus right behind their head and competes with their face. A few feet of space fixes both, and at a wide aperture it also gives you a softer neon sign background.
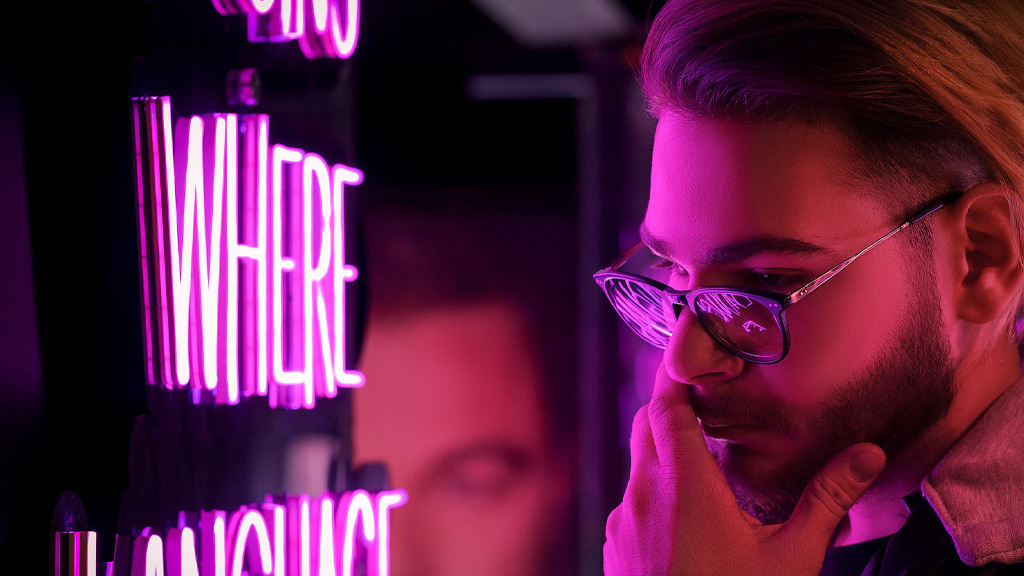
That distance helps your flash too. Light falls off quickly, so if you double the distance from the flash, only about a quarter of the light reaches the wall. With your subject several feet in front of the wall, very little flash reaches the wall itself. The area around the sign stays dark, and the glow keeps its punch.
Then watch where the flash points. LED neon signs are usually mounted on clear acrylic, and acrylic can throw a flash back at the camera like a window. Place the light at roughly 45 degrees to your subject and angle it away from the sign. A grid on the softbox helps if you own one.
Studio shooters get an easy win here. With one of the custom LED signs that hang on a backdrop stand, you decide how high it sits, how far it is from your subject, which way it faces, and how bright it runs. A sign bolted to a bar wall will never give you that kind of control.
Event photographers deal with placement all the time. Couples often hang a sign behind the sweetheart table or photo booth, so if you’ll be shooting portraits in front of wedding neon backdrops, ask the planner ahead of time to leave a few feet between the sign and where the couple will stand. That conversation goes much better before the reception than during it.
How to Drag the Shutter Without Ghosting Your Subject
Dim signs and dark rooms can push your shutter speed down to 1/30 second or slower. That’s dragging the shutter, and it’s how you get a full, glowing wall behind your subject. The price is a higher risk of ghosting.
The sign also lights your subject a little, and during a long exposure, any movement from them gets recorded as a faint ghost layered over the sharp flash image. A small amount can look intentional. A lot looks like your subject sneezed.
Two habits keep it in check:
- Make the flash the main light on your subject’s face so the neon adds only a little there, and
- Move your subject farther from the sign to cut how much neon lands on them. Below about 1/30 second, brace yourself or put the camera on a tripod, because your own shake shows up as ghosting too.
Switch your flash to rear-curtain sync (also called second-curtain sync) while you’re at it. The flash then fires at the end of the exposure instead of the start, so any blur trails behind the movement rather than floating in front of it. At faster shutter speeds, you won’t see a difference, but once you’re dragging the shutter, the result looks far more natural.
Should You Gel Your Flash to Match the Neon Sign?
A speedlight puts out daylight-balanced light, around 5,400K. Put that clean white light on a face in front of a hot pink sign and your subject can look like they belong in a different photo. Color gels fix the mismatch, but they aren’t always the right call.
Leave the flash bare when the sign is clearly in the background, and you want natural skin tones. The contrast between white light and colored glow can look great on its own. Add a light gel in the sign’s color, either on the flash or on a second light placed on the sign’s side, when you want the subject to look lit by the neon.
Warm white signs are the easy case. A CTO (color temperature orange) gel on the flash pulls it toward the sign’s color. A full CTO shifts daylight-balanced light to roughly tungsten, about 3,200K, so start with a half CTO and add more only if skin still looks cooler than the sign.
Whatever you choose, turn off auto white balance. As the sign fills more or less of the frame, auto white balance can drift from shot to shot, and it may try to neutralize the very color you came to capture. Set it to Flash or a fixed Kelvin value and shoot RAW so you can fine-tune later.
For a first attempt, I’d skip the gels entirely and lock white balance to Flash, then see how far contrast alone takes you.
How to Stop Banding and Flicker From LED Neon Signs
Horizontal bands running through the sign in some frames, but not others, mean the sign is flickering faster than your eye can see. Many LED dimmers lower brightness by switching the LEDs on and off very rapidly, a method called pulse-width modulation (PWM). A fast shutter, and especially a silent electronic shutter that reads the sensor row by row, can catch those pulses at different moments and turn them into stripes.
The fixes are quick:
- Run the sign at full brightness while you shoot.
- Use the mechanical shutter instead of the silent or electronic shutter.
- Slow the shutter down so each exposure spans several pulses. Dragging the shutter for more glow often clears it up on its own.
- Try 1/60 or 1/120 second in the US and other places with 60Hz power, or 1/50 and 1/100 where the grid runs at 50Hz. Treat these as starting points, since a sign’s pulse rate doesn’t always match the power grid.
- If your camera has a variable shutter or high-frequency flicker setting, use it to fine-tune the shutter speed to the sign. Standard anti-flicker modes only detect 100Hz and 120Hz flicker, so they usually miss LED dimmers.
If the sign is still too bright for the look you want, darken it with a faster shutter speed instead of the dimmer. You get the same result on the sign without inviting the stripes back.