
You can find time lapse videos just about everywhere you look. You’ve probably dabbled with it a little bit, or seen it on different websites, YouTube videos, even in TV shows or ads. Making time lapses is much easier these days, with all the new digital tools and software that is available to make the more challenging-looking time lapses easy to do. You may have read through my article this past summer on making day to night time lapses. There is also a wide range of equipment available to take your time lapses to a whole new level and get those pro results. Some options can be on the costly side, but there are very affordable options to choose from too. Here are some equipment options that you can use to get those pro results in your time lapse videos.
Smartphone on a Tripod or Gorillapod
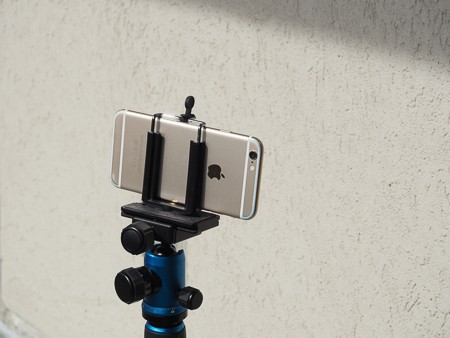
The simplest setup to do time lapse photography is from using your smartphone. All modern smartphones have the ability to record time lapse video in the camera app. An important factor is to make sure your smartphone remains stable, since camera shake throughout a time lapse video will not give that pro look. While you could just prop your smartphone on a stable surface, that can be limiting in terms of how you compose your scene. That’s assuming there is even a stable surface where you are to prop the smartphone on. Using a tripod adapter and attaching it to your tripod or even a Gorillapod, gives you maximum flexibility. Tripod adapters are very inexpensive and can be purchased on Amazon for less than $20.
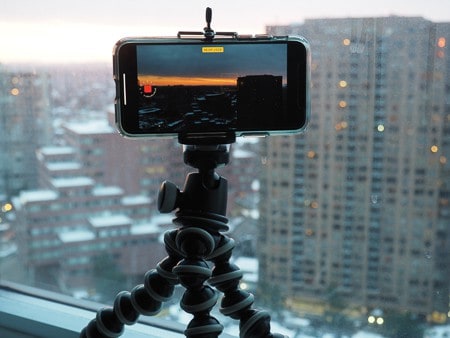
SMARTPHONE ADAPTER ATTACHED TO GORILLAPOD
Panning motion
As simple as time lapse photography can be, having the time lapse video record from a single spot with a single composition can get boring and to a certain degree, can be considered overshot. It’s the easiest to do and with so many people having smartphones with the ability to record time lapses, there are a lot of them out there. One way you can add interest to your time lapse videos is by adding motion. Not motion in terms of having people or objects moving within the video, but movement of the video frame itself.
One way to do this is to add panning movement; essentially, setting up your camera such that it rotates steadily from one side to the other for the duration of your time lapse. There are several kinds of controllers that can be used to add this panning motion to your time lapse, which range in cost and capabilities. These controllers attach to the top of your tripod, which you then attach your camera to.
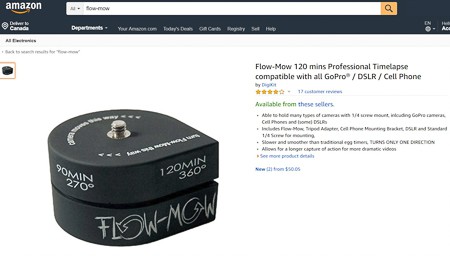
You can find this Flow-Mow Time Lapse Motion Controller for a budget-friendly $50 on Amazon. It is has limitations, as it will only rotate at a single speed. If you’re just getting started into time lapses, it makes for an easy, low cost option to choose from. You may however, find that the rotation speed is either too fast or too slow, depending on what camera settings you plan on using. I personally found it too fast for what I like doing, so ended up returning it.
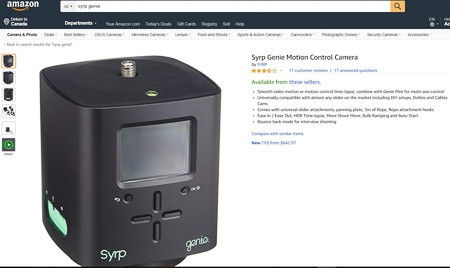
The Syrp Genie is another time lapse controller which has a lot more flexibility. You can customize settings within it or use factory pre-sets, it can do 360 degree panning, it has a built in bubble level, and lots more. It is however on the pricey side, costing $650.
SCREENSHOT OF PRODUCT LISTING
The VidPro controller is somewhere in the middle. A more moderate $100 in cost on Amazon and while it doesn’t have all the bells and whistles that the Syrp Genie has, it does have the ability to select from different time durations of rotation, degrees of rotation and direction of rotation. For what I like doing, I found this to be a good balance between rotational flexibility and cost.
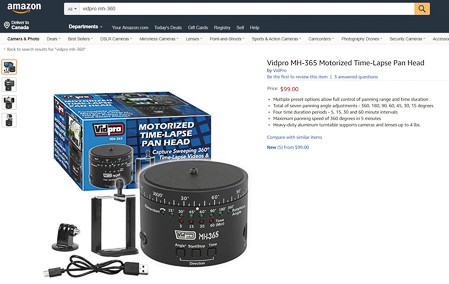
SCREENSHOT OF PRODUCT LISTING
Sliding motion
Taking motion one step further would be from the use of a slider, which gives a horizontal sense of movement. If you couple this with a panning motion controller as described above to get both panning and sliding motion, that would take your time lapse to a whole other level. This is the kind of pro technique that you don’t come across as frequently as with the other options. Just like the panning motion controllers, there are several types of sliders that can be used to get this side-to-side movement.
This Neewer slider is a budget-friendly system that can be found on Amazon for $80-95, depending on the rail length. It’s a very simple rail system that you can mount your camera on to. This slider also has the ability to mount from the slider end and from a central fixed plate on to a tripod, which will give you the ability to do vertical movements or even 45 degree angle movements, in addition to horizontal. This slider is not motorized, so you will need to manually slide the camera on the rails.
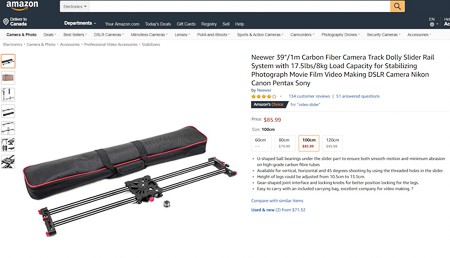
SCREENSHOT OF PRODUCT LISTING
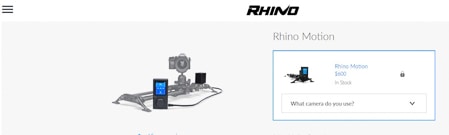
There are motorized sliders as well, such as those made by Rhino or this Varavon slider on Amazon, which will slide the camera automatically. Of course, these are more expensive and can range in cost starting from $300-600 depending on the features that you get, such as programmability and even a panning attachment.
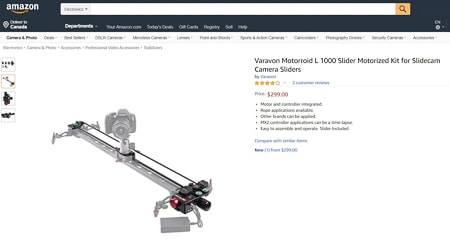
SCREENSHOT OF PRODUCT LISTING
SCREENSHOT OF PRODUCT LISTING
Another option is to make your own DIY slider. A Google search can uncover many tutorials on how to do this. The tutorials range anywhere from making the entire slider yourself, to attaching a motor to a non-motorized slider, like the Neewer slider above.
Neutral Density filter
If you want to do time lapse photography during the daytime but need to slow down the shutter speed to get more fluid transitions, neutral density (ND) filters are a great tool. Think of ND filters as sunglasses for your camera. The slower shutter speeds will give much more interesting transitions, with movement in the time lapse looking more seamless and less “jumpy” from frame to frame. This is especially more noticeable when the motion is fast, like traffic or crowds of people.
The type of ND filter you get in terms of number of stops of light reduction to the camera, depends on how much you want to slow the shutter speed down. For example and to paraphrase Sharky James, if daylight conditions have your camera settings at f/8 and 1/250 seconds, a 3-stop filter will slow you down to 1/30 seconds, whereas a 10-stop filter will slow you down to 4 seconds.
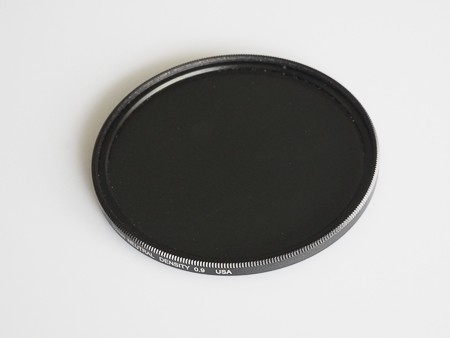
ND filters can also range in cost, depending on quality and the type of filter you get. You can find filters that are round and screw on to your lens, or are square and require a filter holder system to attach to your lens. Lower quality filters tend to cause colour casts on your images. Whether you decide to get ND filters or not may be part of a broader decision on your overall filter needs, since you can use a ND filter for more than time lapses. Here is a great article that Pete LaGregor wrote last year which gives an overview on lens filters, including ND filters and filter sizes/systems.
All of these are great tools that can bring your time lapse photography to the next level, giving you that pro look. How and whether you choose to use any or all of these options is up to you with what you are trying to accomplish with your video. Remember that just because a slider with a pan controller maximizes the type of movement you can get, you wouldn’t want to do this for all your time lapses. In many cases, it can be an overkill effect where just attaching your camera onto a tripod will do. And there’s nothing wrong with just propping the camera on a tripod. What other techniques have you used to get pro results with your time lapses? Feel free to share in the comments.
good
Hello,
I read your amazing article, It has a lot of information and easy to understand, I really like it.
Thanks for sharing.
Great, these are very helpful sharing, thank you very much.