
In this article I want to show how you can make epic photos within two hours from the shooting to the final picture. This is a good project for photography beginners to learn about the exposure triangle and editing. It is also a possible income source for photographers. There are a lot people who like their cars or motorbikes and are and are willing to pay for photos. The time required is relatively small, so that the price for the photo shooting is not too high.
The pictures will not be perfect like in a professional studio shooting but they will make your friends or customers really happy. Photos like this are also good if you want to sell your car or motorbike. The professional pictures will stand out from the smartphone photos.
Time Required
You can make the whole shooting with the editing in about two hours. In the calculation are already reserves for travel and setup included. The photo shooting alone, without the setup, can be done in about half an hour with six or more different compositions.
The editing is most time really simple, even if you have different pictures. Because you are photographing everything in the same conditions you can develop one picture and copy everything to the other photos. The editing can also be done in about half an hour.
If you want to photograph bigger vehicles plan a bit more time. Everything with more than two wheels is heavier to move and it will take a bit more time.
Gear
One good thing for this is, you can do it without expansive gear. You need a camera that can make RAW photos, a lens, the bigger the aperture the better a tripod and Lightroom (or another RAW processing software).
Camera
You will not need a high quality camera for this. If you have one good for you, but this kind of photo shooting will work even with cheap or old cameras because it is a very controlled environment. You do not need a good sensor or a fast autofocus. I did my first pictures with a Canon 500d (Rebel T1i) and it worked perfectly.
Lens
The lens is not so important. If you have one with a big aperture it is nice to blur out the background. A good lens for this is the nifty fifty. You do not need to buy a lens for this; a kit lens will also work perfectly. The lens should not be too wide, but if you have a wide angle lens, you can also bring it for more creative pictures.
Tripod
Because you are working in a relatively dark environment you have to have a tripod. You do not need an expansive one, but you are more flexible if it is easy to use. You should be able to take the tripod up to belly height and down to chest height.
Lightroom
One of the most important things is a RAW processing program like Lightroom. It is good if you can make HDRs and Doge and Burn.
Location
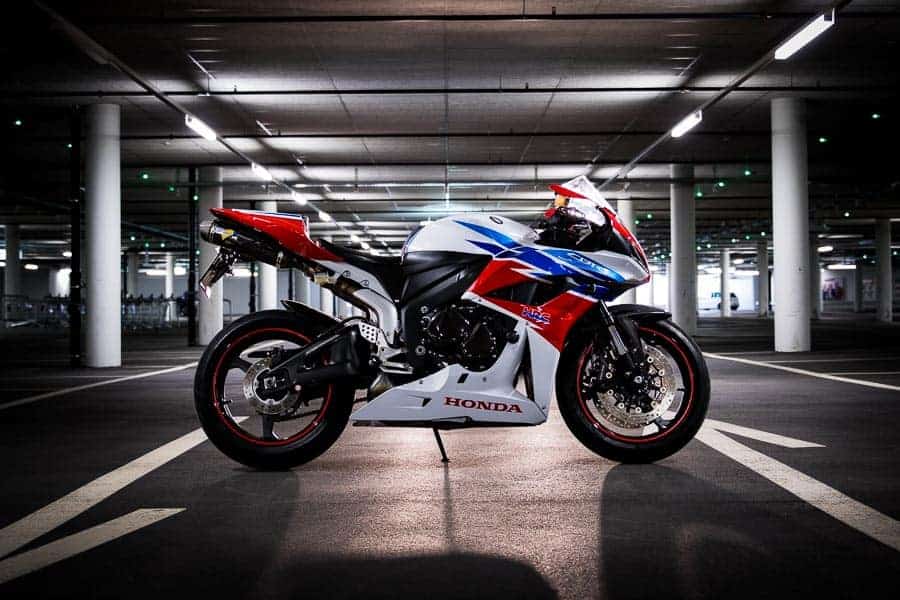
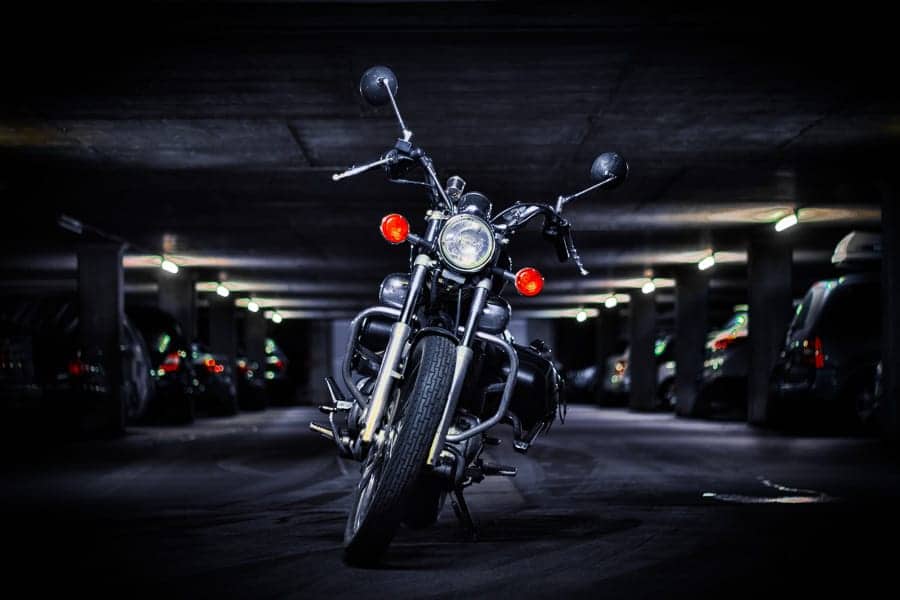
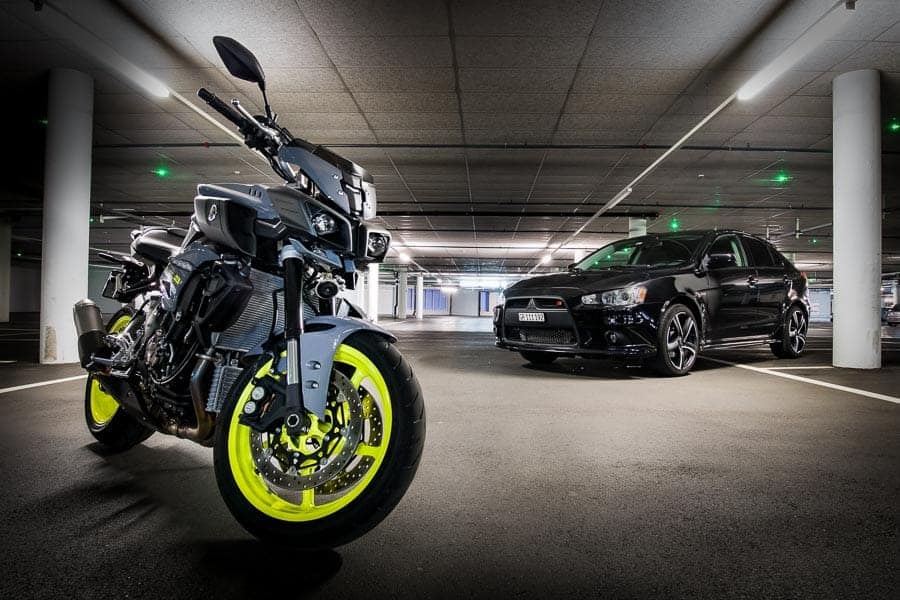
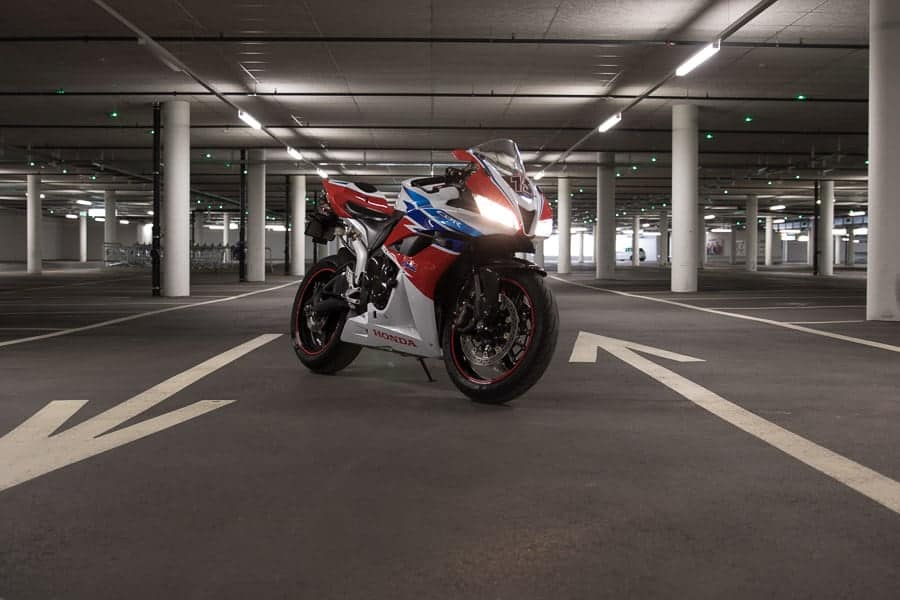
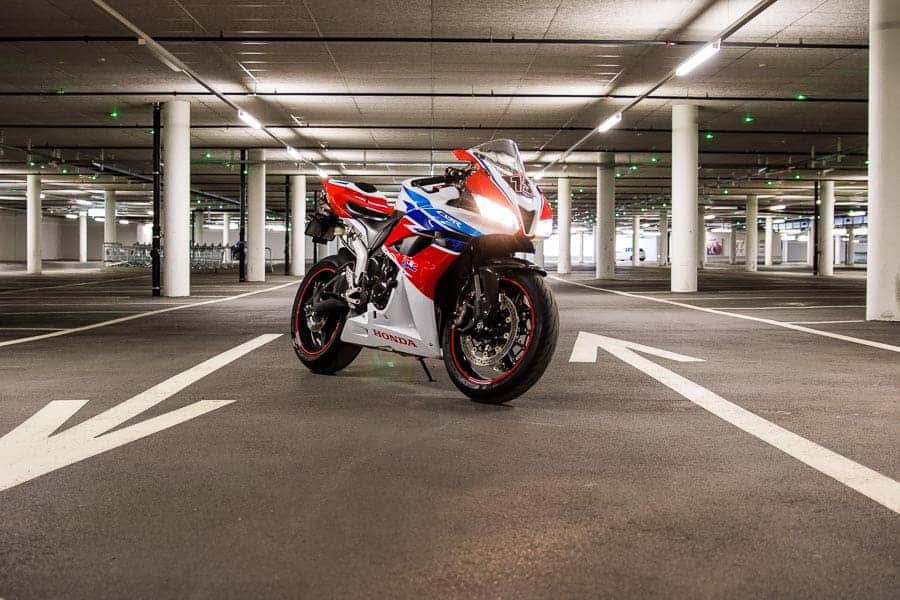
The location is the most important thing. It does not need to be beautiful location; the focus is on the vehicle but you should find something that fits to the vehicle you want to photograph. It should not be too dark or too light. It is good if there is some artificial lights from up above. This can be a lamp in on the ceiling of a garage or a lamp at a parking lot.
Good locations are a big garage, a parking lot at night or evening or a garage at home. If you want to make the photos during the day an underground garage with no daylight is probably the best option.
The most important thing if you are looking for a good location is, that other vehicles should be able to drive around you and your set up. Nothing is more annoying or time consuming, if you have to move vehicle and the camera the whole time and set everything up new.
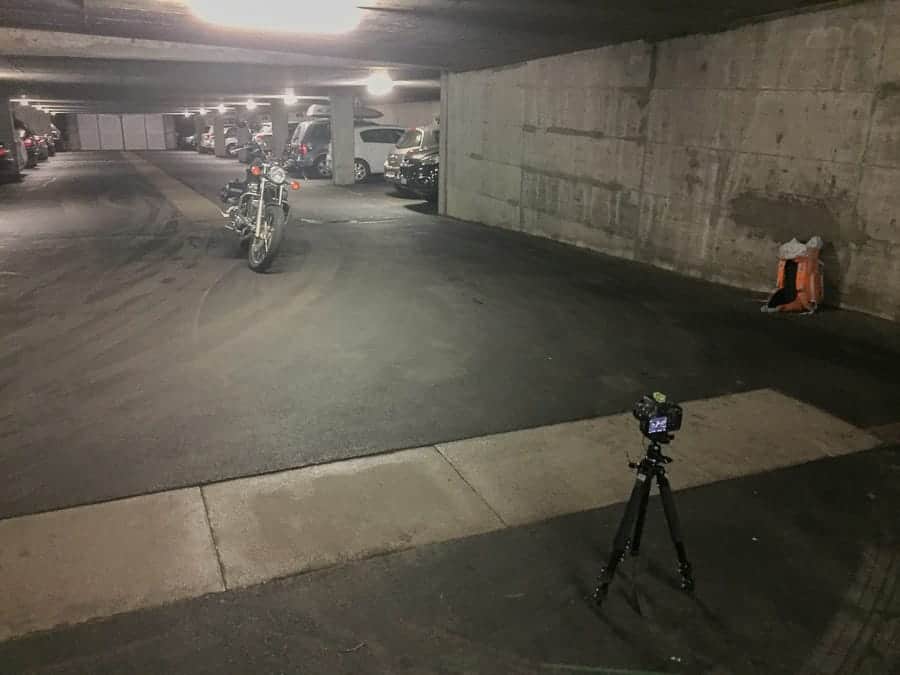
Setup
The setup is really easy. Check that you have no direct reflections on the vehicle. This is something that is hard to fix in post. The rest of the light does not really matter. You will get some reflections, but this is not a studio shooting for a car company.
The tripod should be set to the maximum height of the lights. The effect will be better, if the camera is not too high.
You can focus a bit more on the vehicle if you use a big aperture to blur out the background. If there are some ugly things in the background that you do not want to have on you photo you can blur them a bit. If you want to have a tag sharp picture of the vehicle and a blurry background you should use focus stacking but normally an aperture from 3.5 to 1.8 works great.
The pictures can be made in HDR or normal. If you make HDR pictures the contrasts will be stronger and the additional expenditure is kept within limits.
Composition
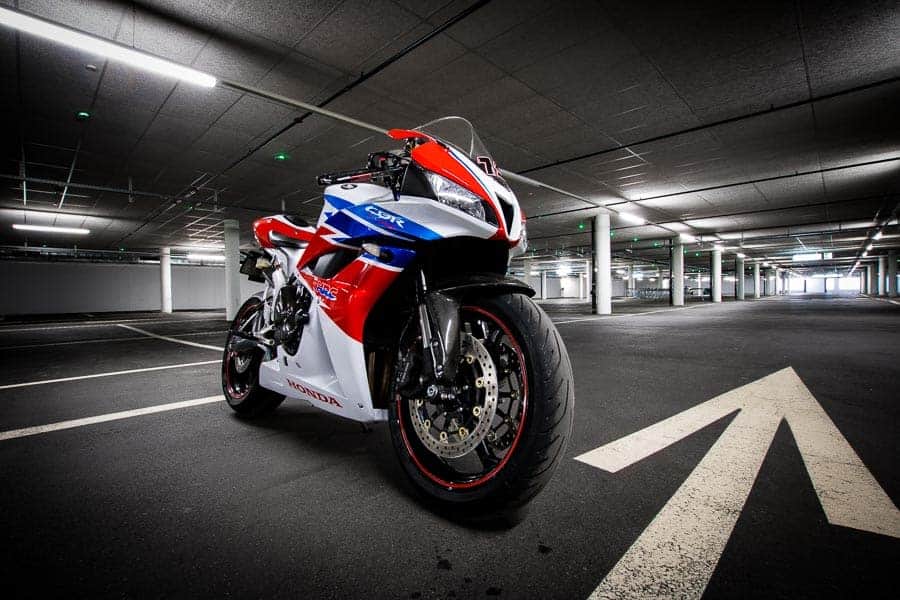
Most times I make easy compositions. If you photograph a motorbike it will be easier, because it is easier to move than a car. Three standard compositions are: Front view, side view and something between the front and the side view.
But you are not limited to this. If you have two motorbikes or a car you can add them to your composition.

If you have made the standard photos you can also make some details shots. Good parts for this are the exhaust, the lights, the cockpit or the logo of the brand. Sometimes you have also special details, ask the owner which part he likes the most.
If you have a wide angle lens you can make a bit more creative photos. Put the tripod down to and go close to the vehicle. The distortion makes the vehicle look powerful and impressive, but you have to like the look.
If you want to experiment a bit you can also put a strong light source behind the vehicle. You can use another car or bike and turn on the headlights or you can place a flash behind the vehicle. This will work well on motorbikes; cars are maybe a bit too big.
Post Processing
The post processing is simple. All editing can be made in Lightroom. If you made HDR you can put them together in Lightroom or Photoshop.
First you process the picture that the vehicle looks good. You can add a lot of contrasts. It often looks better if there is more contrast in the picture.
After you did the basics you can add a vignette to the picture. Play a bit with the sliders until it looks good. Often you have to make the radius bigger.
The last step is to doge and burn. Select the brush tool for this step. Now you can doge the uninteresting parts of around the vehicle a bit and burn some spots of the vehicle.
Problems
There are some problems that can appear normally. In this part of the article I will tell you how to prevent or fix them.
Lens Flare
If you turn on the headlights of the vehicle you can get some ugly lens flare. Most time you cannot do anything to prevent this except to turn the lights off again. If you see the lens flare make sure it is somewhere where you can fix it easy, like on the ground and fix it in post.
Reflections
Because you are not in a studio, or working with controlled light you will get some reflections. Just make sure that you do not place the vehicle directly under a light source or you will get a burned out spot in the picture.
Chromaticaberrations
If you don't have an expensive objective, there will be chromatic aberrations, especially chromium parts. However, these can be easily corrected in Lightroom. Do not worry too much if you find any in the photo
Traffic
This is the most annoying problem. If there is too much traffic you can almost forget a quick photo shoot because you have to move and set everything up new. Look for a place where you do not have traffic.
Did you like this quick project? Let me know it in the comments or share it on social media.
Awesome tips. Thanks a great deal… I would be glad to get tips on dodge and burn in Lr though
Bastian, Fantastic article. Simple, to the point, and you provided items to look for and to look out for. Very well done. Now, I’m going to have to go off and try this.