
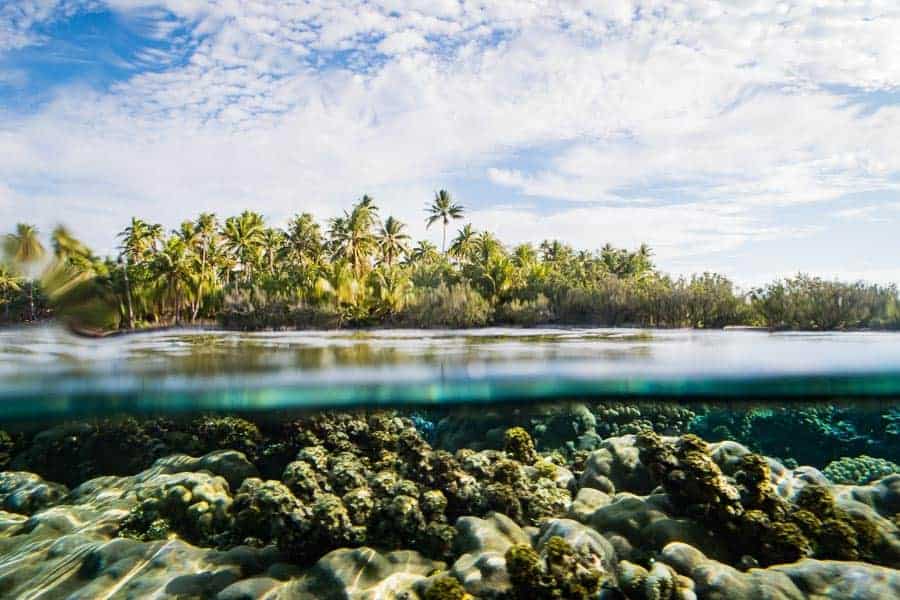
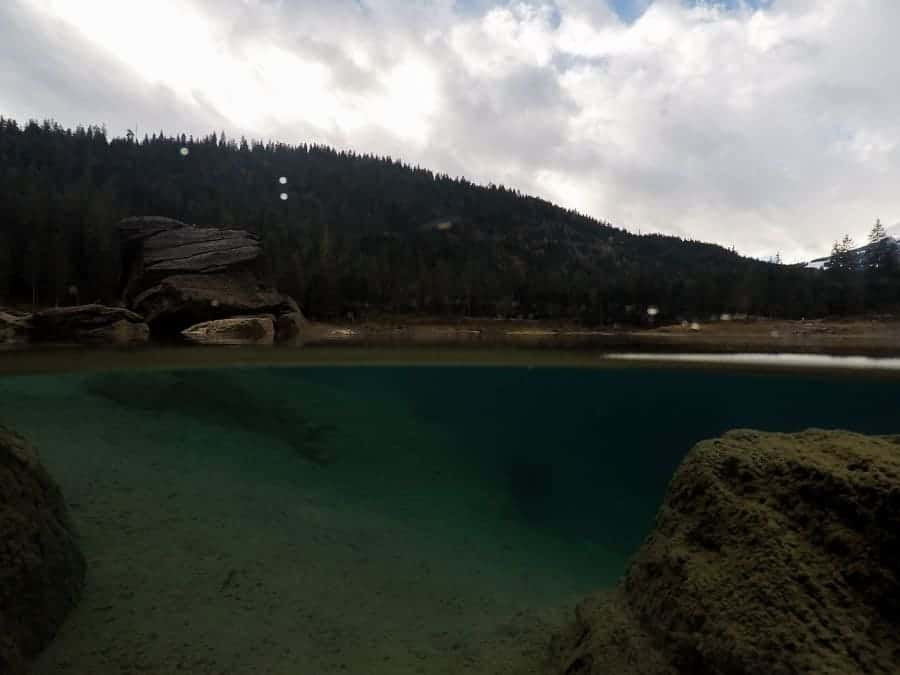
Underwater pictures are always fascinating and open the eyes for a new unknown world. But sometimes you have beside the great underwater world also a great overwater world. With split underwater shots you can combine these two worlds in one photo. But how can you make them?
The easy answer is: Get an underwater case with a dome port and you are ready. For everything else you need to know for great results read this article.
Gear
Compared to other types of photography the gear right gear can make a huge difference. If you make portraits you can get great results with a cheap DSLR with a nifty fifty or with your IPhone plus. If you want to make good split under water shots the right equipment is essential.
Camera
The most important thing is that you have a camera for underwater photography. Everything else will cost you a lot of money. You can make split underwater pictures with every underwater camera whose lens is larger than the water layer. Because you do not dive down it is ok when the camera is not waterproofed up to 130 feet (40m), just make sure that the camera is waterproofed. General rules for the right cameras are: the wider the lens the better and the better visible the screen the better. It is also good of the camera is a bit heavier and can make RAW images. In the next section I show some of the advantages and disadvantages of some camera types for. Some types works better than others but every type has its pros and cons.
Smartphone
If you have a waterproofed smartphone, congratulation you are ready to start. Just go to a water and try it out. Make sure that you do not lose you smartphone. It can get very slippery. Hold the lens straight to the water horizon and make some pictures. The drawback of smartphones is that the lens is very small. It is more and trial and error until you get the right moment and you have a good split between over and underwater. If there are some small waves you will not be able to make god split underwater pics. The good thing is that the screen is really big and you can see really good, what is happening in front of your lens. Most smartphones can make RAW images what is an advantage but they are often very light what makes it more difficult.
Action cams
Action cams are good to get started if you want to make split underwater pictures. Most of them are waterproofed what is a great advantage. The lenses are not very big but also not as small as a smartphone lens and more important, they are usually very wide angle. The cons on action cams are that they are small and light and the screen is small. Small and light is normally good, but if you make split underwater shots, you can get troubles with light gear if a wave comes. There is also a lot of cheap gear available especially for GoPros which can make it easier to make split underwater shots. Also most of the action cams can make RAW images what makes the post processing a lot easier.
Compact camera
I am a big fan of compact cameras especially of pro compact cameras like the Canon G7x but for split underwater pictures they are not very good. The screen is small, and the lens is not very wide, which makes it difficult to make good split underwater pictures. Most compact cameras are not waterproofed so you will need an additional underwater housing. The good thing is, that an underwater housing for compact cameras is not as expensive as for big DSLRs but they are also very limited, what will explain later. Nevertheless I got some really nice split underwater pictures with my Canon G7x.

DSLR
DSLRs are probably the best choice for quality split underwater pics. You can change the lens put a fish eye on, perfect for this kind of picture. You will not have any trouble with not shooting RAW. DSLRs are heavier and bigger, making it easier to control them in water. A drawback is that the most DSLRs have small screens. You will also need additional gear (underwater housing) which can be really expansive for DSLRs.
Underwater housings
Underwater housings can make the difference if you want to make split underwater pictures. There are different kinds of housings which are better or worse suited. Good is, when the front window, or dome port is as big as possible. It is also good if you can control the camera fully. If the front window is too small you can have trouble with the refraction. Also here I will show some of the advantages and disadvantages of some underwater housing.
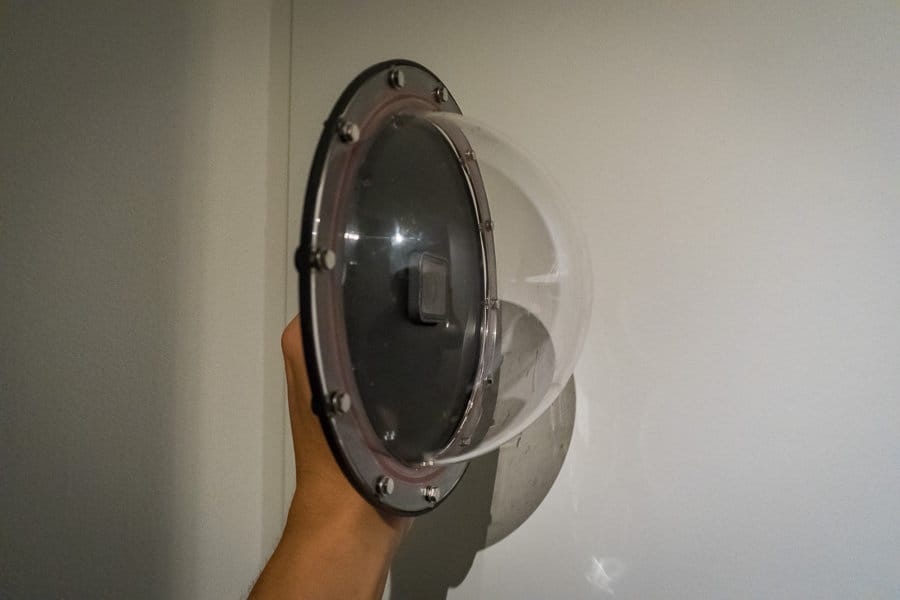
Dome Port
The key to good split underwater pictures is a dome port. This is a transparent plastic bowl that you can attach to your camera or underwater housing. Dome ports are available for smartphones, action cams but also for big DSLRs. They also helps to get rid of de refraction.
Smartphone Housing
Smartphone housings are good if your smartphone is not waterproofed. But if you have a normal underwater housing or just a waterproofed bag you will have trouble to make good split underwater shots. There are some housing with dome ports that are highly recommended if you want to make solid split underwater pictures.
Aquapac
An Aquapac is a waterproofed plastic bag for your camera. This is an option if you want to get stared with split underwater pictures or underwater photography. The front window is a bit too small for solid results but you can put your DSLR in with a fish eye lens, what is a huge advantage. If you want to know more about the Aquapac read this article on Improve Photography.
Underwater case for compact cameras
Underwater cases for compact cameras are not ideal for split underwater pictures and as I mentioned earlier in this article compact cameras have also drawbacks. The underwater housings can be expansive compared to smartphone housing. They are often not very flexible; this means you cannot add a dome port.

Dome Ports for action cams
If you already have an action cam check out, if there is a dome port available. For most of the GoPros they are relatively cheap. This is probably the best option if you want to get started or just have some fun in your holydays.
Dome Ports for DSLR
Underwater housings for DSLRs are very expansive but if you want to make split underwater pictures this is the key to the success. The front part of the lens is changeable so you can put on a bigger dome port if you want. The National Geographic photographer Paul Zizka makes great split underwater photos with a dome port and a DSLR. Check out his Instagram feed if you want to see what is possible.
Additional gear
If you want to make split underwater pictures there is some gear that can help to get better results or make that you do not lose your gear. If you have a camera that sinks, like a GoPro or a smartphone you should have a lanyard, a floaty or a floating grip for the Gopro.
If you have an underwater housing you do not have the problem, that the camera will sink but the camera can be really shaky if there are some waves. If you add some diving weights on you underwater housing you can keep the camera more stable.
Sometimes it can also make to use a tripod. If you want to make half under water landscape photos in a dark environment you can improve the image quality by using a tripod. On most of the underwater housing you can attach a normal tripod.
Settings
Here are some tips for the settings you can choose to start. This is not an exact science and it depends on what you photograph. Often it is try and error. Most time I shoot still photos but if there is a lot of action I also film and cut out the pictures afterwards. Based on the experience there are some tips for the settings.
Still photo settings
When choosing the camera settings you should set it like you photographing underwater. If you have too much contrast between sky and under water you can underexpose the water a bit but most time this is not a problem. When I do underwater pictures I usually set the camera to Time Priority (I usually use 1/320 s). This prevents you from blurry photos, movement under is often faster than you think. The ISO should be in auto mode. If you can shoot RAW you should, this makes the editing easier.
Film settings
When I want to have a picture of a fast moving thing I use my GoPro and take a video in the highest possible quality. This means highest solution (4k) and highest frame rate. Afterwards you can cut out a JPG from the clip. The quality is not the best, but sometimes it is better to get a bad quality picture than none.
Composition
A good composition for half underwater pictures is hard to find. You have to have something interesting in the foreground underwater and something nice in the background overwater. You also have to keep in mind that you are shooting with a wide angle lens. This means you have to get really close.
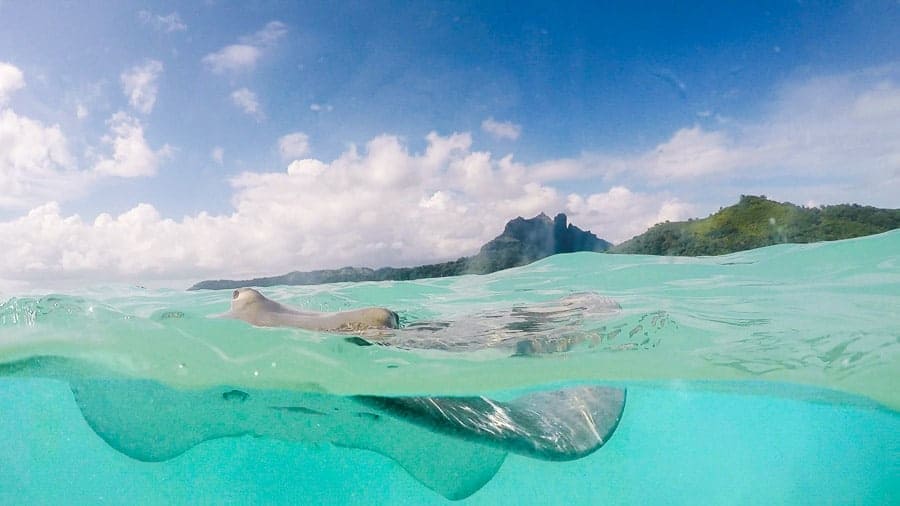
Thinks you can search underwater can be animals like stingray or sharks. Stingrays for example often come really close to people and are easy to photograph. Slow animals like starfishes are good for the foreground. If you are not in tropical environments look for rock formations that are close under the water surface. Sometimes there are interesting plants or corals that work great in a composition. If you live in a city where no rivers or lakes are close look for a fountain. Half underwater pictures can get really boring if there is nothing close.
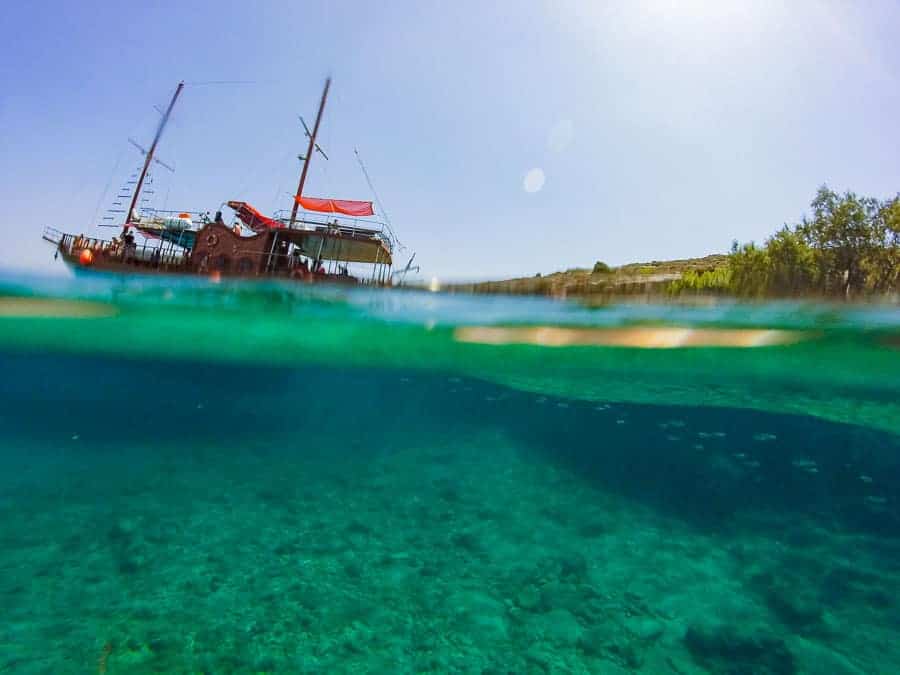
For the background there are a lot of things that work. If you have a boat over the water this is a perfect background. Thinks at the water like beaches, threes or houses are also good as a background.
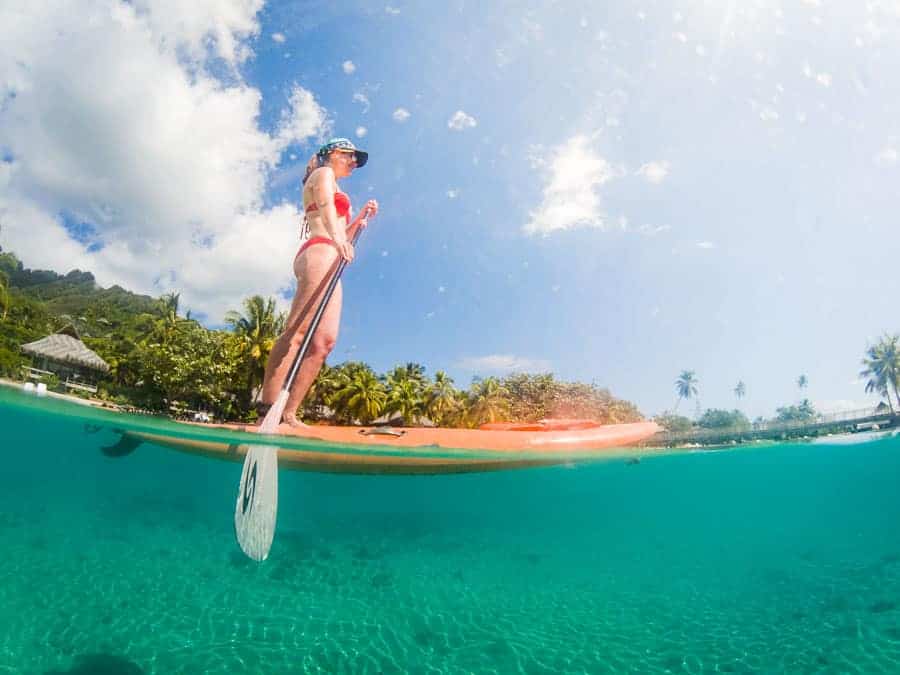
Good for split underwater pictures are people. This can mean someone can dive through a pool or someone can stand in the water. Make sure the person you want to photograph is not too far away or it will be very small in the picture (if that is not your goal).
Processing
The post processing can be a bit tricky because you sometimes have to deal with two completely different pictures in one, the part over water and the part under water. If you have a straight water line in your picture, the processing is a lot easier. I edit in Lightroom so these processing steps are for Lightroom but could also be used in other editing software.
Step 1 edit the overwater part
If there is overwater part with more than only sky in the picture I start with the overwater part. Most time the underwater part need more editing than the overwater part. Edit how you like it. I does not matter how the underwater part looks. Focus full on the overwater part.
Step 2: Edit the underwater part
When you have finished editing on the underwater part you can start working on the underwater part. Add a gradient filter if you have a straight water line. If the water line is not straight you can use a brush. Edit the underwater part with the sliders for the gradient filter. Most time you just to have to change the colour temperature, the brightness and push the dehaze slider a bit. It helps if you have taken the picture in RAW because the edit of the white balance is easier.
Get started
The best way to start is with the smartphone or if you have with the GoPro. The dome ports are not too expansive and you can great results even with these cameras.
If you do not have much experience with underwater photography start in a calm water like a swimming pool it is a lot easier to start, if you can hold the camera on eye height and see what is happening in live view. It is easier to start if you have no waves in the water.

Problems/troubleshooting
In the last part I want to give some tips how to avoid certain problems I often face and how to deal with them or avoid it.
The picture is boring
This is something that happens really often to me. Most of the split underwater pictures I make are not really great. Often compositions look great from far away but boring if you open it in Lightroom. To avoid this you have to go closer. Remember that you have a wide angle and thinks looks small if they are not very close. Make different pictures and go closer every time. If you cannot go closer try to place something in the foreground or add a person in your composition.
The waterline has a round shape
This happens if the camera is tilted up or down. The water will make a circle around the underwater case. Try to hold the camera as even as possible. Most of the dome ports for GoPros have a line that makes it easy holding it even to the water.

There are too many waves
Ok nobody can turn out waves but it can help if you change your direction. Try to stand with your back to the waves. The water will be a bit calmer in front of you. If you have an underwater housing without a dome port you will have a hard time.
There are a lot of water drops in the overwater part
To avoid water drops in the overwater part it helps if the overwater part do not touches the water. This can be impossible, especially if you are swimming. If you cannot avoid this put the whole underwater case in the water, pull it out fast and shake off the rest of the water. It can also help, if you put on glass cleaner with rain repellent before you go to the water.
The underwater case is dirty inside
This is one of the most difficult problems. Try to avoid getting any water or dirt in the underwater case. If you have some dirt or spots on the front window of your underwater case you often have to take it apart to clean it. Most time it will not get as clean as it was when you bought it so pay attention that no dirt or water comes inside.
Things underwater looks bigger than overwater
This is cause by the refraction and happens if you have a straight front window or the lens is too close to it. A dome port will help to avoid this problem.

If you have any questions about split underwater pictures that were not answered in this article? Let me know it in the comments and I will see if I can help you.
There is another technique that can work if you have relatively calm water and it is shallow – Get a good-sized fish tank. Put a few bricks in it so it will not float. Set it in the shallow water so it is about half-submerged and sitting on the bottom of the shore. (Depending on the size of the tank, the water will likely have to be not much deeper than 6-inches or so. Now you can set your camera inside, (perhaps on a table-top style tripod or maybe a Gorillapod) and shoot through the side of the tank with half the frame under the water and the top half above the water. https://www.dpreview.com/articles/9947678477/goldfish-all-gone-turn-that-empty-fish-tank-into-an-underwater-housing
Than you for that Rick. I have completely forgotten this possibility. Thanks for the addition