
If you've ever wanted to upgrade to the expensive TrekPak system for your Pelican case but can't justify the expensive cost, I'll show you how I built a pretty good replica for about $40 with stuff you can buy from Amazon and Lowes.
Ever since I picked up my Pelican cases to replace my camera backpack, I've been in love. The Pelican case is rugged, near indestructible, and travels well. It has kept my camera gear well protected once I switched over. I started out with the included pluck and chuck foam that most cases come with by default. I bought a padded foam insert for my second Pelican case, which has worked fine. But I've always had my eye on the TrekPak divider system but I was having a hard time paying as much for the dividers that I paid for my case in the first place.
Pluck and chuck vs padded dividers
I thought the pluck and chuck foam would be fine. It seemed like a good enough fit and held everything in its exact spot. The problem with the foam is that it wears out over time. Some of the foam bits start to fall out and it loses its shape. After only 1 year of light use (taking my camera out to shoot less than once per week), the foam was already coming loose. I had to hold the foam in place when I took out my camera or a lens because the foam wanted to come with it. This was really annoying.
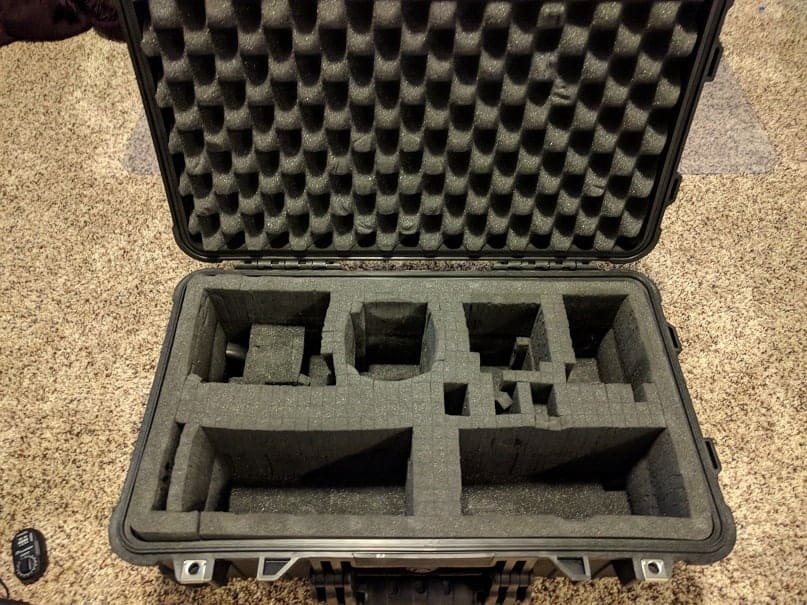
The problem I've seen with the padded inserts is they aren't truly customizable. Sure, you can arrange it to fit your camera gear but the problem is that some of your gear is wider and/or narrower and the velcro walls don't provide a precise fit for everything you could put in your case. It's not the fall that kills your camera gear, but rather the abrupt stop at the end. So if you have enough movement in your case, a short drop could mean a cracked lens, broken LCD screen, or a busted battery door. Having a tight fit is crucial to keep your gear safe.
The amazing TrekPak
This is where the awesomeness of the TrekPak system comes into play. You can create a fully customized divider system for your camera gear to fit everything perfectly. And because it is modular, you can arrange it and rearrange it later to fit the new gear you'll eventually buy. But that price…$115 for a divider system for the Pelican 1510 case. I paid $120 each for my cases (purchased on a Black Friday sale) and I can't see doubling the cost of them for a customized divider system.
If you look closely at a TrekPak divider, you'll see that is basically 2 layers of 1/8″ foam glued to a corrugated plastic board (think cardboard but made out of plastic). You see these things all over the place, announcing houses for sale, yard sales, and candidates running for political office. Corrugated plastic boards are cheap, rugged, and in this application, modular.
So why can't I just buy some foam, some glue, a corrugated plastic board (or “recycle” some of those campaign signs), and figure out how to attach them to each other? Well, that's exactly what I did.
Supplies
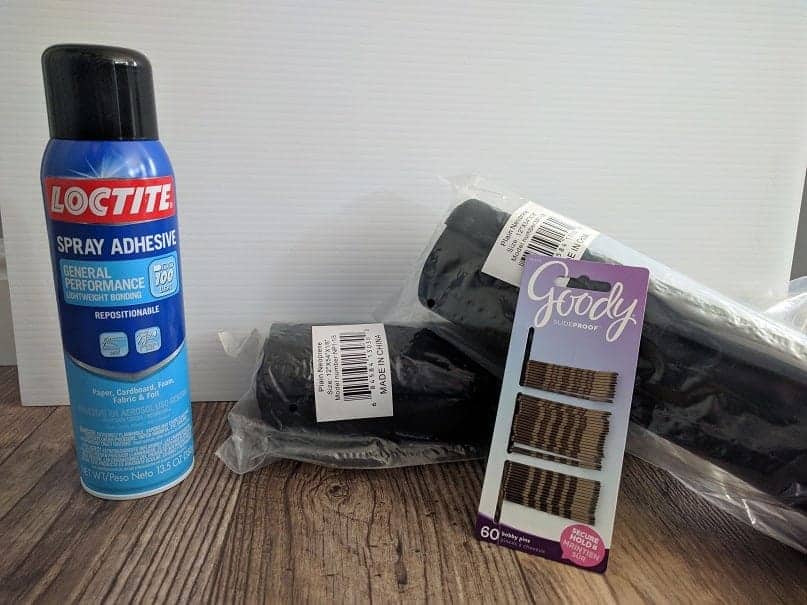
What you'll need is to get a couple rolls of 1/8″ foam and glue them to the back and front of your corrugated board. I bought some foam off Amazon and some spray glue and corrugated board from Lowes (or your home improvement store of choice).
2x Neoprene Foam Roll on Amazon
Loctite Spray Glue
Corrugated Plastic Board (24×36)
Bobby pins
Utility knife
Tape measure
Marker
I used neoprene foam because I like how dense they are and they provide an easy surface for applying the spray glue. However, they have a higher friction coefficient than other foams. This means they “hold onto” your gear in a sense that you'll have a harder time pulling it out of your case. This didn't bother me because if my case tipped over while the lid was open, it would be less likely that all my stuff would come spilling out. If you don't like the idea of neoprene, choose another foam of your liking but make sure it is 1/8″ thick. Also, prices will vary wildly on this stuff, so shop around. I was able to get my rolls for about $10 each, including shipping.
I bought two rolls which was enough to cover 75% of the front and back of a 24×36″ board. I wish I had just a little more to use on the rest of the board, but I was able to make due.
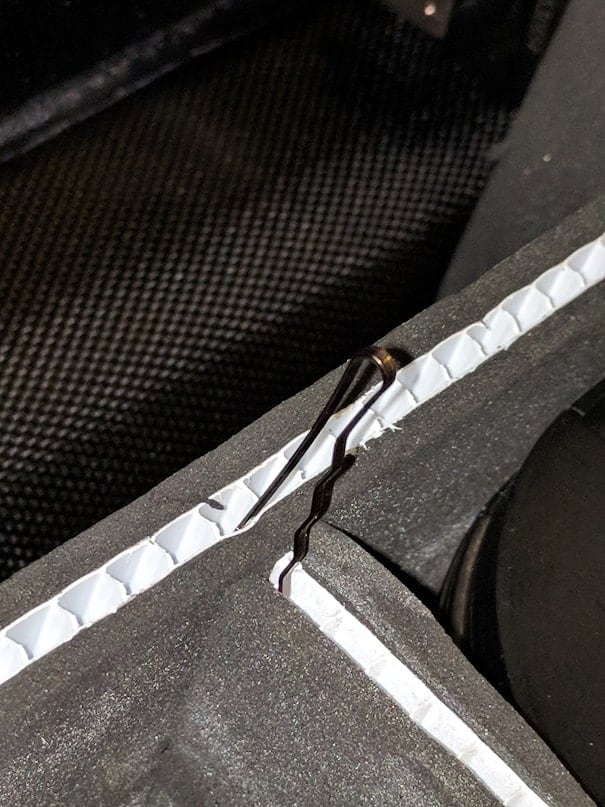
The genius idea was what to use to hold these sheets together once inside the case. I thought maybe about using those little plastic alligator clips that sometimes come with clothing to hold it nicely folded together, but I didn't think they would give me a tight enough hold. I needed a clip that was strong and wouldn't snap at the bend. Then I thought about using bobby pins and they worked perfectly. They are long enough to provide a strong hold and thin enough to take up almost no space at all. I used 2 pins for a couple joints that were especially difficult.
Prep the board
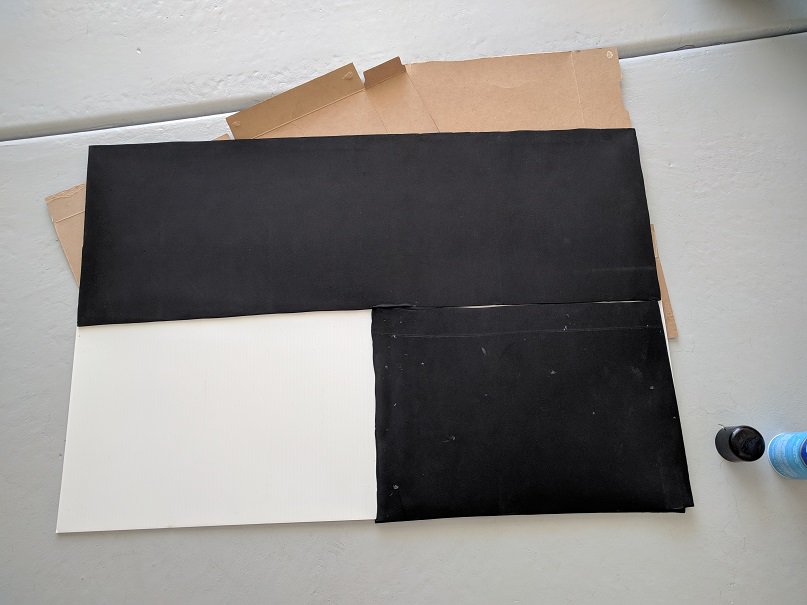
The first step is to cut the foam and glue it to the board. The instructions say to glue both surfaces with a “moderate coat” and to let it dry for 10 minutes in order to achieve a permanent bond. Well, after applying a “moderate coat” of glue, it started to dry pretty quickly. I was afraid it was going to be worthless after 10 minutes, so I just stuck the foam onto the board right after spraying it. It dries fast an in 30 seconds I had a pretty permanent bond.
I highly recommend you do this in a workspace that you don't mind getting glue all over: like a driveway or your lawn. The over spray from the glue will get everywhere and make for some sticky messes that will be hard to clean up. I did this in my garage but I have an epoxy floor so it wasn't terribly hard to clean up. I also recommend you wear latex gloves, or something similar. The glue was terribly difficult to clean off my fingers when I was done.

Glue up one side of the board, then work on the other side. Be careful to align your foam roll with the edges of the board to reduce waste and make sure you are applying foam to the matching reverse side or else you'll end up wasting it all. Once set, the foam will not want to come off easily and will tear if you used a good amount of glue. Be sure to get the edges and corners well coated, this is where the foam will want to pull away from first.
Measure and cut
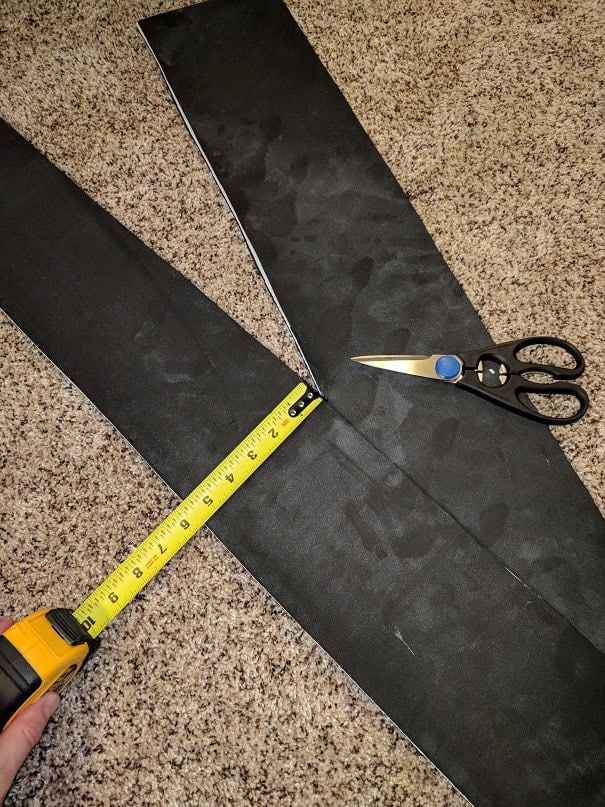
The Pelican case is 5 and 3/8″ deep. By using 12″ rolls, I was able to get 2 usable strips from each roll. This gave me about 216 inches to use, which sounds like a lot, but you burn up quite a bit building the perimeter.

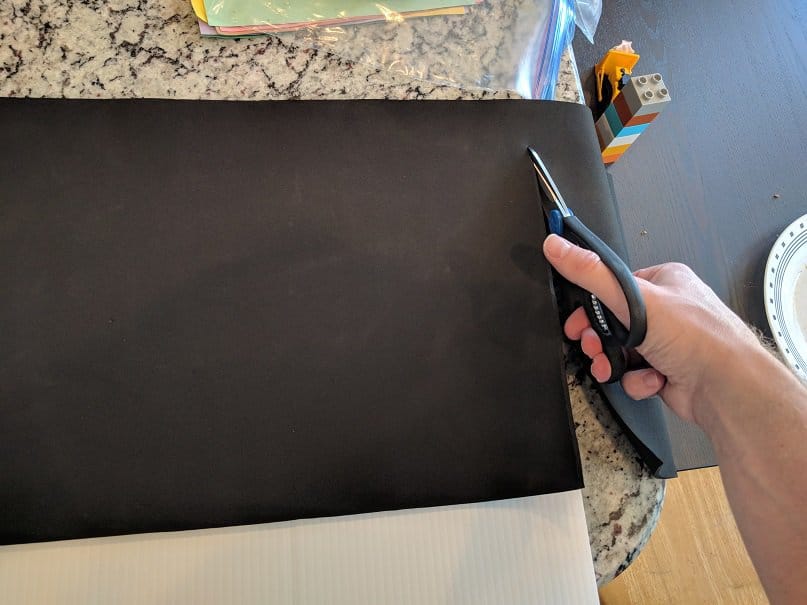
The best way to cut these would probably be to use a sharp utility knife. I used some kitchen shears and it was difficult getting straight cuts because of how rigid the board is. You can make a quick lengthwise cut by using a marker to make a series of marks at 5 3/8″ down the length of a section of board. Then just cut along the marks, kind of like connecting the dots. This is more precise than just making one mark at the top of the board and trying to keep a straight line all the way down.
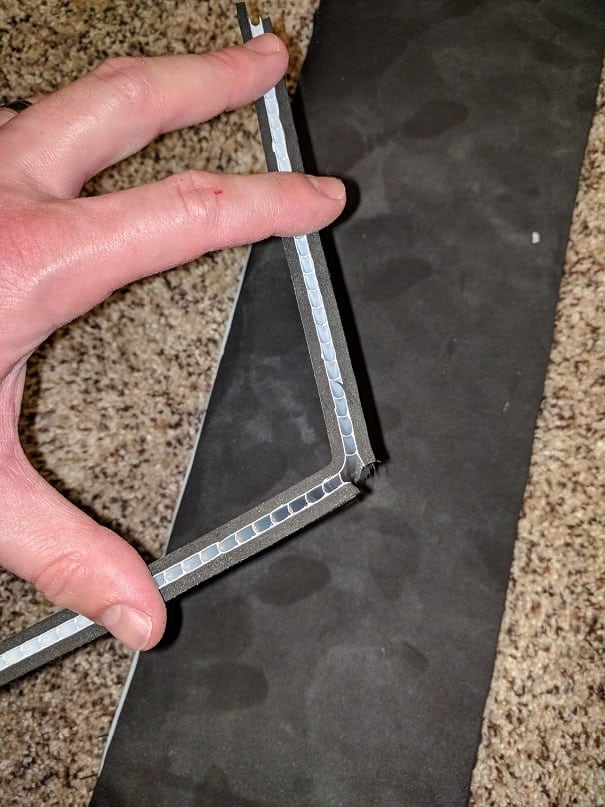
To cut the pieces for the perimeter corners, only cut one side of the board. This leaves the other side intact and makes a kind of hinge. I held up my board pieces on top of the basin of the case and eyeballed some measurements to get a good fit. I found that instead of making 1 cut and creating 1 hinge, it was better to make 2 cuts about 2 chambers apart. This makes for a more “curved” edge that fit better inside the case. You should be able to use 2 strips of board to cover the perimeter. Off set them so you only have 1 hinge per board (make 2 “L” shapes that form a box).
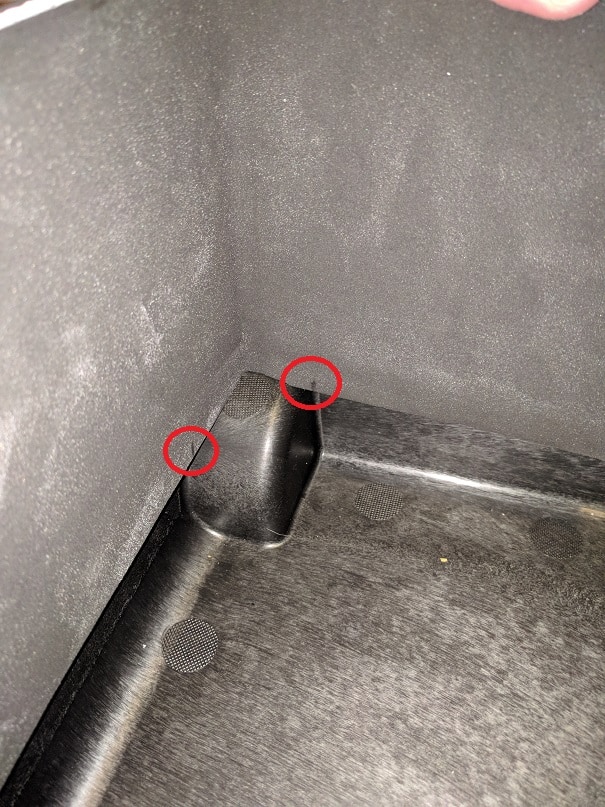
Next you'll need to measure out some cutouts for the wheels and the handle. This is pretty easy, just put the board above the wheel well and then mark it off with a marker. Do the same for the handle.
Once both sections are measured, cut, and fit into place, you can slide them in and secure them with your bobby pins.
Arrange your gear
Next, put your gear in your case and arrange it how you want. Leave enough space between each piece to fit a new wall. Measure, mark, and cut each new wall then hold it into place with the bobby pins. If you have some sections that are trying to pull apart or you see some bobby pins lifting out of the board, use two pins for a more secure hold.

As you can see, I was able to get all my gear into one case and ran out of foam board to use. I had to recycle a few pieces of my pluck and chuck foam in order to fill in the dead space, but that wasn't a big deal.

Conclusion
This was an easy project that took about an hour from gluing the foam onto the board, to measuring, cutting, and arranging. If I had a little bit more foam, I could have made a few more walls and finished out my case. But as it is, it works pretty well.
Does this look as good as a TrekPak divider system? No. Is it as refined as a TrekPak? No way. Several of my cuts are a little slanted and don't fit together quite perfectly. I'm sure the TrekPak people spent many months engineering everything to line up perfectly and they have a huge cutting machine that makes precise cuts for different Pelican cases which fit together perfectly.
Will this work as good as TrekPak? I believe it will. With this customized fit, I don't see any issues moving my gear around and I'm not afraid of catastrophic failure. All in all, it was a good project and saved me a lot money to have a fully customized storage solution.
Your project is very interesting, I always love these homemade items!
Thanks for sharing the information.
Actually you did a great job, I have two pelican 1615 cases, one with the foam and one TrekPack, I am going to measure my TrekPack and see if I can replicate your work, but will use a big cutter I have to cut it and will submerge the board into black paint on the part that will be exposed(borders) prior to gluing the foam. Then it will look more closer to the look of the Trekpack plus will use some plastic pins that I saw at a store in red color, similar to the ones you use but red and plastic, similar to the real Trekpak.
Thank you!!
Did you complete this?
What store had red pins?
very good. Thank you for sharing!
Your photography is really awesome and your explanation is so good. guys here you have to explore all the options from accessing your system control panel, this is a great web portal and there mentioned information are fully free for everyone.