
 If your photography hobby gets serious enough, you are going to have to have some place to store your gear. If you do any post-processing, you're going to want a quiet place to march through your workflow efficiently. But for many photographers, it doesn't stop with gear storage and a quite place to use your laptop.
If your photography includes portraits or product photography, you're going to want a studio. Unless you're photographing professionally–and that business is generating enough income to warrant owning or renting a studio outside your home–you're going to want to dedicate some home space to a studio. But before you convert the mother-in-law suite to your dream studio, give some careful thought to which space would be best. To do this, you'll want to consider the purpose of your studio, the impact on your family, and the needs of your equipment and clients.

For some great tips on gear and other ideas for building a home studio, see Dustin Olson's previous Improve Photography article from a few years ago about building a home studio. I concur with his great suggestions for initial gear and making the home studio work for you. I'd like to focus more on choosing which part of the home to put your home studio.
Frequency of use/traffic
This might be the most important consideration for a home studio. How often will you be tearing down your setup to convert it back to a spare bedroom? How often do you have guests in the den? Are your kids going to trip over a light stand in the basement? While the studio has to be big enough and have adequate light and power, it's also important that the frequency of its use is low enough that you won't be tearing down or setting up too often, causing tedious unnecessary work and wear and tear on your gear.
We'd all like to use a space as large as the living room with the vaulted ceiling. But that's probably not practical, since you use your living room far too frequently. Choose a room that's large enough to be useful, but not so frequently used that it poses danger to your gear or your guests.
Usable Size
All photo studios are a series of compromises, mostly between space and cost, but a home studio has to be large enough to accommodate the equipment you expect to use — backdrops, light stands, perhaps a table, a stool. Even if you've chosen the most out-of-the-way area of the house that will never be disturbed, if it's the size of a broom closet, that's probably not going to do you much good. In this way, size is a threshold criterion.
First, you'll want to consider how useful it will be to your photo business or hobby and compare that to the room's loss for other activities. Just how big is it? Are you better off using a smaller room that won't compete for other uses, or a larger room? A larger room might be better once your photo studio gear is set up but might needs to be broken-down and stored back in the closet every time your in-laws come over to play euchre. (For the geographically uninformed, euchre is the Canasta of the Midwest.) If you're using the studio only infrequently, then I think the largest room possible makes a great studio.
Overall square footage
Besides its usable space to you and your clients, you will also want to give some consideration to the tax benefits of a home studio space. If your photography is part of your business, you probably already take a tax deduction related to the size of your home office or studio. According to the IRS, it must be space used exclusively or regularly as your principal place of business, or to meet with clients. So if you drag out a portable studio that you set up temporarily once a month in your garage, you might have trouble counting a 30′ x 20′ garage as a full deductible home space.
The good news is that the IRS now as a simplified option for the calculation–$5 per square foot, up to $1500–which cuts down on the paperwork to determine the deduction. The bad news is that because the simpler version of the calculation is an “option,” you'll probably have to pay your accountant to calculate both the new and old method to determine which would be best for you. And that, friends, is how the IRS makes your lives easier. #blessed. Either way, please don't get tax advice from a photography article–talk to your accountant.
Ease of access
You might spend 45 minutes on the StairMaster every day. And you can crack a pistachio against your abs. But maybe, just maybe, not everybody wants to walk two flights of stairs up to your attic to sit for a portrait session. And what if others coming to the studio have to walk down dimly light hallways, or step over many bear-trap-like Lego toys to get back to your studio?
As photographers, we put up with a lot that others might consider a hassle. Lifting heavy equipment, constantly packing and unpacking, dead batteries, and cleaning equipment over and over. But in order to think carefully about how easy it is for others to access your home studio, it might be worth putting yourself into the shoes of your clients, friends or family.
If you're only using the studio for product photos, this may not be a critical factor. But if you have guests to your home studio, you could be taking a real liability risk if your guests must undergo an Indiana Jones-like adventure to get their portraits taken. 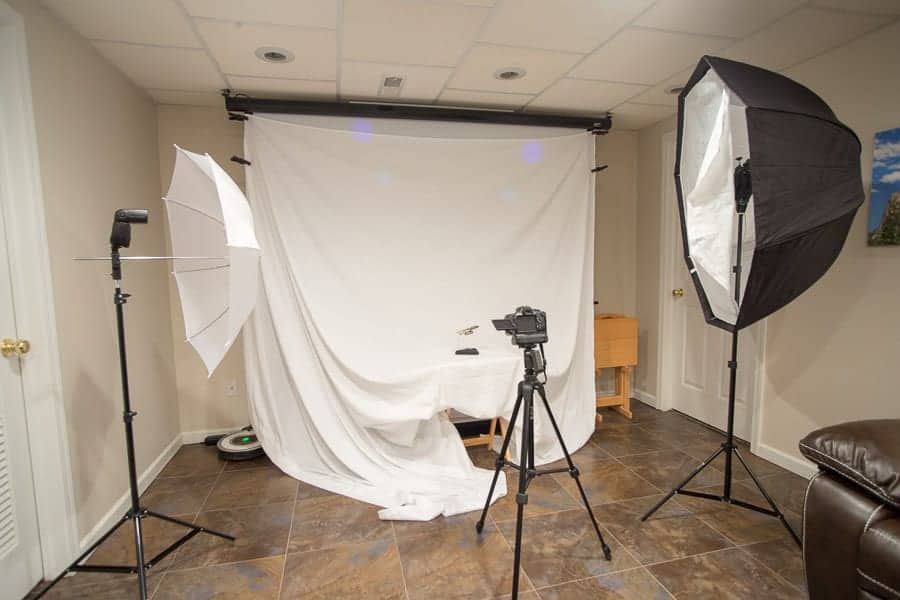
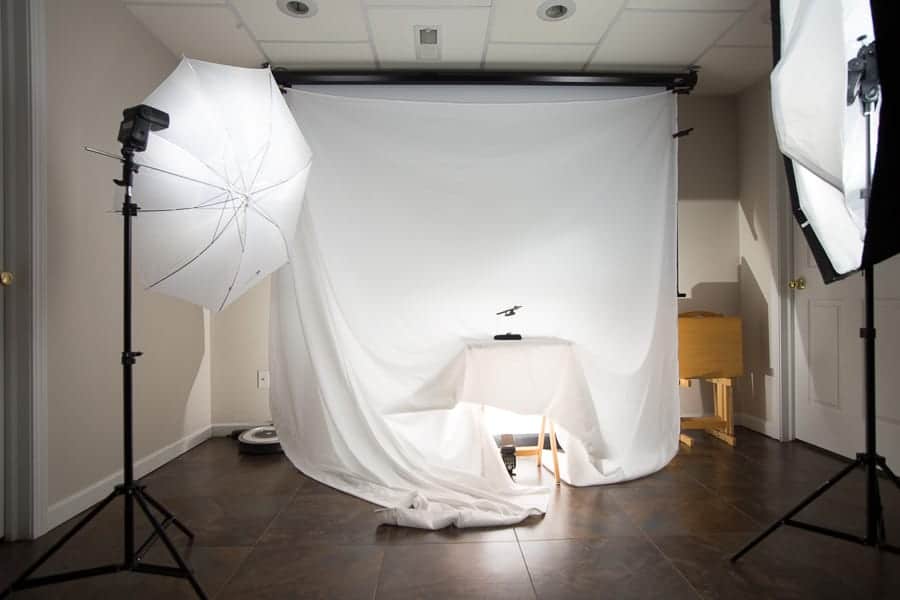
Light
Being able to control light is essential to taking the frustration out of studio photography. If you're using traditional studio strobes or a speedlight flash setup, you don't want an uncontrolled mix of color temperatures to ruin your portraits. In mny situations, you might want to take extra steps to keep the window light at bay.
That's not to say every studio has to be a light-tight box. You may want to incorporate natural light. Often a large diffused light can be ideal, and serve as an essential part of making studio images look natural and flattering.
Ceiling the Deal
Nobody thinks about ceilings. They're easy to overlook. If you're putting together a studio, and you want to control light, think about how much a ceiling impacts studio portraits. Will you have canned lights you have to make sure are switched off so you can control your studio light setup or your speedlights? Will the ceiling be so low that you cannot easily move lighting modifiers around your subjects without piercing the foam drop-ceiling tiles like Captain Ahab hunting Moby Dick?
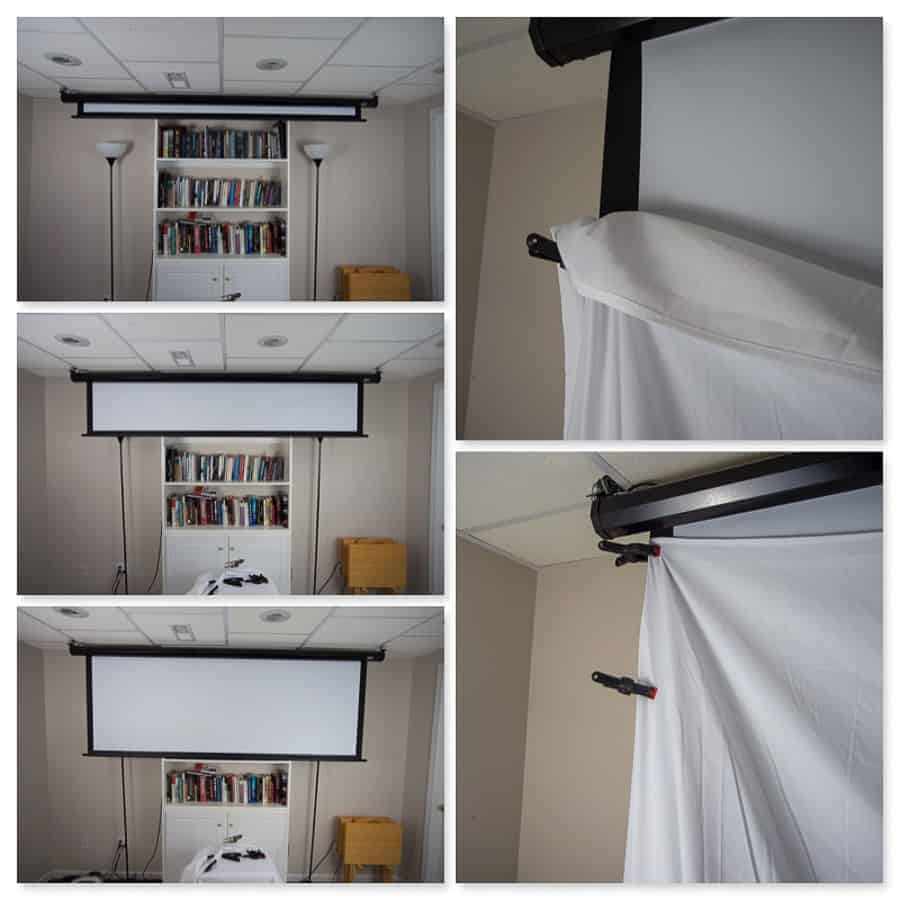
Don't forget about the impact that bounce-light will throw on your subjects. Whether you're purposefully using the ceiling as a giant softbox or trying to prevent bounce-light from cluttering your image, you can't ignore it. The lower the ceiling is, the more likely that you're going to have some bounce-light. Consider the color casts capable with a ceiling as well. Will it be a cooler or warmer effect on your images?
There's a great deal of personal preference involved in choosing a home studio, but I believe with an in-home studio setting, the higher the ceiling, the more satisfied you'll be with the use of the space. It's not a deal-breaker to have a studio in a room with eight foot ceilings. Here are my suggestions for ceiling priorities:
- If you're fortunate enough to have a choice, a ten-foot ceiling gives your home studio more flexibility and a larger margin of error when moving lighting equipment around.
- If you have to choose between two ceilings that are both low, just go with the one that can take the most punishment.
- If you have a room with popcorn ceilings, and you find out what kind of evil, Machiavellian misanthrope invented those atrocities, leave a message in the comment section below. Honestly, have you ever tried to clean those?
Power to the People
It's difficult to imagine an in-home studio without adequate power outlets. If you set up a studio in a location without adequate power outlets, you're going to be darting in-and-out of other rooms. Even if you will be using a speedlight or natural light set up, you're not going to want a second location to recharge batteries or to plug in a laptop. So power up.
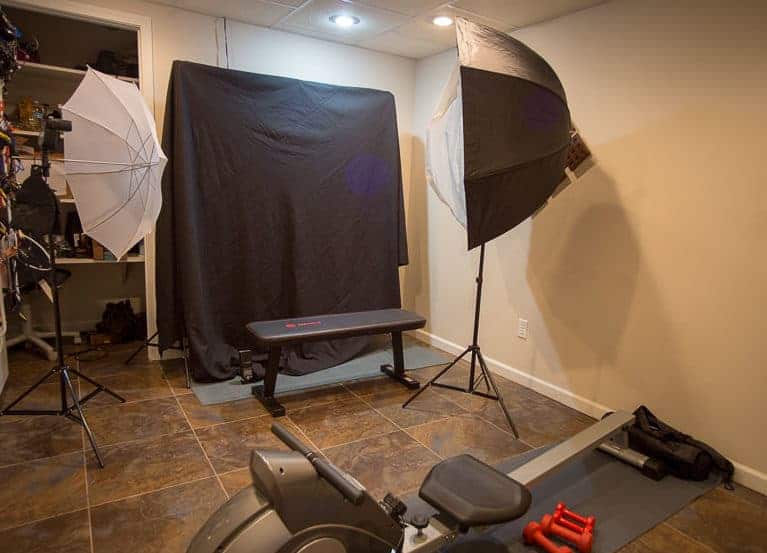
If you've given thought to long-term equipment, like studio lights that will now be installed semi-permanently into the workout room in the basement, consider duct tape to secure extension cords or other wires to floors to prevent tripping. Your guests and your insurance company will thank you.
Conclusion
Home studios are often a logical next-step as hobbyists develop space to learn more about their craft and professionals look for a creative space to control the photo shoot environment and to meet with clients. Consider carefully what you need from your studio, and what your family needs from the usable rooms in the home, before claiming a great deal of space for you new photo studio.
I have encountered virtually EVERY challenge and obstacle in this article over my 30+ years of doing photography! From my early days, when I was just learning and developing my craft, and my college friends allowed me to “experiment” with them as subjects, to doing all that I do now – portraits (studio and environmental), weddings reunions, parties, etc, I could have written this article. I have been places where walls were green, gold, orange, blue – just about every hue of the rainbow – and they ALL present a different challenge! Filters become your friend. I have been places where the space allotted was no bigger than 6 or 8 feet wide to maybe 10 feet deep.
Thank you for this article! It keeps in front of me the challenges that we face as photographers and our solutions to overcome the challenges! And yes, POPCORN CEILINGS SUCK!!! And, the cost and to scrape and replace them is not cheap! I have found that if you use a good application of Kilz, then use a sealant, you can survive, but you may have to keep re-applying.
Thanks, Ronald! I took a more aggressive approach to the last house I had with popcorn ceilings. I moved!
I’ve found that hard surface flooring is best. Paper backdrops will be ruined if placed over carpet and then walked upon. If your only room available has carpet, a workaround is to get a sheet of white hardboard from a home center and flop it onto the floor before shoots.
That’s a good tip, Paul. I also know that my office is always looking to replace those hard chair mats as they get old or get some small cracks-. These would still have plenty of life in them to place under a paper backdrop.