
 All great photography requires planning. Not just about the shoot, the weather, or the model. But about packing and transporting the gear, too. By concentrating on the goals of your trip, and learning to pack more creatively, it's possible to take enough photo gear without over-packing or giving up the photo opportunities you want most.
Great philosophical debates move from generation to generation. The context evolves slightly, but the themes do not change. Nature versus Nurture; free will versus fate; Seinfeld versus Friends. We could include the eternal struggle between the twin values of “traveling light” and “being prepared.” In my book, these may not be one of the all-time philosophical debates–but at least it's an all-time logistical debate.
Everybody wants to be prepared, not just Boy Scouts. Photographers, too, want to be prepared for all photo contingencies. A nature hike might turn into a portrait opportunity, or a sunset landscape chance. I think most photographers would travel with all of their gear if they could do so practically. But that's the trick, isn't it? We can never practically carry all of our gear–unless we have a magic backpack or we're extremely conservative about purchasing gear.
 Too much gear can slow you down. Or make it impossible to travel by air. Or make it too expensive. Or dislocate your shoulder. It might even put your gear at risk if you overstuff a bag or backpack with photo gear. Too little gear can caused missed opportunities, like needing a telephoto lens when you only brought a wide-angle. Or needing to use a tripod when there's no rock or pedestal to put your camera on. Neither extreme is satisfying. As a photographer, you want to balance these extremes –packing enough gear to get the shots you want, without the risks or inconvenience of over-packing.
Because the suggestions that follow are based on value judgments (mine, to be precise), they are inherently subjective. By contrast, Seinfeld is better than Friends–that's not subjective. Here are some tips to balance these competing values.
1. Start by Thinking About What You'll be Shooting
Life is about making plans from which you deviate, almost always. If you're lucky, you do come up with a plan.
— Kenneth Branagh
There's no substitute for planning. Suppose you're traveling for business. You plan your trip to the airport, your flight, your hotel, and your rental car. You plan your meetings, seminar, or other purpose for your visit. At the Improve Photography Create Photography photo retreat I'm going to next month, they even wanted me to plan by downloading an app and putting in all kinds of information so they can group me with other photographers. While it's possible to over-plan anything in life, I just don't think most of us really struggle with over-planning.
 Since professional photographers are conducting business, I suspect planning for most of them is second-nature. In that respect, I suppose this is something that amateur photographers need to take to heart more than pros, but planning your photo opportunities does not make you obsessive. If your family or friends can't understand why you would get up at 5:30 AM just to go take pictures on your vacation, when you should be sleeping in like a normal human being, that's okay. It's nothing to be embarrassed or be defensive about. Planning is a natural step in improving your photographs. Specifically, it's an essential component of the transition from snapshots to photographs, since it makes images intentional.
2. Reality Check: You Can't Take All Your Gear
Unless you are just getting started in photography or you have been extraordinarily stubborn (or disciplined, if you see this as a virtue) in refusing to purchase new photo gear, you are probably to the point where you realize that taking all your photo gear is no longer possible when traveling. You just need to deal with this reality and move on.
The sooner you realize that you will have to leave some gear behind, the more confident you will become in your own discretion. The first time you cropped a picture, you probably waffled a little bit on how much to cut out of the frame. What if it's too much and the viewer doesn't see everything she should see? What if it's not enough and there's a bunch of dead space? You don't sweat these choices as much as you used to. The same goes for taking your gear. Each time you leave gear behind without regretting it, you'll gain confidence in your ability to assess your gear needs, and you won't agonize over the choices.
3. Reality Check: You Can't Get Every Shot You Want
The Yin to the Yang of gear storage limitations is the reality that you can't get every shot.
Here, too, your discretion is a muscle that needs exercise. If you're headed to the Caribbean and you've always wanted to come home with beautiful underwater images you could blow up into a large acrylic print for your home, be prepared to sacrifice some other priorities. If you are renting an underwater housing before getting on the plane, it's likely to take up a substantial portion of the packing space you've designated for gear. But pretending that you can get every image to be had will only lead to frustration.
4. Carefully Consider Your Method of Travel
Whoever said “getting there is half the fun” was never a Sherpa for a photographer carrying 120 lbs. of gear. But the automobile can be a blessing and a curse when it comes to packing camera gear. If you pack so much that you can't carry it to the photo spot, what was the point? But if you can drive to your photo spot–problem solved.
I tend to look at cars as pack mules — you load up as much as you can within reason. If you're going to be gone for the day, but need a great variety of equipment, why would you be limited by the size of your backpack? You're not. But it's difficult to get into that mindset if you've spent good money on a photography backpack. If you're flying, it may be impractical or weird to bring half of your gear in a fancy backpack and put the rest in Tupperware containers and bubble wrap. But if you're driving, you absolutely can!
If you're boarding a plane, efficiency matters. You're going to be looking at the “one bag plus one small personal item” rule of airline travel. In storage terms, this means one bag in the overhead compartment and one that will fit under the seat in front of you. Unless you've upgraded to first class, this means that you'll constantly be re-adjusting your feet around your gear. Take advantage of bag space dimensions, and learn how much room you have to work with, because this space can differ between airlines.
|
Airline Underseat Storage Dimensions (inches) |
|||
|
Airline |
Width |
Depth |
Height |
| Delta |
20 |
17 |
11 |
| American |
20 |
17 |
11.75 |
| Southwest |
19 |
19 |
9.5 |
| United |
20 |
17 |
10.5 |
|
Source: USA Today |
|||
5. Use Dual-Purpose Bags
I'm blessed with a spouse who packs lightly. This means I can often include some gear in her carry-on. Sometimes, I can persuade her to use one of my camera bags or backpacks for her carry-on, and remove all of the camera gear. This gives me another option for carrying when I get to my destination. Essentially, this lets me travel with my gear in a hard-sided Pelican case and a large backpack, and once I get to my destination, I can take both backpacks into locations, such as hiking trails, where the Pelican wouldn't be practical.
 6. Consider Whether to Delay Post-Processing
On relatively short trips, or on trips where space is at a premium, you might consider holding back on all your post-processing until you return. For some of us, this seems not only disruptive to our work flow, but may risk losing images–so you might explore other backup options, such as dual-card shooting, a stand-alone SD card duplicator, or using WiFi or Bluetooth to backup to a smaller device.
7. Make Use of Helpers
On most trips in which I expect to take photos (read: all trips), I like to take my tripod. Not my gorilla pod. Not a mini-tripod. My full-size, durable tripod. It fits on the outside of two of my backpacks, though somewhat loosely. This is fine if I'm driving. But if I'm going to be boarding a commercial flight, this gets a bit trickier. The tripod barely fits in a standard carry-on size suitcase, and only then if I load it diagonally and sacrifice a fair amount of space that could be used for other camera gear.
However, it fits just fine in my wife's carry-on case! I know, that sounds a little selfish, but hear me out. My wife's carry-on usually consists of her clothing, necessities, a book, and little else. The tripod is easily packed around these items and needs almost none of the additional padding that comes in typical camera bags. Occasionally, on longer trips, we will check a larger bag with all of our things. The tripod fits easily into a larger travel suitcase as well. But beware: the 50-lb. limit most airlines impose sneaks up on you quickly, even with a “lightweight” aluminum tripod. I'm not sure this alone justifies the upgrade to carbon fiber in your tripod, but to each his own.
I also will often use my carry-on size Pelican 1510 for the heaviest, most expensive photo gear, and put my clothes and other travel items in the camera backpack as my “personal item” because it (barely) fits in front of the seat underneath me. Then, once I get to my destination, I unload both and have the backpack for photo day trips–one for me and one for my assistant, if I have one available. It might be confusing for the TSA to see my toothbrush in my camera bag, but the flexibility is useful and I won't wince uneasily as I try to stuff my camera and lenses underneath the seat in front of me.
 8. First Class, Business Class, and Coach: Prioritize Your Equipment
If you're really trying to pack as much camera gear into a bag as possible, re-think which gear will truly benefit from padded dividers and equipment for which padded dividers might be overkill.
For example, lenses and camera bodies are the heaviest and most expensive parts to replace in my bag. You might say they fly first class. Breakable, but less expensive items, such as flashes and remote triggers, filters, fly business class– I want an adequate amount of protection, but I'm not going to wrap it like fine China. Finally, there are camera straps, batteries and chargers, and most flash modifiers. These tend to be either the most durable or the least expensive items on the gear list, or both. They fly coach. There is no reason a foldable 18″ softbox needs to travel in its own case, let alone surrounded by padded dividers.
Padded dividers take up a good deal of space. If you're looking for more elbow room for your gear, consider taking out the divider between the battery charger and the filter-carrier, or the softbox and the camera straps. We tend to develop habits when packing. Camera-related items seem drawn like a magnet to the “camera bag” regardless of whether they really need its protection or not. Fighting this presumption and categorizing your gear can help you save space.
9. Make Contact with Your Inner McGyver
Just because a tool exists doesn't mean that you have to use it. Have you ever been camping and hammered in a tent stake with a rock? Sure, it's not as well-designed for the job of a hammer. But if you backpacked into your campsite, it means you didn't have to bring a hammer. While it is less efficient for setting up camp, it's more efficient for getting to the campsite.
The same is true of carrying photo gear. There are hundreds of well-designed and well thought out tools to help us pack photo gear. Not all of these value efficient packing. Some stress portability, or theft protection, or speed of access. A great many of them are built for photo gear safety. But that doesn't mean that's always your best option. Maybe you can pack that 50mm lens in some thick socks or other clothing that you will wear when you arrive. In fact, all clothing in your pack will protect camera equipment to some degree. Consider a layer of bubble wrap might be thinner and more flexible than traditional padded dividers. If you want to bring a backpack for use when you get there, some backpacks can be rolled up with a lens inside or packed into the carry-on style case, creating as a case-within-a-case and decreasing the need for some padding.
10. Ship Rental Equipment to Your Destination
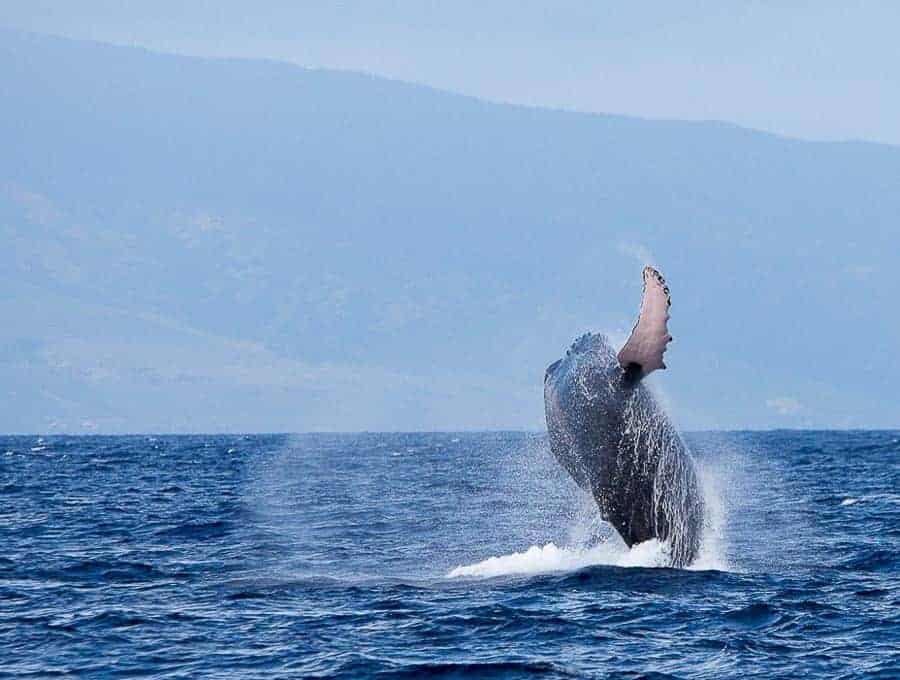
If you're considering renting gear for a special photography opportunity, why not have it delivered to or near your destination? For example, at BrentRentsLenses.com, Brent notes that he can ship to a UPS or FedEx Store. If you're flying to Maui to watch the humpback whales, why not stop by the UPS store after you arrive–thus saving the weight, space, and effort required to take a large telephoto lens with you on the flight. Just remember to leave yourself a plan for carrying that rented equipment onto the boat.
Now Get Packing!
Every time you pack photo gear, you should do so thoughtfully, with some idea what you're going to shoot and how you're going to shoot it. But don't stop there. If you want to pack a great deal of gear, to minimize the chance that you won't be prepared, you're going to have to get creative. Creative about bag or suitcase choice, about where to put all that gear you plan to carry–and even about whether others can do some of the carrying for you. And even if all of your gear fits into one bag, don't assume that's the best bag to take on every trip you make. Camera bags, suitcases, and other carriers are just tools. Just like you don't use one lens, one camera, or one flash set-up for every shoot, you shouldn't use one method to transport your equipment for every photo trip.
More, more, more…..great advice, especially for a beginner like me. I bought my little Canon Rebel to shoot houses; but quickly added stuff….so your advice is right on.
Thanks, Warren. I, too, started with the Rebel (the film version actually). So easy to add gear.
This is fantastic advice. I always struggle with toning down my gear when travelling, and it inevitably results in me carrying a 20kg bag around the airport and injuring my back!