
Every so often, we as photographers run out of inspiration and find ourselves in a creative block. When we run out of ideas and struggle to get our creativity going, it gets hard to find the inspiration we’re looking for. And often, we end up shooting less or shooting photos that aren't creative and don’t have that wow factor. We get tired and bored of photographing the same things over and over, and want to try something different but aren’t sure what to try. Sounds familiar?
So what do you do? Among other things, you search the web or go to your favourite photography site like Improve Photography, and find an article just like this one. To help inspire you, here are 10 simple ways that have worked for me, to add creativity to your photos when you’ve lost that inspiration or just want to try something new.
1. Glass Ball
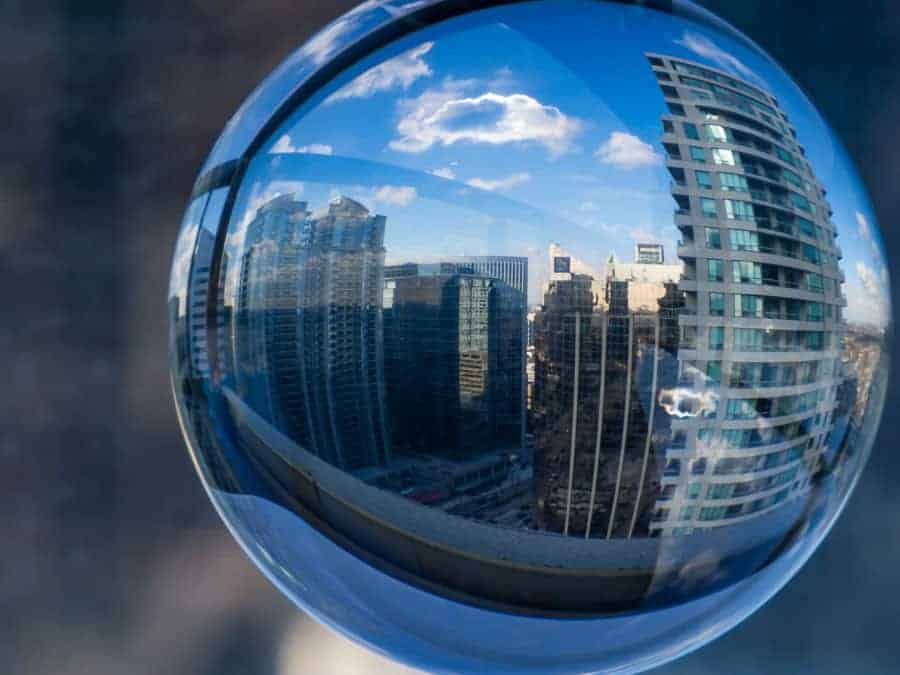
Using a glass ball is a creative way of framing your subject. The glass will reflect, or more accurately refract, the subject or scene that you position behind it. The image you see in the ball will be upside down, and you will also see a large amount of the scene behind the ball. It will look much like what you would typically see from a fish-eye lens.
A good technique would be to zoom in on the glass ball, so that the ball fills as much of your frame as possible. This will help blur out the background, giving you a shallow depth of field with the glass ball being the main focus of your photo. You can also get some good compression of the scene with a longer focal length lens. If you desire, you can rotate your photo by 180 degrees so that the scene in the ball is not upside down. Leaving the scene upside down can add a different creative feel, in particular if you can also see some of the blurred scene in the background.
2. Polar Panorama
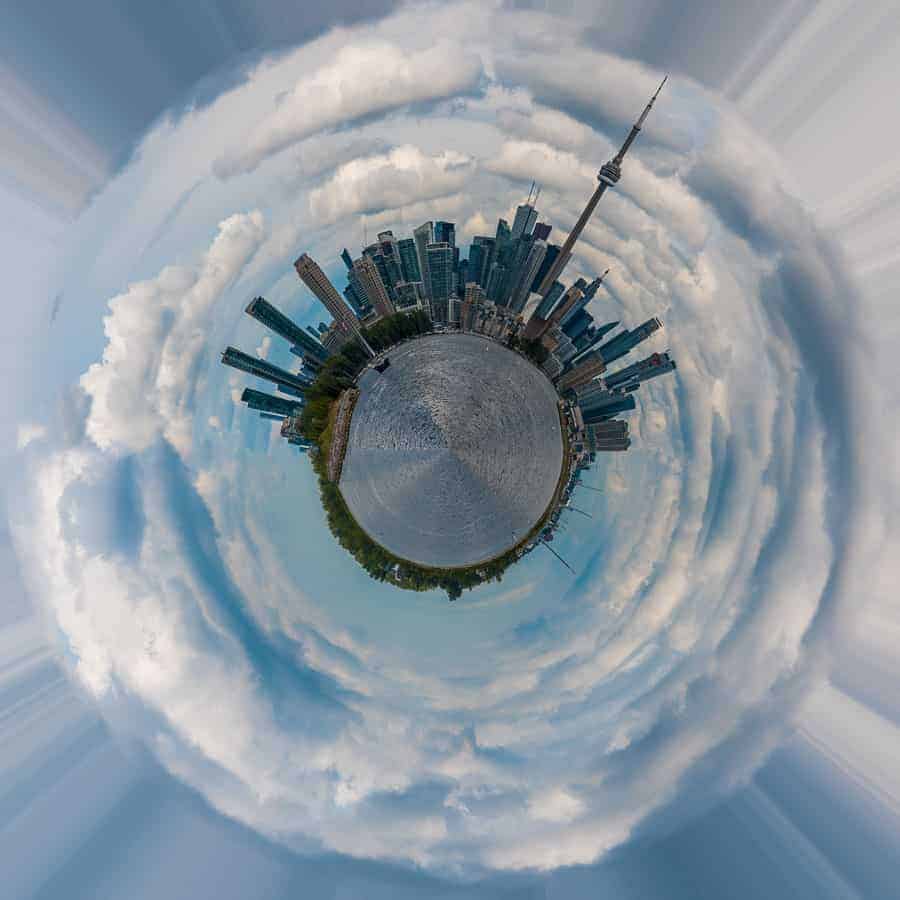
Have you seen those images that look like a small planet and wondered how to do it? Here’s how! This type of image is known as a polar panorama. To create one, you need a panoramic image, which could be a landscape, a skyline or something else. Some will say that the panoramic image you’re using should be 360 degrees, but it doesn’t have to be. The longer the panoramic image is though, the better it will work.
Once you have your panoramic image, you will need to open it in Photoshop and reformat the image (not crop!) into a square image. To do this, go to Image > Image Size. In the window that opens, click the chain icon to de-link the width and height dimensions, change the values so that they are the same, and click OK. What I do is change the longer of the two dimension numbers to match the smaller one.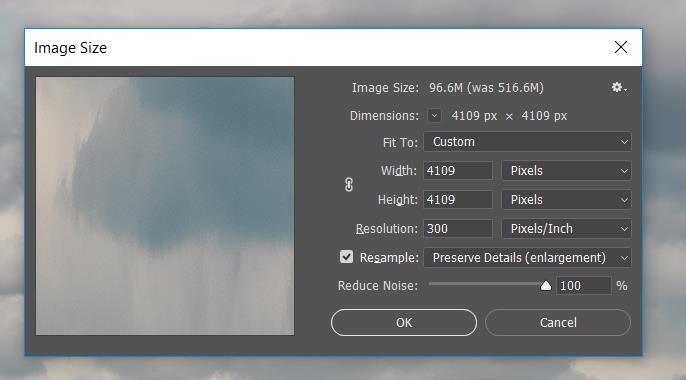
You will then need to flip the square image upside down by going to: Image > Image Rotation > 180°. Lastly, you will need to apply the polar coordinates filter to the upside down image. Go to: Filter > Distort > Polar Coordinates. In the window that opens, ensure the Rectangular to Polar option is selected, and click OK. 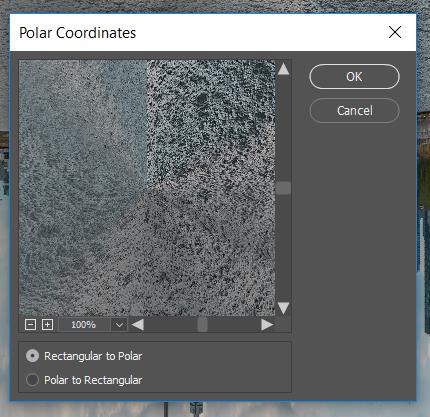
And voila! You have your small planet. If you have a “hard seam” from where the two sides of the panorama come together, you can use the spot healing brush to clean up the seam so that it’s not visible.
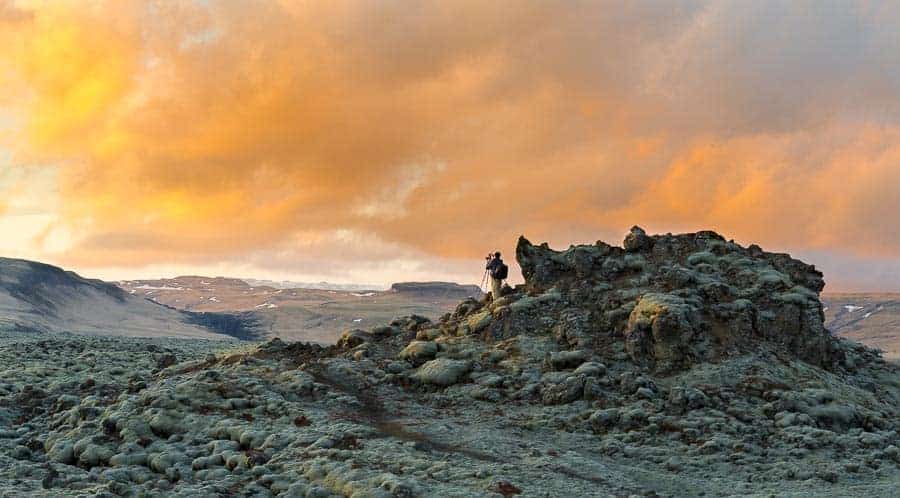
3. Play with Scale
Creating a sense of scale is a great way to add more interest to your image. Often, the scale of things in your scenes may not be obvious. By having an object of a contrasting size in your image, you can play off the differing sizes in your scene to establish that size relationship. It will give you a better sense of size of the subject and scene in your photo.
I captured this image in Iceland while photographing some lava fields. As vast and scenic as the area is, it’s difficult to get a sense of how large some of the lava rocks were without a known reference point. To get that sense of scale, I took this shot with fellow photographer and Improve Photography writer Frank Gallagher near some of the lava rocks to provide that scale comparison. Having Frank there gives that sense of how large the lava rocks are, adding that majestic feel to the scene.
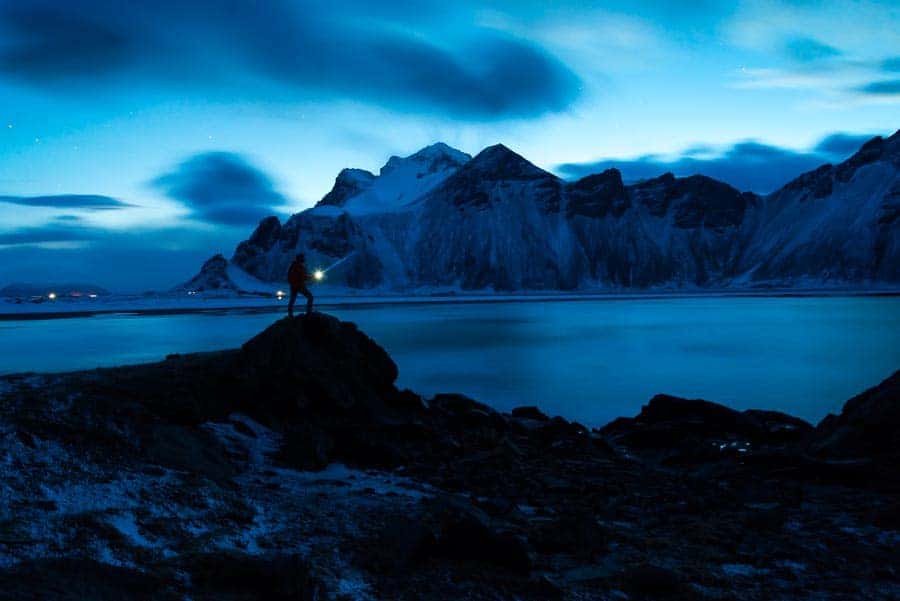
4. Add a Person to the Scene
Another way of adding more interest in your image, especially in a landscape photograph, is having a person in your scene. Not only can a person add to the sense of scale as described before, a person in your scene will give the viewer something of interest to focus on in what otherwise may be just an ordinary scene. While doing some night photography at Vestrahorn Mountain in Iceland, one of the photographers in our group posed for us with a flashlight on one of the rocks in the foreground. As scenic as this area was, having the person in the foreground adds a whole different dimension to the image. Without him there, is would be just an ordinary scene.
If you’re out shooting on your own, remember that you can always pose yourself in your scene. You’ll need a tripod, and you can use the self-timer in your camera or a remote shutter release, to give enough time for you to get into the scene and take your image.
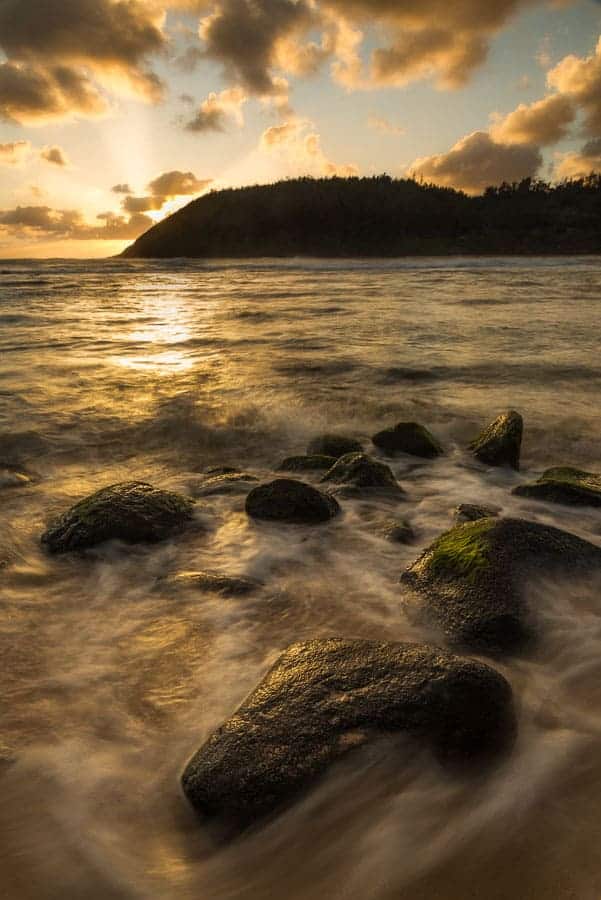
5. Long Exposure
If you want to portray a sense of movement in your images, long exposure is a good way to get that effect. All you’ll need is a tripod, and perhaps a remote or cable shutter release. The blur effect of moving objects against the sharp still objects in your scene is what will provide that sense of movement. In the images below, I’ve done long exposure to get that blur in the water and clouds.
Water
At this beach in Kauai, I captured the moving water as it washed up against the rocks on the shoreline, setting my shutter speed to 1/2 second. The speed was slow enough to soften the moving water while still keeping a bit of detail in the water. The slower you set the shutter speed, the smoother and silkier the water would become. Depending on the look you’re going for, you’d aim for 1/4 or 1/8 seconds to as long as 10-30 seconds. How fast the water is moving would be another factor. If your light is too bright, you may also need a neutral density filter on your lens to get shutter speeds that low.
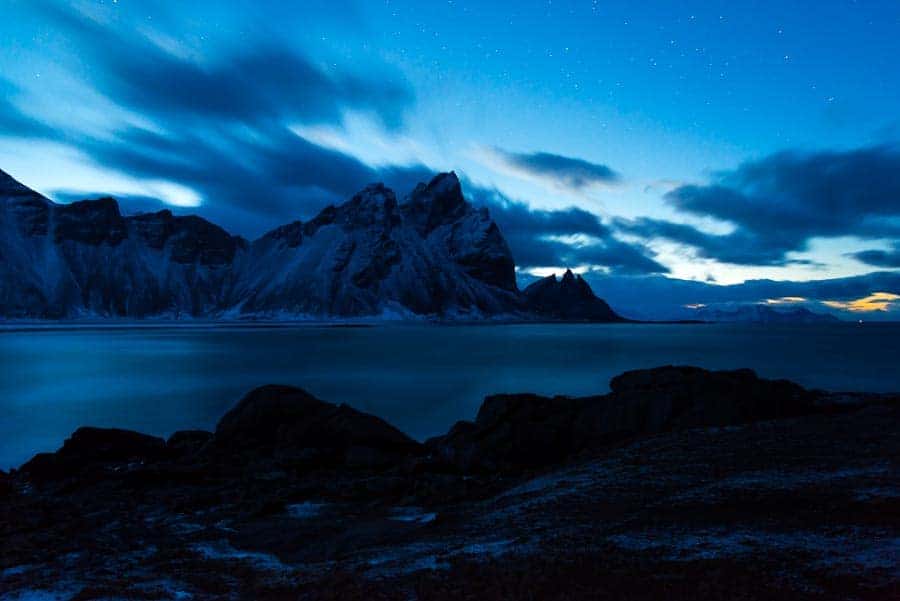
Clouds
I captured this image at Vestrahorn Mountain in Iceland while doing some night photography. To capture the clouds moving across the sky, I set my shutter speed to 30 seconds. It was windy so having a sturdy tripod will help to avoid movement in the rest of the scene. The clouds here were not moving too quickly, despite the wind. If the clouds are moving faster, you won’t need as long a shutter speed to capture the cloud movement and get this dreamy look in your images.
As you would with water, you can play around with the shutter speed to get the look in the clouds your going for. You can go for shutter speeds of seconds to minutes, depending on whether you want slight blur in the clouds or if you want them to totally wash out in your scene. If you want to get this effect during the day, you’ll need a neutral density filter on your lens to cut down the light.
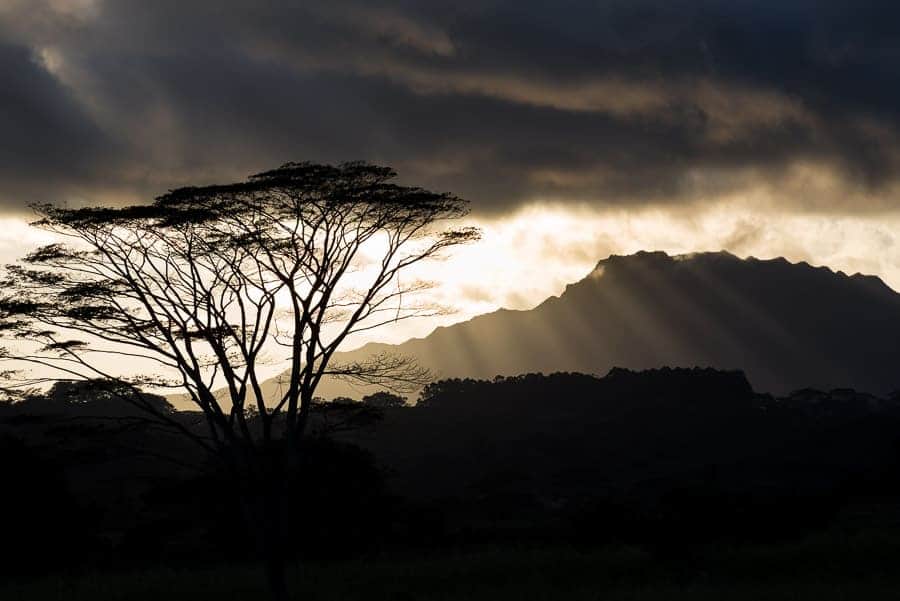
6. Silhouettes
If you want to create mystery and drama in your photos, then silhouettes are a good way to add that intrigue. It's as easy as positioning the subject you want silhouetted in front of your source of light, which is what I did in this photo in Kauai while waiting for sunset. As the sun was setting, the light broke through the clouds creating these sun rays. Instead of just focusing on the sun rays in my scene, I zoomed out to ensure the silhouetted trees were in the foreground to add more interest. I reduced the exposure and the shadows to get the silhouette, which also helped avoid clipping the sky. The contrast in the clouds and the trees add to the drama in this photo.
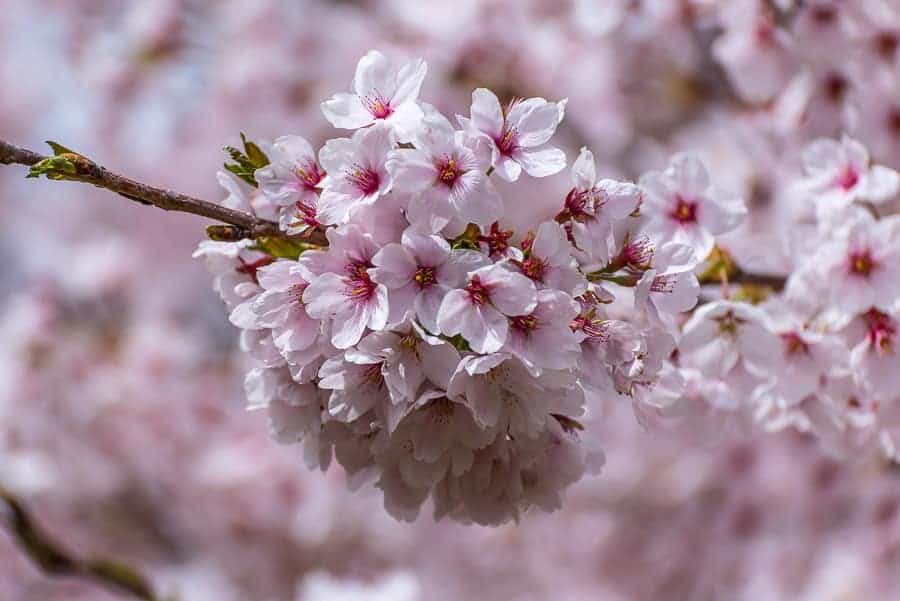
7. Shallow Depth of Field
To get an intimate feel with your subject, using shallow depth of field is a great way to get the main focus on to the object that you want to stand out in your scene. When the background of your scene is blurred, your eye will be drawn to what is in sharp focus in your image. I took this image in High Park in Toronto, when the cherry blossom trees were in full bloom. By zooming in on this small cluster of cherry blossoms and using a shallow depth of field, I was able to get the main focus on the branch without it getting lost among all the other branches and blossoms in the tree.
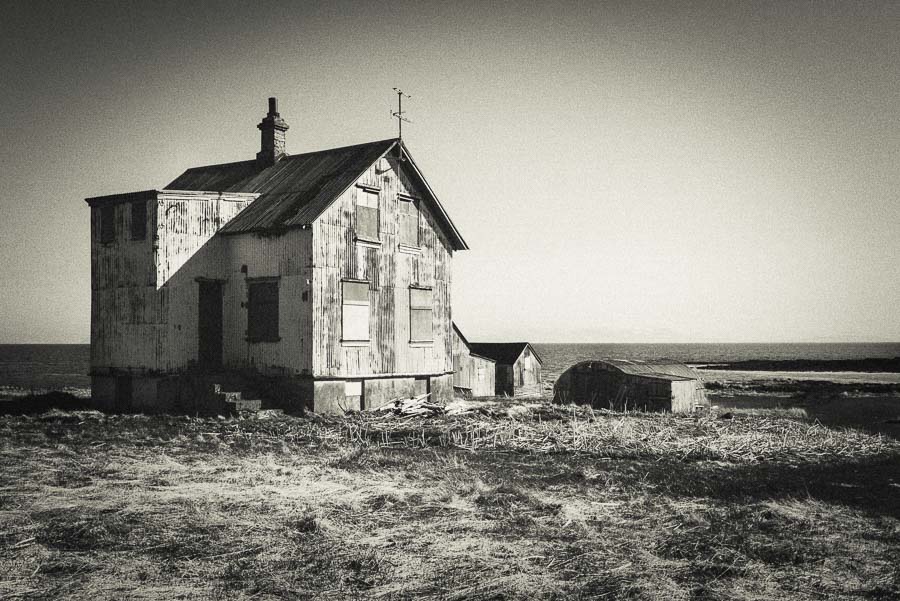
8. Grain
Usually, the norm for photographers is to avoid or remove noise or grain from your photos. Keeping grain in your photos however, can add some mood or a sense of age. And if there's no grain in your photo, you can add it in afterwards. It’s particularly effective in black and white images.
You can get grain in your photos in a couple of ways. Boosting your camera’s ISO settings right up towards your camera’s maximum is one way. As you probably already know, the higher your ISO, the more grain you’ll get in your image. You can take advantage of this to play around with the ISO settings to see what level of grain works best for your photo.
Another way is to add the grain to your photo during post processing. In Photoshop, you can add grain to your photo by going to: Filter > Noise > Add Noise. In the window that opens, make sure the Monochromatic tickbox is selected otherwise, you'll get unwanted colour noise in your photo. You can choose either Uniform or Gaussian, and adjust the percentage amount to get a grain pattern you like. I find that the Gaussian option gives more realistic looking grain than the Uniform option.
9. Look Around!
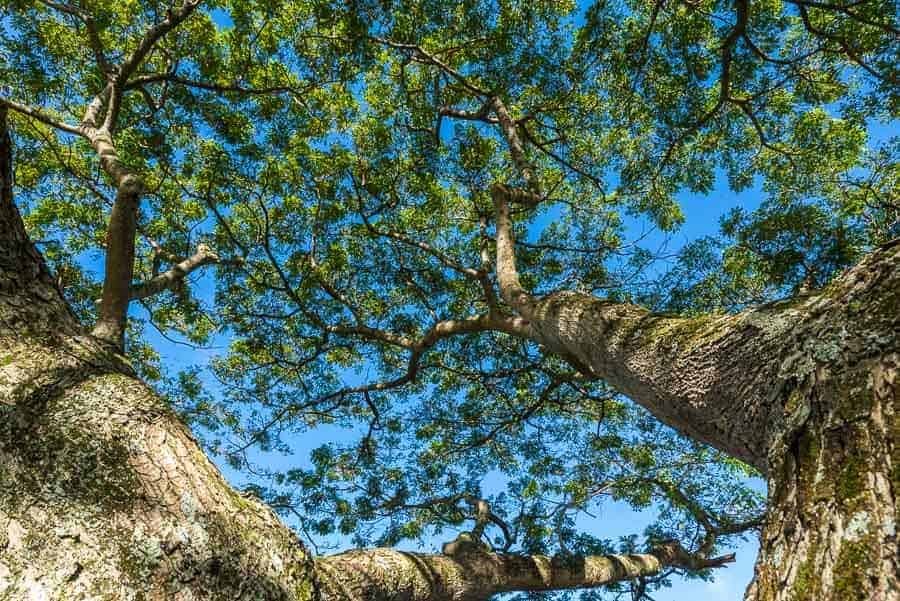
We always have a tendency to extend our tripods, aim our cameras forward, and then wait for the moment that we want to capture. What about everywhere else that you’re not aiming your camera at? And what would it look like if the camera wasn’t set up at eye level? While you're waiting for that moment, take a look around and see what else there may be. Also, play around by aiming your camera at different angles and perspectives. You may find a much more interesting scene than what’s in front of you. And you'd probably kick yourself if you missed getting it.
After stopping on the side of the road in Kauai to capture this tree, I went underneath it and shot upwards. It gives this interesting perspective of the tree trunk reaching for the sky, and the sprawl of all the branches radiating outwards to the edge of the frame. It's a much more interesting composition, compared to just standing back several hundred feet and composing the tree as a subject against a scenic background…the kind of composition you’ve seen a hundred times. When shooting from a low angle aiming upwards, the object looks big and mighty in your photo.
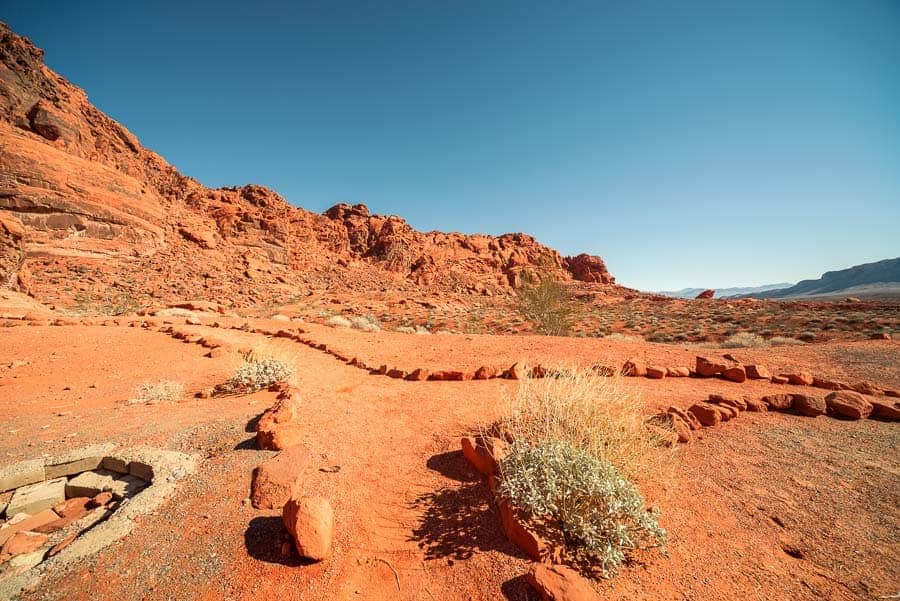
I got down low to focus on this footpath in Valley of Fire State Park, and accentuate the leading lines that the rocks on either side of the footpath were creating. I didn’t want the hills in the background to be too dominant. When shooting down low, it allows you to get more detail in the foreground, making it look larger and providing depth in your photo.
10. Abstracts
Abstracts can give you some of the most creative photographs. There are a wide range of elements that you can take advantage of to make abstract images: textures, lines, shapes, patterns, colours. This technique gives you a way of capturing just a small sense of the subject, rather than the entire subject. When you find a scene that has any of these elements that would make an interesting abstract image, move in close and fill the frame with it.
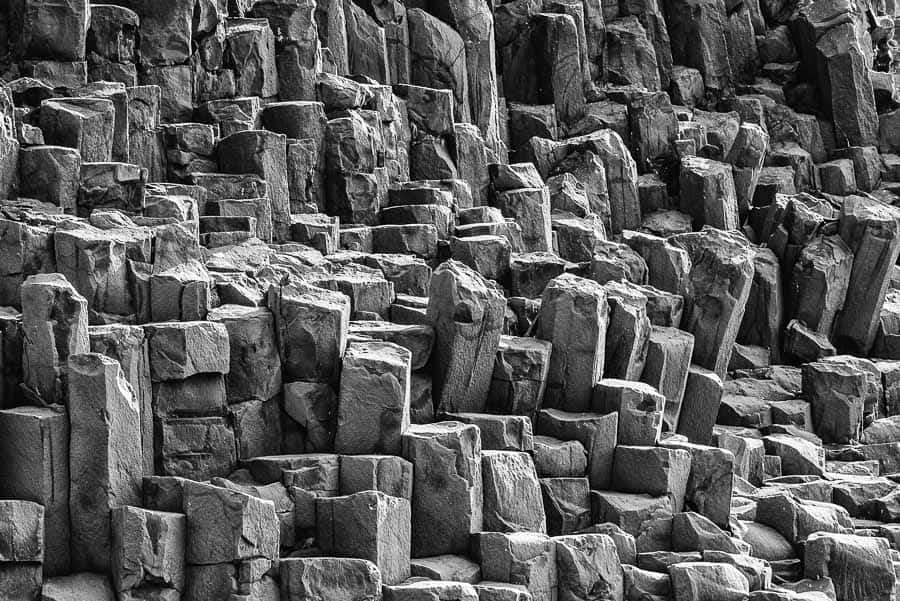
I captured this image at Reynisfjara Beach in southern Iceland. Famous for its black sand beach and iconic sea stacks, I looked around the area to try and capture something different as well. I found it in the rock formations on the cliffs along the beach, so I got up close and focused on the interesting patterns that these rock columns formed.
This is just a short list of ways to add creativity to your photos. Have you tried any of these techniques before? Do you have any other techniques that you’ve tried? Let us hear about your experiences in the comments below.
Very nice, and thank you. I shoot timelapses and have/will incorporate several of these ideas.
That sounds great Nick, thanks for reading!
Great food for thought. Working part time as an industrial photographer I have to focus on client needs and creativity definitely suffers. I found this inspiring – time to try new stuff.
Really like to read this awesome article.