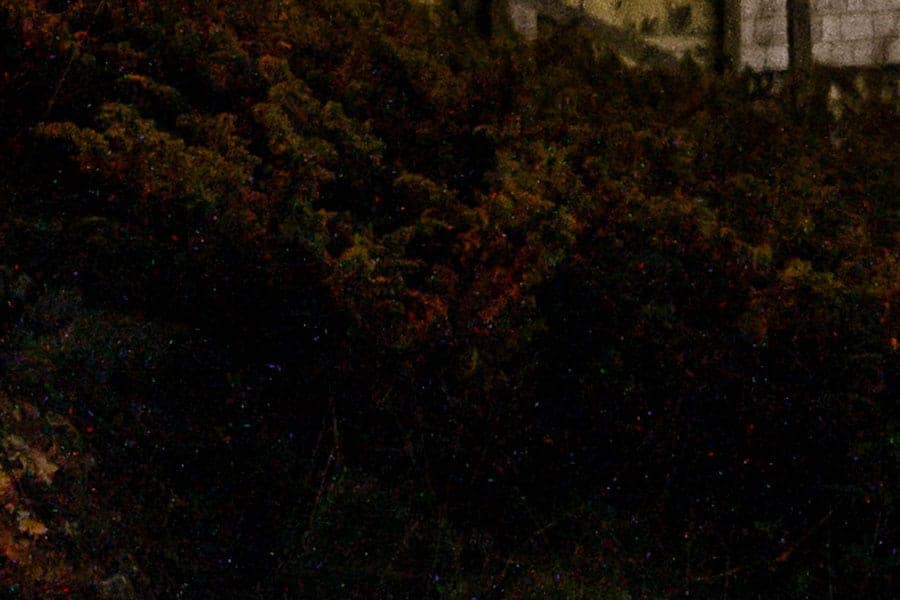
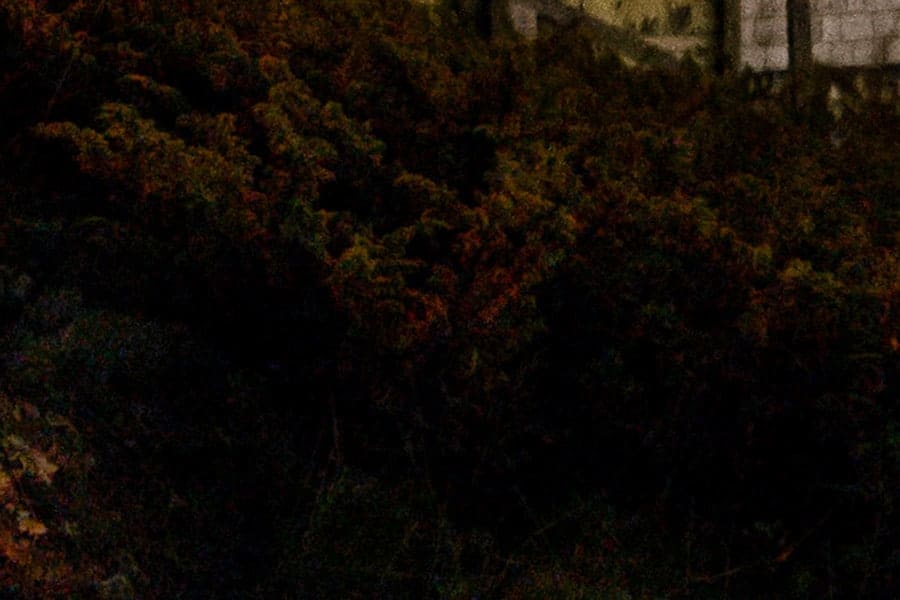
As a night sky photographer, I spend much of my time pushing my camera sensor to its limits by shooting at very high ISO settings and/or capturing exposures ranging anywhere from a few seconds to ten minutes or more. With these long exposures, especially when shot at high ISO settings, the potential exists for the camera’s sensor to heat up, which can result in troublesome noise patterns in an image. Given that these pixels are a result of heat, they are often referred to as “hot pixels,” and often appear as odd colored specks in your image. If they are bad enough, these hot pixels can give the impression that you sprinkled confetti on your photo, which, outside of perhaps a parade, is probably not the look that most of us are going for.

Example of colored hot pixels resulting from sensor heating caused by capturing a long exposure. Photo cropped to show noise.
What is Long Exposure Noise Reduction?
Without expensive modifications to your camera that provide mechanical cooling, sensor heating and hot pixels, unfortunately, are a type of noise that is almost unavoidable when capturing long exposures. As a way to try to combat these noise patterns, many modern digital cameras (both DSLR and mirrorless) come with a feature called “long exposure noise reduction,” which attempts to remove hot pixels from an image file in-camera.
In order to understand how long exposure noise reduction works, you have to understand the ideas of dark frame and dark frame subtraction. The idea behind a dark frame is to provide a reference file that removes all of the signal from an image (the “signal” being all of the pixels you intended to capture when taking a photo), thereby leaving only the noisy hot pixels. For example, capturing a long exposure with your lens cap on can be considered to be a dark frame since the resulting file will be completely black other than the noisy pixels which appear. Dark frame subtraction occurs when that reference file, the dark frame, is used to subtract the hot pixels from the image file that includes both the signal and noise, which is the photo you intended to capture, plus the resulting noise. Since hot pixels are often similar in files captured at similar times, a few dark frames can be sufficient in mapping the hot pixels that are visible in your original image file.
In-camera long exposure noise reduction is an automated process that captures a dark frame immediately after your initial exposure. During this process, if you turn on long exposure noise reduction and set your camera to capture a 30 second exposure, for example, the camera will capture a 30 second dark frame immediately after capturing your intended exposure. At the end of this process, the camera will use that dark frame to perform a dark frame subtraction and, if all goes well, remove the offending hot pixels from your image, leaving you with a clean shot will relatively few hot pixels compared to what you would have if long exposure noise reduction was turned off.
The Downsides to Long Exposure Noise Reduction
While long exposure noise reduction may sound great in theory, there are some downsides and complications that you should consider before deciding to make it a regular part of your long exposure workflow. First, with many cameras, you are unable to take photos while your camera is capturing its dark frame during the long exposure noise reduction process. This means you are literally cutting the time you have available to capture photos in half. If you are taking a few 5 second exposures, this may not be a big deal to you. However, when I am out shooting late at night on top of a mountain, I may have a limited window to capture the composition I am hoping for before the light changes, clouds move into the frame, or any other number of factors prevent me from being able to get the shot I want. If one of the shots I need to capture is something like a 10-minute foreground exposure (which is something I do regularly), enabling long exposure noise reduction instantly turns that process into a 20-minute ordeal.
In addition to the time commitment associated with using long exposure noise reduction, there’s also another downside: it might not even help. And if that isn’t bad enough, in some cases, using long exposure noise reduction has the potential to make the noise in your photo worse. Yes, you read that right. Worse.
There are varying opinions and information I have come across regarding whether long exposure noise reduction has any effect at all on RAW files. Some people say they find it to have an effect on their RAW files, while other information indicates that it only has an effect on RAW files if you use the proprietary editing software that comes with your camera (i.e. Digital Photo Professional for Canon cameras). Since programs like Lightroom strip some types of metadata upon import, the RAW files may not show the effects of long exposure noise reduction.
I personally have used long exposure noise reduction on three different cameras: a Canon Rebel XS, a Canon 6D, and a Nikon D750, and have not seen the beneficial effects of long exposure noise reduction when conducted in-camera. In addition, the manual for the Canon 6D actually states that when shooting at ISO 1600 or higher, using long exposure noise reduction may make images “look grainier,” which is sort of similar to me saying that if you invite me over I’ll clean your house, but if it’s after 10 a.m. I’m just going to dump a bag of garbage on your floor and leave without doing any cleaning. I think the take-home message here is that you shouldn’t hire me to clean your house.

Manual Dark Frame Subtraction
Luckily, for those looking for a reliable method of long exposure noise reduction, you can do so manually, and the process is fairly simple. You will still need to capture a dark frame in-camera after taking your long exposure. However, instead of having the camera capture one after each exposure you shoot, you can capture one dark frame at the end of each batch of long exposure you shoot with the same settings. For example, if you take ten exposures at 18mm, f/3.5, and ISO 1600 for 1 minute each, you would only need to capture one dark frame after shooting those ten exposures. You could do so by placing the lens cap back on the front of your lens (being careful not to change the focal length or focusing), and capturing one more exposure at 18mm, f/3.5, and ISO 1600 for 1 minute each. Afterwards, you can place your dark frame file as a layer above your image file layer and set the blend mode of the dark frame layer to “Subtract.” This will remove the hot pixels which show up in each exposure.
Another Photoshop Fix for Hot Pixels
In case you don’t want to take the time to capture dark frames while in the field shooting, I use a simple method in Photoshop to remove hot pixels from my long exposure images, no dark frames needed. In order to do so, follow the three steps below:
1.) Duplicate your long exposure layer in Photoshop;
2.) With the new layer selected, click Filter>Noise>Median and, when prompted by the dialogue box, select a radius somewhere in the 3 to 5 range;
3.) Set the blending mode of the duplicated layer to Pin Light.
Switching to the Pin Light blend mode will effectively remove the hot pixels from your image. However, be sure to inspect your image to confirm that you didn’t also remove pixels you wanted to keep. If your image includes a starry sky, there is a good chance that some of your stars were also removed, or at least diminished. If this happens, add a layer mask to the Pin Light layer and paint black over the mask on the portions of the image you want to be unaffected by the hot pixel removal. This process is regularly a part of my Milky Way photography workflow, and it has significantly reduced the time it takes me to clean up the noise in my shots.


Final Thoughts
For those taking long exposures, in-camera or manual long exposure noise reduction may be something to consider. In order to be able to decide which method is right for you, be sure to experiment with you camera to see if the in-camera version has any effect on your files. If it doesn't, or even if the time involved to use it is just too much for you, a manual dark frame subtraction or a little Photoshop noise reduction magic may be more up your alley. Either way, start experimenting with those long exposures if you haven't already and add a new trick to your photography toolkit.

I’ve ran into this issue a lot with the GH4. Is there a way to do this in Lightroom?
I have seen the effect of long exposure noise reduction in photography.
Thank you so much for the making this article for the use and now we can use this site by the help of this site in the system
It was a wonderful chance to visit this kind of site and I am happy to know. Thank you so much for giving us a chance to have this opportunity!