
Most families these these days want their portraits outside, a pristinely sculpted landscape in the background, perfect golden-hour sun dipping below the horizon. But perfect conditions don’t always exist. Sometimes it’s raining. Sometimes it’s winter. And sometimes the family has a newborn. That means we need to go inside. In this article, you’ll read about 11 ways to make your indoor session a desirable reality.
1. Lens consideration
When you’re working inside, you’ll most likely be working in a tight space. On a crop sensor camera, you won’t want a focal length longer than 50mm. Somewhere between 35mm and 50mm should give you the flexibility as well as the compression you’ll want in family photos. A lens wider than 35mm might start to distort faces and edges too much for most families’ tastes. On a full frame sensor, somewhere between 50mm and 85mm should do the job. A 24mm-70mm zoom lens would be perfect for either sensor size. Just consider, though, that a decent prime lens will allow you to open your aperture even wider, which will bring in that much more light, something that’s often hard to come by indoors.

2. The Usual Suspects–Wide Aperture, Higher ISO
You’ve heard it before, and you’ll hear it again. In a low-light situation, the first thing you’ll want to do is either open your aperture or raise your ISO sensitivity. The aperture is represented as an f-number, which tells you how big of an opening your lens will give you in order to allow light to enter the lens. The lower the f-number, the wider the aperture, which means more light will enter the lens.
You should probably commit this sequence to memory: f/1.4, f/2, f/2.8, f/4, f/5.6, f/8. Each time you go down to a lower number on that scale, you let twice as much light in the lens. In other words, if you go from f/8 to f/5.6, an additional “stop” of light hits the sensor, which means you have doubled the amount of light hitting the sensor. Where this is important to know is when you are using the the light meter on the camera. If the little pointer is telling you that you are underexposed by two-stops with an aperture of f/8, then you can open your aperture to f/4 to move the pointer to “perfect” exposure, at least according to the camera’s light meter. (One quick trick for memorizing: every other f-number is doubled. Take a look: f/2, f/4, f/8; or f/1.4, f/2.8, f/5.6.) (Another quick trick: camera’s tend to allow you to adjust aperture in thirds, so every three clicks of the aperture scroll wheel equates to one f-stop.)
I mention the above sequence from f/1.4 to f/8 because that is probably the range you’ll want to stick to indoors. In fact, you may actually want to stay between f/2 and f/4 if you’re not using a flash. Be careful, though–if you have a group larger than three or four people, then you’ll really need to have their faces on the same plane. Otherwise, the wide aperture may give you depth-of-field issues, resulting in some faces being out of focus.
Similar to aperture, increasing your ISO sensitivity will allow more light to be captured by the camera sensor. An ISO of 200 will allow twice as much light to be captured as an ISO of 100. ISO 800 allows twice as much light as ISO 400, and so on. (What’s confusing at first is that small aperture numbers mean more light, but bigger ISO numbers mean more light.) But be careful, the higher your ISO, the more digital noise you will introduce to your photo. And the dynamic range of the sensor decreases significantly at higher ISO numbers, which means the darkest shadows and lightest highlights will not have as much richness and detail. Test your camera and figure out the highest comfortable ISO you can get without losing too much detail and dynamic range to noise.
I don’t mention shutter speed as a consideration because you’re going to want to stay somewhere between 1/200 and 1/100. You won’t really be able to go much faster (like 1/1000) because the image will be underexposed, nor should you go much slower (like 1/25) because you’ll introduce camera shake and blur (unless you have a tripod, of course).
To summarize the technical portion of my advice here: open your aperture as much as you comfortably can, and raise your ISO as much as you comfortably can. Somewhere between f/2 and f/4 is a good place to start, and ISO 400 to ISO 1000 should work, too.
3. Find a Big Window

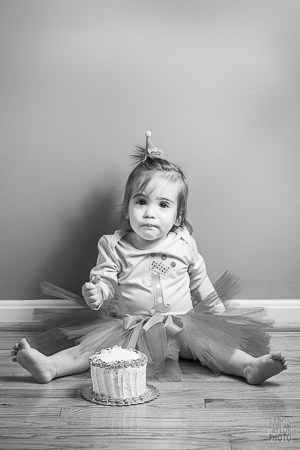
If the home you are in has big windows, use them. A huge window is your best friend when photographing indoors. Raise the blinds, open the curtains, and let in the sun. Even on a cloudy, rainy day, a huge window can become a gigantic soft light source. If you’re photographing young children, especially toddlers, have them cruise the window sill and look out at the world. The light will be amazingly soft and huge on their chubby little faces. If you need to do a group shot, put them on a wall adjacent to the big window. That way, the light will be directional instead of flat, which will give the family shape and shadow.
4. Use a Reflector
To supplement the light of a big window, put a reflector on the shadow side of the subject. Enough light will bounce back to the subject that the shadow won’t be too dark. Instead, the reflector will give the subject a nice rim of light on the jaw or top of the head, enough to brighten the look and give great definition to the subject’s features. You can also use a reflector to direct the light more intentionally, especially if your subject wants to be farther from the window. You’d be surprised how much a simple reflector can subtly lighten the shadows on a subject. Just be careful–don’t get rid of all of your shadows. Shadows give dimension. You’ll always want to find the right balance between lighting your subject well while keeping enough shadow to maintain shape and dimension.
5. Bounce Your Flash

One great aspect of having a speedlight is its rotating head. Sure, you can just point the flash straight up and have a relatively well-lit room, but the rotating head will allow you to create direction with your light, which will allow you to much more deliberately shape the light on your subject. Think about an easy standard lighting set-up for portraits: the light will come from 45-degrees to the right or left and 45-degrees above the subject’s head. That set-up gives you a great balance of light and shadow on the subject’s face. You can do that with a speedlight on your camera, too. You just need to aim the flash behind you and twist the flash to the right or left by 45-degrees and up by 45-degrees. The light will bounce back at an angle similar to that standard set-up. Play around with how much to the side and how vertical or horizontal you point the flash. You’d be surprised by what you can accomplish by bouncing your speedlight off of a nearby wall or ceiling. (Just don’t use the built-in flash on your camera. It’s tiny, and it creates flat, harsh light. Go get one of these and start playing.)
You can also use a bounce flash to supplement the ambient light in the room. You don’t have to completely cancel out the natural light, especially if you are still using a huge window. In fact, one thing I like to do is bounce light off of the window if things are a little too dim. You can also bounce your flash in the opposite direction of the window, which would serve the same purpose as the reflector. Just make sure that you speedlight power is low. You won’t want to overpower the ambient light and the shadows created by the ambient light.
One huge benefit to using a speedlight to bounce your flash instead of only using the ambient light is that you don’t have to have a wide open aperture. By stopping down your aperture from f/1.4 to f/4, your photo will get a big increase in sharpness. Not only will your subject be sharper due to a broader depth-of-field, but your subject will also be sharper because lenses tend to perform better the closer they get to f/8.
6. Consider an Umbrella and Stand or Monopod
You can get slightly more complicated by using light stands and light modifiers. For families with small children, I don’t go this route–they tend to move around too much. I have used a speedlight attached to a monopod with an umbrella modifier, but you need an assistant to make this happen. The great benefit to the monopod set-up is that you can change direction easily if something isn’t working well.
I could go on and on about the possibilities you can have when you introduce more and more lighting equipment. There are other posts and places on Improve Photography that can expand this section for you. Look here and here and here to start.

7. Find Blank Space
Homes can be cluttered and complicated. Seek out the places in the home that have less stuff. Hallways and basements tend to have blank walls. Clean bedrooms may also work. Find a blank space in the home and use it for more formal portraits. And if the space isn’t blank from your perspective, take a step or two in either direction. You might find just the right vantage point from which to snap a photo that focuses only on the person, not the cluttered background.
As you look through the viewfinder, pay close attention to everything around your subject. Does the person have a picture frame sticking out of her head? Is there a lamp on in a room in the background? A great photo can easily be ruined by a cluttered, complicated background. Do what you can to simplify things.
8. Make Blank Space
If you can’t find blank space, make some of your own. Don’t hesitate to ask the family to move furniture, take things off of the walls, detach baby gates, clear, clear, clear. The family will not remember how much furniture they had to move even a day later. In fact, moving furniture around is a good way to keep the session moving and to not make the client get too nervous about taking photos. Remember, good photos are what matters. Redecorate as much as you need to in order to get a clean, uncluttered portrait.
9. Turn Lights Off
Nothing will complicate your photo-processing more than multiple light color temperatures. Your client may think that they’re doing you a favor turning on all of the lights in the room. Turn them off! Use the big window or your bounce flash. Don’t use anything else. Each little lightbulb in the house might have its own color temperature. You don’t want to battle with warm light and cool light and orange light and green light and everything inbetween. Turn the lights off and use one light source.
10. Get low
Especially with little kids, do not hesitate to get on your stomach for that child’s-eye view of the world. Chances are, most of your photos are from an adult’s perspective. Get low and be a kid, too. You never know what new details you might capture. And getting low might allow the kid to open up that much more to the camera. When you’re not towering over them, kids tend to want to play a little more. Get low and see the world from a new perspective.
11. Move around the house
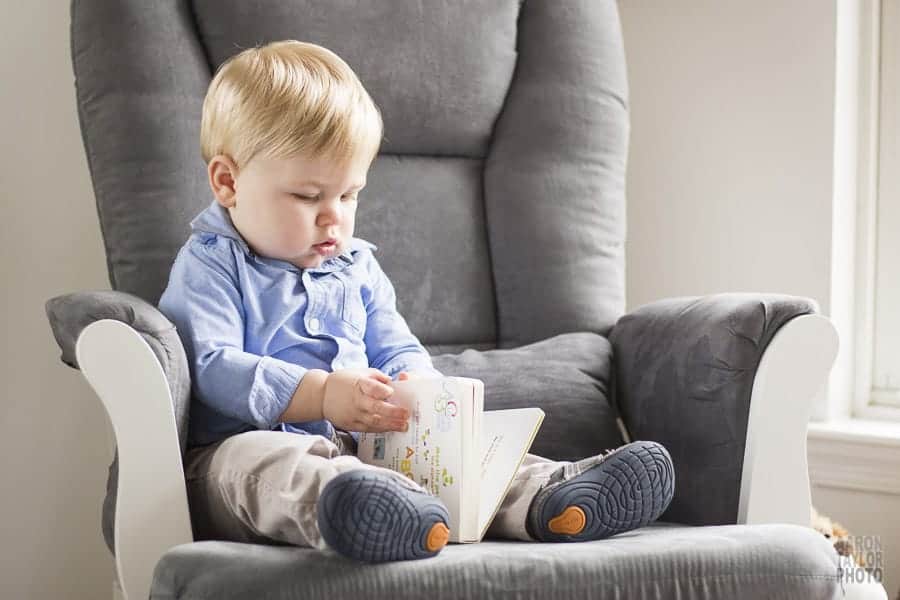
Don’t just stay in one room the entire time. Go room to room, exploring the intricacies and details this family has built together. You never know what meaningful piece of furniture or family heirloom you might encounter and want to photograph. Also consider photographing each person in “their” room. That doesn’t necessarily mean each person’s bedroom. Perhaps Mom is the fixer-upper and would look great posed in the garage near her tools. Perhaps Dad is a voracious reader and would look great sitting in “his” reading chair. Maybe the kids spend more time in the basement or a treehouse. Ask them to show you “their” spot in the house and use it for a portrait.
As I said at the beginning, most people these days, especially families, want their portrait sessions outside. I use my blog (from which many of the images here are taken) to show my clients the amazing images that can be accomplished inside. What’s great about the list I present here is that you can practice these skills at home at any time. Experiment with yourself and your family and friends. Use a reflector. Learn to bounce a flash. Photograph each person in “their” spot. Soon enough, you’ll be convincing all of your clients that an in-home studio session is exactly what they need.
THANK YOU!!!
Very informative. Thanks
Awesome tactics.. 🙂 Thanks.
Taking my sister’s newborn portraits this coming (rainy) weekend in DC – very timely! Thanks!
Very well written.
Thanks !!
I’m not a professional photographer but I do take lots of photos, this is great information as I will be taking some photos for someone indoors and the lighting is always tricky.
Thanks!