
Today is the very first camera duel, a weekly feature we're adding to ImprovePhotography.com. This week's theme is close-up photography.
We chose close-up photography for the first Improve Photography Duel because it's something I've always struggled with. I'm generally not a big fan of close-up or macro photography because they all look the same to me. Once you've seen a nice flower picture… they all look the same. It feels to me like macro photographers are so consumed with the magic of making something small look big that they forget to do anything creative with the composition or lighting.
So, we set out to try and do something different with close-up photography and get our creative juices pumping.
One quick not before we get going is that we called this the close-up duel instead of the macro duel because this isn't macro photography. Although many photographers use “macro” to mean any type of close-up photography, true “macro” means producing a 1:1 replication of the scene. That means that an ant in real life would be reproduced to be the size of an ant on the image sensor. True macro photography usually requires dedicated macro lenses, which most people don't own; therefore, we chose close-up photography which is doable with nearly any lens.
Close-Up Photography Duel
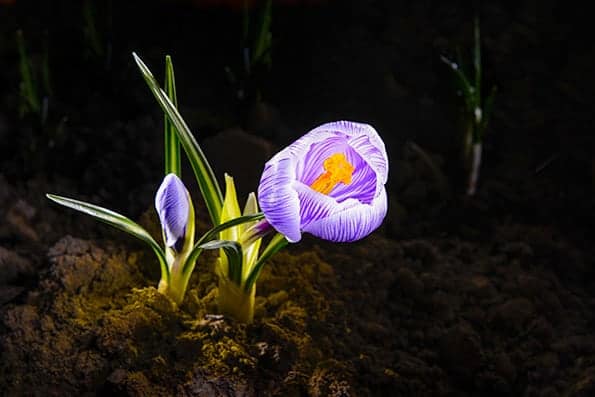
Jim Here: It's finally starting to feel like Spring in Idaho, and the flowers in my front garden started to pop up this week. I really liked the flowers, but I DEFINITELY didn't want just a traditional “Yeah! Look! I made the flower look bigger!” kind of photo. I wanted to add interesting lighting and a more dramatic mood to the photo. So, I decided to do light painting. I've never seen a close-up light painting, so I thought it would be fun to try.
Jim's Process: I first tried to take this picture in my front yard where the flowers were. I went out at 11PM to shoot the flowers so that I could fully control the lighting without fighting the sun (and yes, my neighbors probably think I'm a nutcase). However, when I went outside at night to do the shoot, the flowers had closed up for the night. So, the next morning I dug up the flower and brought it to the studio in a box (this is when Dustin started thinking I was a nutcase). Having the flower inside made the process much easier.
Under the flower, the ground turned a bit yellow due to the light reflecting off the yellow/green stem of the flower. I was going to get rid of that color cast in Photoshop, but in the end I decided that I kind of like the warm glow. I showed the photo to a few people to get some feedback, and they were 50/50 on whether or not to get rid of the color cast on the dirt.
The camera was on a tripod (obviously), and I used an inexpensive Stylus Streamlight flashlight to paint the light on the flower during the exposure. If you don't have a flashlight like that, you could use the LED flash on your smartphone and get the exact same result. I recorded a video of how I made this photo and I'll release it on our Youtube channel in the coming weeks.
Jim's Metadata:
Shutter speed: 30 seconds, Aperture: f/16, ISO 100.
Camera: Nikon D800, Lens: Nikkor 24-70mm f/2.8.
Lighting: Stylus Streamlight flashlight
Dustin Here: Allow me to introduce you to my photo for this week's Photo Duel!! I had such a blast doing macro photos for this duel that it was really hard to pick just one.
Dustin's Process: I love the vibrant colors in a peacock feather – but I knew it needed more than just a great angle. That's when I grabbed my medicine dropper and carefully placed water drops on it. The next challenge was to get the right amount of side lighting to bring out the texture in the feather, but enough light to expose everything the way I wanted it. With the use of my flashbender, I was able to wrap it around the lens and the feather to get the lighting that you see here.
Once I had the shot that I was in love with, I did basic edits in CameraRaw (such as: Exposure, contrast, saturation, etc) and then used Nik Software Color Efex Pro to give it a bit of a glow. That's it.
Dustin's Metadata:
Shutter speed: 1/160, Aperture: f/16, ISO 200
Camera: Canon 6D, Lens: Canon 24-105mm lens with Macro Extension Tubes
Lighting: YN-560 Speedlight with Flashbender light modifier

Let the Voting Begin!
Please note that you do NOT have to share this to your Facebook page or Twitter feed in order to vote. It just gives you that as an option after you've clicked your vote.
Comments are closed.