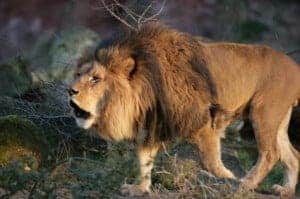
Many wildlife photographers turn up their noses to photographers who shoot at zoos, but most of us think it's fun. The following tips will help you to capture better photos when you go to the zoo or a wildlife refuge.
Zoo Photography Tip #1: Use a large aperture to shoot through fences. These first 4 tips are all ways to help you shoot through fences without making the fences noticeable. By using a large aperture, your lens is able to capture light wrapping around the fence and it will be practically unnoticeable in the photo.
Zoo Photography Tip #2: Shoot through shade. Chain link fences will show up in photos if they have sun reflecting off them. Find a shady portion of the fence and it will likely disappear if you use a large aperture and follow the next tip as well.
Zoo Photography Tip #3: Stand as close to the fence as possible. The closer you are to the fence, and the further the animal is away from a fence, the less the fence will be noticed.
Zoo Photography Tip #4: Don't let copyright get you! Zoos own the rights to the animals in their zoos, so you cannot use the photos commercially without getting them to sign a property release. If you use the photos improperly, you could get sued! Contact a photography attorney if you have questions. Don't trust a little law student like me… we don't know much 🙂
Zoo Photography Tip #5: Check for a schedule online before you go. Many zoos and wildlife refuges do shows where they bring the animals out for the public to see them more readily. Plan ahead and get a good seat for these shows and you'll get great shots.
Zoo Photography Tip#6: Be there EARLY! Some zoos even let photographers come in before the public for a small fee. Being there early will improve the lighting in your shots, and sometimes it will make the animals more lively. For more information on this topic, read this post on planning the light for wildlife photography.
Zoo Photography Tip #7: Be patient. A recent study of zoo visitors found that most people spend an average of 28 seconds at each cage. Photographers need to be patient and wait for the right moment when the animal does something interesting. Last week I was at the zoo and looked at the sleeping lions for only a brief moment before leaving. I walked 100 feet away from the cage and suddenly heard the lions ROARING and playing with each other. If only I had been more patient…
Zoo Photography Tip #8: Watch your backgrounds even more than the animals. If the background is cluttered, unnatural, or distracting, the animal photo just won't work. Learn to watch the backgrounds and you'll improve your photography dramatically.
Zoo Photography Tip #9: Find an interesting angle. Lie down on the ground and shoot up at the animals, or find a nice bench and shoot from a high angle. This will differentiate your photo from the day-to-day boring snapshots by the other visitors.
Zoo Photography Tip #10: Invest in a cheap monopod. Most zoos do not allow tripods, but most don't have any policies against using a monopod. This can stabilize your photos and increase the sharpness. I recommend this low-cost but extremely high quality monopod by Manfrotto.

Thanks for this post! I love going to the zoo we have in our city. I’ll keep these tips on my mind next time we go. 🙂
I’m not that much of a online reader to be honest but your sites really nice, keep it up! I’ll go ahead and bookmark your website to come back later. Many thanks|
It’s a good idea to shoot through shade. I love chain link fences around houses, but it’s not the best for shooting animals. However, I could put my lens through the links in the fence and get a cool picture. Thanks for the tips!
These are awesome tips! I love getting to the zoo to get some shots for my page! especially this time of year when it’s nice and cool out.