
Anyone who has used Photoshop for some time has heard the term Smart Object used from time to time. The phrase “Non Destructive Workflow” is often mentioned in thousands of videos, articles, books, etc. when the subject is of a post processing workflow with photographic images. One of the best and most powerful features within Photoshop is the ability to work with the king of all non destructive items – The Smart Object. This article will aim to explain what Smart Objects are and how they can be used. If you don't use them in your current workflow, this may totally change the way you process your images in post production.
What is a Smart Object?
A smart object, simply put, is a layer containing data from a RASTER or VECTOR image.
What is a Raster Image? A raster image is a dot matrix type of layer that is pixel based and these individual pixels make up the graphic that you then see on your computer display.
The image files you open into Photoshop from Lightroom (or from wherever) create a RASTER layer – with one exception we’ll discuss below. When raster layers are enlarged or decreased, they lose quality each time you make a change in the size or even the rotation of that layer when using the transform tools within Photoshop. Photoshop redraws the raster image when there is a transformation made and you'll lose image data with each confirmed transformation. This is a limitation with Rasterized layers inside Photoshop because once you transform these layers, there is no going back later. These transformations are very much destructive in nature.
A vector image is comprised of thin lines and curves known as paths. These are mathematically based images. Text is an example of a VECTOR based layer. Vectors can be shrunken in size and enlarged as many times as you please without losing a single bit of quality. They are often used for logos and other graphics that are non photographic.
With Smart Objects, you can make Rasterized layers behave like Vector layers in that you’re able to increase and decrease size, flip, rotate and resize again over and over without any degradation in quality – AND a whole lot more!! Additionally, both raster layers and vector layers can be combined into a single Smart Object AND Smart Objects can be placed inside of other smart objects and ON AND ON!!
Benefits of Using Smart Objects in Photoshop
The best part about Smart Objects is that they are completely non destructive. Think of a them as vaults. Once the image data is placed into a smart object, anything within that smart object cannot be altered in a destructive way. You cannot work directly on a Smart object the way you can with a RASTER or PIXEL based image. What you can do is apply filters and any of the adjustments that Photoshop allows and have the ability to go back and tweak or delete those adjustments in the future without losing any editing power.
Opening Lightroom Files Into Photoshop As Smart Objects
Above I had mentioned an exception when opening images into Photoshop from Lightroom that will NOT create a Rasterized layer in Photoshop. This option is the “Open as Smart Object In Photoshop” option from within Lightroom. This can be done by choosing from the Photo menu option “Edit In” and then go down to “Open as Smart Object In Photoshop” or simply right click on the image in the image area or thumbnail in filmstrip and choose this option there. If you shoot RAW and aren't opening files into Photoshop this way, you should be.

Lightroom is, in the develop module, a Raw converter and a very good one. You get tons of tools and because it is RAW data that we are working with, you are afforded great latitude with your edits. Color temperature – white balance control is an adjustment that can be done with a RAW editor without any image degradation at all to the file.
You should certainly make as many edits in LR as you can if working on a single image and then bring into Photoshop for final image tweaking when needed. But what about if you want to combine multiple images and then adjust them in Photoshop – NON destructively and in the RAW state? Change something you didn’t change in LR? Make minimal edits in LR before blending together in Photoshop? It can be done easily using smart objects.
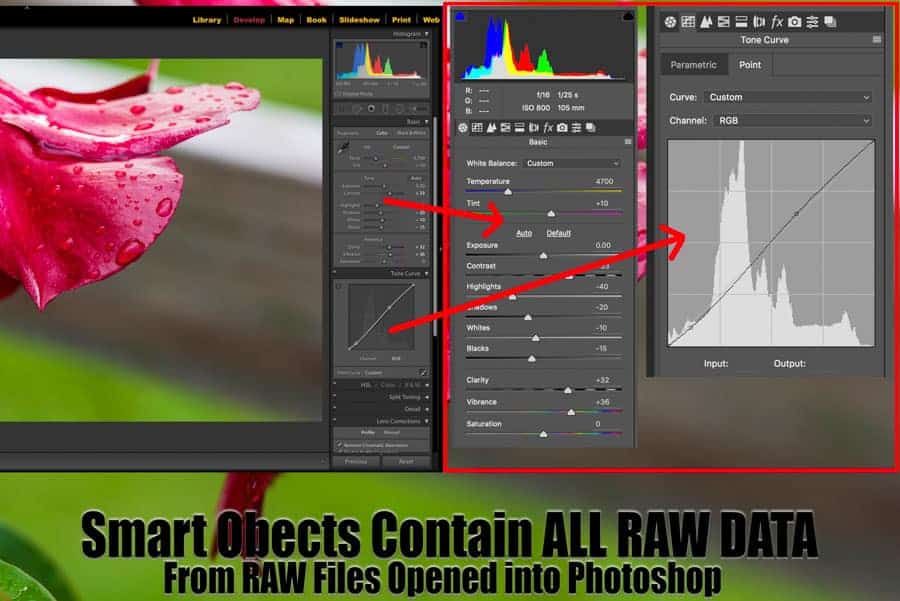
When you open a smart object into Photoshop, you'll have a single layer and you will see the smart object symbol on the lower right corner of the thumbnail. This let's you know you have a smart object. This Smart Object contains ALL the RAW data. If you double click on this smart object in the layers panel, you'll open Adobe Camera Raw and every single tweak that you made in LR will be shown in the ACR (Adobe Camera Raw) window – from exposure to tone curve and details panel – all of it. As a matter of fact, the tone curve in ACR is actually better than the one in LR because you can move multiple points at once by holding the shift key where with LR you can only move one at a time. This isn't merely opening your image with an ACR filter, this is the exact same thing as working with a RAW image in LR.
So if you've ever moved your image over into PS and thought “I wish I had done this first!” now you can with a smart object. There are many other reasons also why you should be using smart objects.
A Workflow Example
Let’s suppose you were out shooting and you shot a scene and exposed to keep the sky without blowing out the highlights and this meant a foreground that was underexposed but useable with an exposure boost in post when using many of the great sensors today. This is where using Smart Objects in layers can really help out. You can open an image as a SMART OBJECT and then, once in PS, you can right click on the layer and choose “New Smart Object Via Copy.” The reason why you want to do this is because this will give you a NEW Smart object that can be edited separately from the Original that you made this copy from. If you had simply hit CMD or CTRL & J, you’d just make a copy but when you go into ACR (Adobe Camera Raw) by double clicking that thumbnail, when you make adjustments to one layer via ACR, it applies it to the other. That isn’t something we want in this case so make sure to make a new layer via copy.
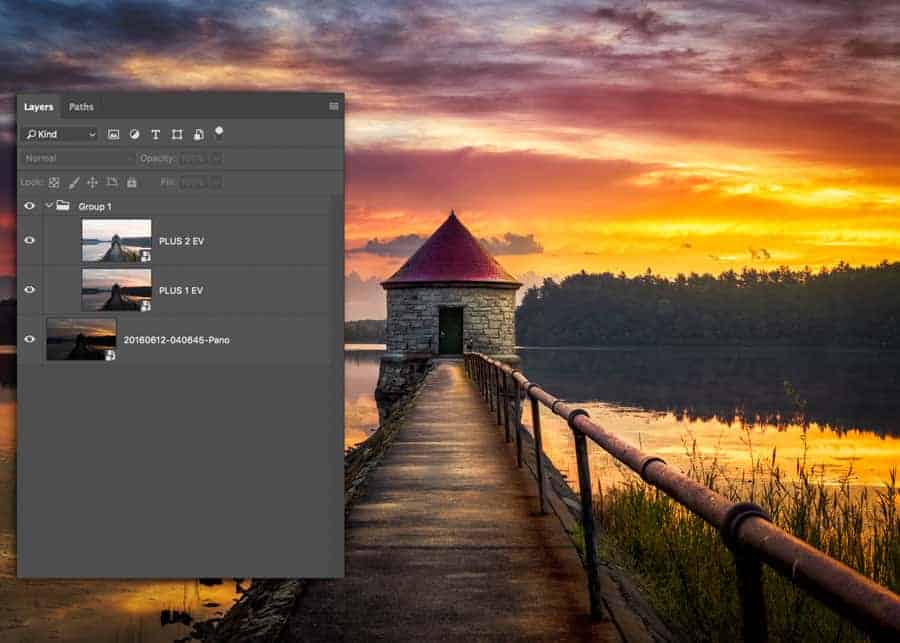
Ok, since you made a NEW Smart object via Copy, you can double click the New Smart Object and enter ACR and make adjustments. Here, in the example, you can boost the exposure to +2 EV and now you’ll have the foreground exposed. You could even make a +1 EV copy just to bridge the gap during exposure blending. This will give you two images (or three if wanted) of the same scene with different exposures to allow for great sky detail and foreground detail. Anyone knows that bracketing shots with movement can be a real pain. Doing this allows you to create a high dynamic range image from one exposure. Blending these exposures with Photoshop tools and masks such as Luminosity masks is the best way to go but those techniques are outside of the scope of this article.
Creating Smart Objects
In this next scenario, let’s assume we are creating a composite image with a main image and a few other smaller images to be placed in with the main image. To create a smart object, you have a few choices and with choices come differences. First, you can simply drag and drop any image from anywhere right into your Photoshop work area on an open image and it will become a Smart Object (Unless you change this default setting in Photoshop Preferences).
There will be an “X” through the image you are placing and this shows your are in FREE TRANSFORM mode and you can then resize the image as you see fit.
Alternately, you may use the “PLACE EMBEDDED” command from the FILE menu and then choose the file you wish to use and the same rules apply. It is EXACTLY the same as if you dragged and dropped the image on top of the image in the PS work area. The image will be placed in the work area of the current file you have open with the big “X” through it signifying Free Transform Mode.
The limiting issue when using this method is that suppose you want to add layer adjustments to the smart object. Double clicking will open the smart object in its own tab as whatever file type it is – JPEG for example. Now if you add a curves layer, for example, and then try to save back to the main composite, you will be prompted letting you know you must first flatten your layers for you to be able to make these changes back in the main image. With the below method, you can save multiple layer Smart Objects.
The Manual Placement – The better way
If you wish to place a Smart Object that you want to keep more editing power over, open the image into it’s own Photoshop document and then using the move tool, click and drag the image onto the file tab or window of the image you want this smart object to be in. Holding down the shift key while doing this will center the image on the one you're dragging to. Once here, you can resize it using free transform and move it to wherever you’d like.
The example I will use here is let’s suppose you wanted to make this Smart Object Black and white and add a curves adjustment layer or anything else to the smart object. To edit the smart object, double click the smart object thumbnail in the layers panel. This will open the file into it’s own tab as a PSB file. You can add layer adjustments and do whatever you would like to do here. Once you’re satisfied with the results, SAVE this by hitting CMD/CTR & S. You won’t be saving this to disk. You are saving these changes BACK in your main composition within the embedded smart object. The best thing here is at anytime, you can go back to this layer, double click and go right back to all the layers and adjustments you made and edit them again OR add to them!
Useful Reasons To Use Smart Objects
Now that we have discussed the best ways to create smart objects from other image files, I will now discuss some of the things that you can and may want to do with your image files.
Preserve Raster Image High Quality
When you are bringing a smart object into a composite, a major reason why they are so powerful is that you can resize the Smart Object up or down as many times as you would like without losing the high quality image data. This does not mean that you can create super huge sized images with perfect image detail. It means that you can resize the object over and over as long as the original pixel dimensions are not exceeded.
This also means rotating and vertical and horizontal flipping as well. Remember, with a non Smart Object, Photoshop is rewriting the RASTER pixel data each time Free Transform is used so any changes lead to degradation of quality.
Your Free Transform Data Is Saved
Another really nice benefit is the fact that our original image dimension dats is maintained within the smart object. For example, if you resized a S.O. (Smart Object from this point on) and then wanted to again use free transform, your percentage and degrees of rotation are shown in the FREE TRANSFORM boxes.
LINKED Smart Objects
Now this is a really useful feature for many reasons. One in particular may be your custom watermark for your images, for example.
Let’s say you have a separate file that you made in Photoshop that has your name and website for your watermark. It could be anything that you want to have shared among two or more images in your image library.
You can have this same smart object linked to ALL of these images that you have put it in. And better yet, if and when you make a change to this Watermark or Logo, the changes duplicate across all the images – even if they aren’t open files. How? The Smart Objected is LINKED to the file and the next time that image that contains this linked smart object is opened, there will be a little indicator notifying you to that the linked object has been altered. You can simply right click that layer and click “UPDATE MODIFIED CONTENT.”
This is very useful and you can have this done to many images in your Lightroom Library. Here is how it works when using Lightroom and Photoshop:
- Choose Two sample images to try this with in Lightroom.
- Open them into Photoshop using CMD/CTRL & E and choose Edit a Copy for this exercise. If they are RAW files, this won’t be an option. Just open them.
- On a MAC, with both LR and PS both open, drag a third image or a graphic such as a water mark you’ve made in Photoshop on one of the open files and place it where you’d like. It is KEY to press and hold OPTION after you begin dragging and then until you release the mouse button. This will assure you’re placing a LINKED smart object and not an embedded one.
- On Windows, choose File>Place Linked and you must then navigate to the folder and find the file you wish to use for this experiment.
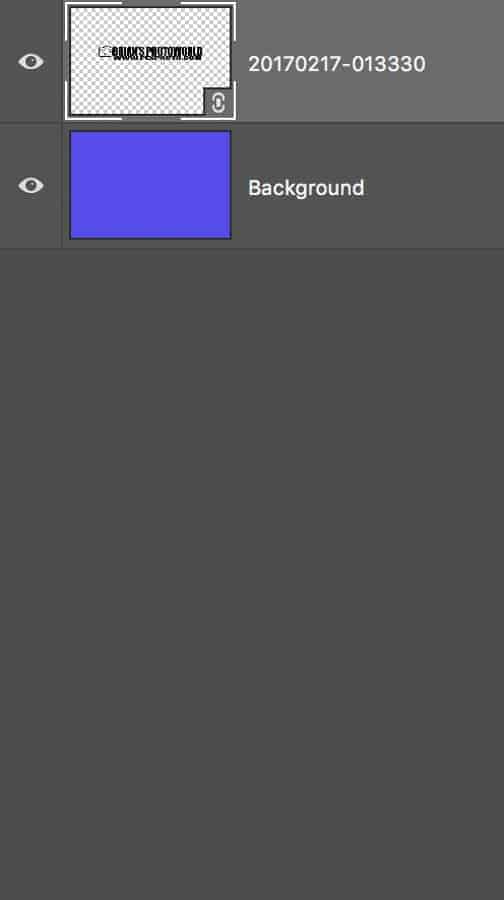
- The Text/Logo or whatever it is that you placed will appear in the center. Drag inside the bounding box to move around.
- Shift drag a corner to resize the object.
- When happy with placement, hit the check mark or simply hit enter.
- Do this for the other file you want to object on. Place it where you want and again hit enter.
- Save both of these files and then close one of them.
- Now, on the remaining open file, double click on the Smart Object Layer.
- This will open the smart object in its own tab.
- Create a new blank layer. Get your brush with black paint and make an “x’ across the entire screen. This is just for demo. Whatever you want to do you can do here.
- Now hit CMD/CTRL & S to save. This doesn’t save to disk; it saves the Smart Object modification to the smart object. Close this open smart object.
You have effectively altered the Linked Smart Object and this will reflect in other open files that have this same linked object in them. But what about the one we closed? Simple!
Open that file up and open it from Lightroom into Photoshop as original. You will see the LINKED Smart Object with a little yellow triangle signifying it has been altered and needs updating. You can right click on the layer and choose to UPDATE Modified Content or double click the little yellow arrow and choose to update it there! Presto! All the files with this LINKED object will be updated when opened into Photoshop. Just make sure to open ORIGINAL and not copy!
Expanded Adjustments with Smart Objects
When working on files in Photoshop, you’ll usually add adjustment layers to the image. With Smart Objects, you can use adjustment layers AND the Adjustments under the IMAGE>Adjustments menu options. Shadows/Highlights is one adjustment that cannot be made with an adjustment layer.
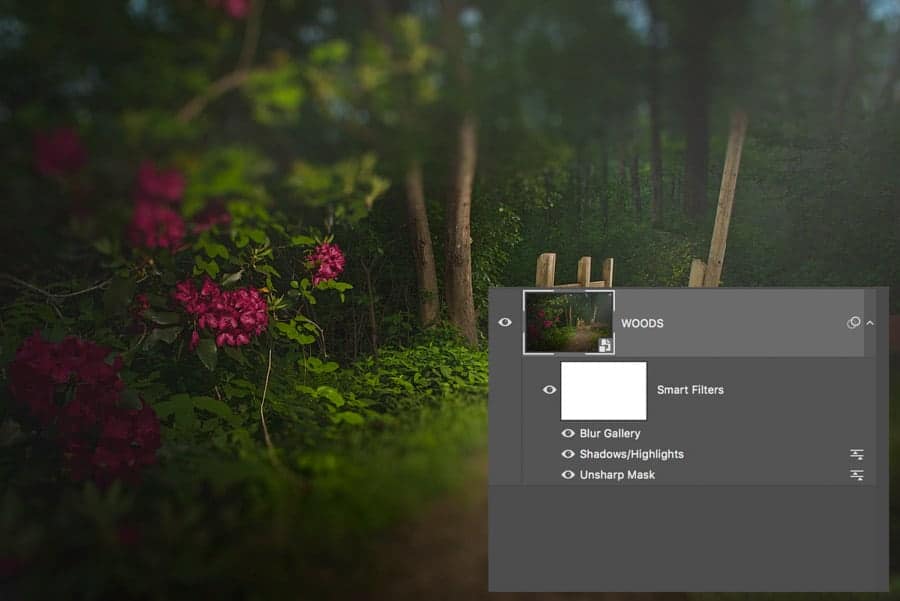
These adjustments, as well as any filters, are listed under the Smart Object layer and they can then be re-edited by clicking on the Filter/Adjustment name and this will bring you back to the exact way the filter/adjustment was set to start with! Even more, you can double click on the blending options icon to the right of the adjustment/filter name and alter blend mode and opacity!
Smart Filters
One of the best parts about using Smart Objects is the ability to add filters to them and of course these filters are then easy to tweak at anytime where with a static raster layer, once you create a filter on that layer, you’re stuck with it.
As mentioned above, you can click on the little filter blending options icon just to the right of the Filter to open the box that will allow you to change blend mode and opacity. Double clicking on the Filter name itself will allow you to change the filter options.
Filter Masks
A filter mask is a mask that resides below the Smart Object and is used to mask out any effect that is created by the many layers that you can use in Photoshop. A normal layer mask can still be applied to this Smart Object Layer but it will, like any other mask, either reveal or conceal – and all points in between – the contents of that layer.
Text As A Smart Object for Special Effects
Text layers can be resized large to small and back again over and over without any issue. But there are certain things you cannot do on text layers themselves – UNLESS you place them inside of a Smart Object. You can then apply things like warping your text that you cannot do without converting to a Smart Object!
This article was a tad more advanced in some areas and I hope that if you have any questions or comments you'll make them below! Thanks and Keep SHOOTING and EDITING!
I feel smarter! Doesn’t matter how much you think you know about something, you can always learn more. I thought I knew why I used smart objects. Now I really know! Never new about the resizing issue…