
Photoshop TIPS For Creative Image Making
Time flies and we are here again talking about some more useful Adobe Photoshop tools/tips/tricks that can have an impact on your images and take them from good to great. Creative thinking is something that is very important when starting the process of making an image with impact. From the lighting, subject, focal length, perspective – it all has to be taken into account. If you’re someone who likes to snap shots when away on vacation or a weekend warrior that loves getting great landscapes all the way to a product photography pro, these tips and tricks can make your images stand out.
FREE TRANSFORM TOOL
The Transform Mode in Photoshop can be used for a multitude of things. Free Transform Mode can be easily accessed by using the SHORTCUT CMD(Mac) or CTRL(Windows) & T. You will see a box like the one in the image below.
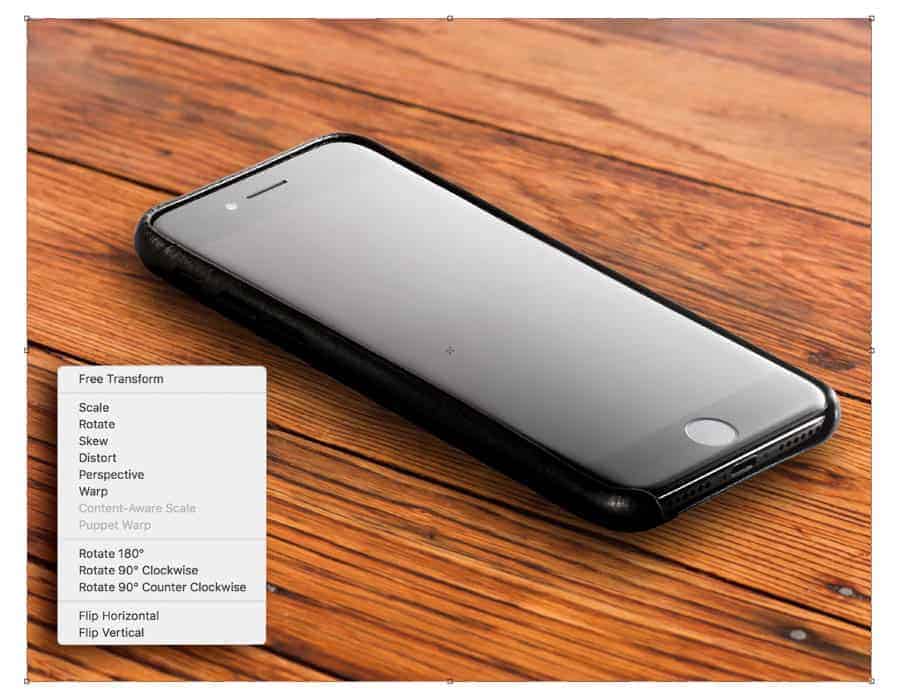
When you right click inside the box, you will see this list or Transformation options. There are also shortcuts while using this “Tool” (It isn’t in the tool list but it is really a tool!). Rather than right clicking when using Free Transform, you can use the modifier keys to help speed workflow and more importantly, maintain the creative flow that is so key.
- Holding the Shift key while you drag any of the corner anchor points (handles) will force proportional transformations.
- Option + (Mac) / Alt + (Win) – while clicking and dragging transforms from the center OR the anchor point which you can move by clicking and dragging on it.
- Command (Mac) / Control (Win) – drag a corner anchor point to freely distort the image.
- Command + Shift (Mac) | Control + Shift (Win) – drag a handle to skew the image.
- Command + Option + Shift (Mac) | Control + Alt + Shift (Win) – drag a corner anchor point to change the perspective of an image.
- When ready to apply the transformation, hit the ENTER/RETURN key.
- Hit ESC to exit the transform mode.
What To Do?
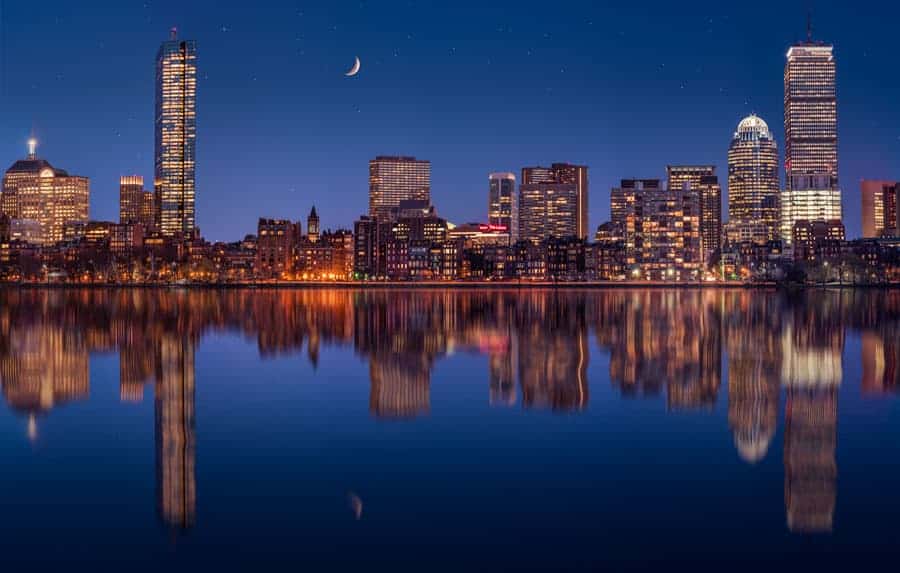
What does all this mean and do? THAT is up to you! But there are an endless array of things possible. For instance, you can take a PANO image and then make a duplicate copy of that layer in PS to have the look of reflections off the water. This is great because viewing PANO images online often does not do justice to the image since all those details are made so small when viewing on mobile devices. By making a “reflection” you are making the image more like the image format we see regularly and are accustomed to!
MANUAL FOCUS BLENDING
Another thing that can be done with the free transform tool is to help aid when compositing images together – focus stacking is one place where this is of huge help. There are times in PS that the AUTO blend mode in the EDIT menu just won’t work. If there are areas of the image where parts of the image are totally dark and they DO NOT line up well, FREE transform works great!
You can enter Free Transform and go up to the options in the toolbar. By linking the H & W dimensions of the image, changing the percentage ever so slighlty will shrink or expand the size of image and with “Difference” blend mode selected in the Layers Panel, you can see these areas line us perfectly. Nudging the layer with the arrow keys will help out as well.

Remember that holding the SHIFT key down while using ARROW keys will make the layer move 10 pixels at a time to speed up things when using the “V” Move tool. It is usually best when using one nudge at a time for fine tuned control. Focus breathing causes this zoom in/out while focus stacking and this allows fully manual control over the stacking process for those times when you want it perfect. Most of the time we are focus stacking, it is usually an image we are putting extra work into anyway so this may help give you total control over the entire process.
An important thing to remember when using the free transform mode is that it allows only one CMD+Z or CTRL+Z backward step while inside the tool. So if you want to go back more than one move, just hit ESC and start over.
Another tip here is when using Free Transform, it is a good idea to have that layer as a SMART object. Free Transform rewrites all the pixels upon completion of the Transformation so the image quality is degraded each time with a pixel containing layer. If you use SMART objects, this is not a problem as you can make them as big and as small as you want over and over.
ADD LENS FLARE
The filter in PS in the RENDER menu option that lets the user add a lens flare is very cool. It gives a light that is very hard to duplicate other wise. The only issue is that it has to be made on a pixel containing layer.
There is a work around for that, however. Here is what you need to do:
- On your pixel containing image layer, choose FILTER>RENDER>LENS FLARE and then create the lens flare you would like in image. You can resize and change opacity later.
- Now hit CMD+Z or CTRL+Z to undo that added filter. Trust me here!
- Create a new blank layer on top of layer stack and FILL it with BLACK paint by hitting “D” for default foreground/background. Black will be chosen color. Hit OPT+DEL on a Mac or ALT&BACKSPACE on PC. The layer will be black.
- Change the Blend Mode to screen. The Layer is now transparent.
- NOW hit CMD+F or CTRL+F to bring up the LAST filter used which was the lens flare and it will be in the exact spot you wanted it in.
- You now have a layer that contains ONLY the lens flare.

This image has a slight lens flare added just off the left side of frame at top. It looks very much like light bleed you would get from lights on a field.

You are now able to do whatever you would like with this light. Full control over opacity, color (Either desaturate or saturate using a HUE/SATURATE LAYER and clip to the flare layer). You can also use the above Transform mode to make the layer larger to spread out a softer and larger light source. Use your imagination and get creative.
ADDING SHADOWS TO OBJECTS
There are many ways to do many thing inside of Photoshop. Making shadows is one of these tasks. An easy way it to use LAYER STYLES. This is accessed by double clicking on the layer (Not the thumbnail) and you will then enter LAYER STYLE dialog. It has many different features but the one right at the left on bottom is what we are concerned with. Clicking that box will add the drop shadow effect to the current layer that contains pixels. You don’t want to add Drop Shadow on a pixel layer filled with pixels because where would the shadow be cast? It is important to have a definite selection and object on the layer alone for this to work properly. Adjusting the setting and the color are possible and it is a fairly intuitive process. Hit OK when you are satisfied with your shadow.
This below example is a simple BALL on it's own layer with some lighting added.
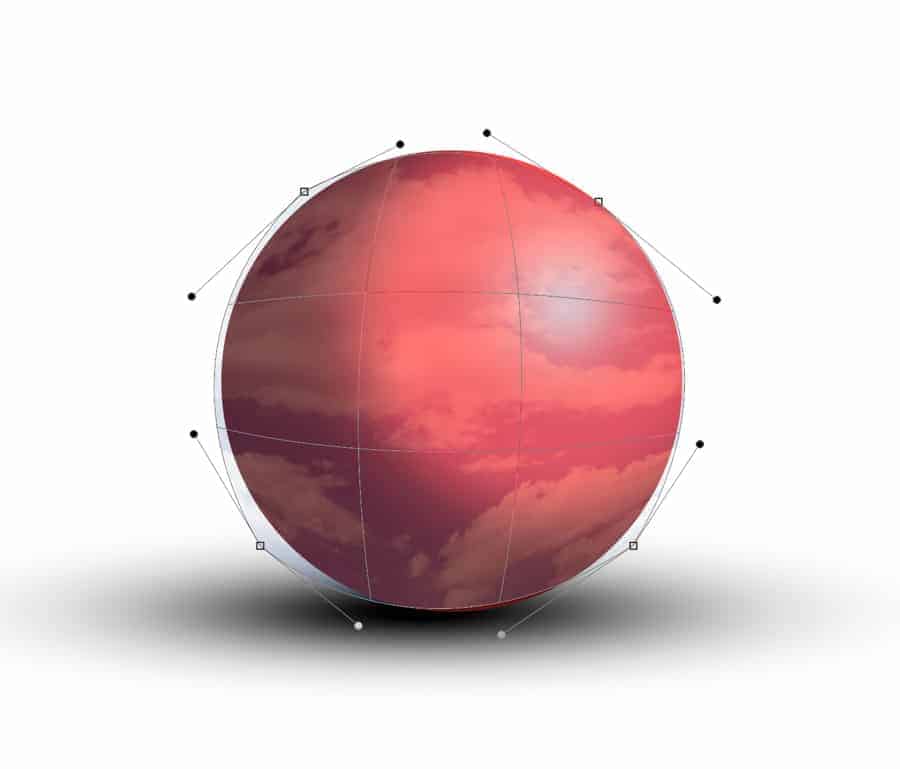
By placing a layer under the ball and using a wide and flat brush, I was able to just paint in with a few big blobs of black pain and then adjust opacity and “STRETCH” the shadow using FREE TRANSFORM tool. There really is only one sure fire way to get really comfortable with Photoshop and that is with playing around. The most insignificant thing you learn may come into play one day while making an image and you'll be so glad you took the time to learn that method.
TURN LAYER STYLES INTO THEIR OWN LAYERS
A little known trick in Photoshop is the fact that you can turn LAYER styles into layers and then mask, adjust and manipulate just like any other layer. After you apply a layer style or styles to a layer, simply right click on the small “FX” icon to the right on the layer. A drop down list will appear and you can select “Create Layers” and you will then have layers for each part of that layer style. It is very nice when dialing in fine details.
CREATIVE VISONS
There are so many things possible within Photoshop. You can watch all the YouTube videos, Creative Live sessions, Webinars, Courses, etc but it is ultimately up to you as a creative to come up with new and unique ideas. As great as it may seem to learn a new trick that you have seen online or you were shown at a workshop, there is no greater feeling of creative accomplisment when you discover new and exciting methods on your own. This comes with time and with constant practice. If you're reading this, chances are you're pretty serious about making great images. Give yourself a few extra hours per week when you can and you'll be amazed within a few months how much you have grown! Happy Shooting and Editing! 🙂

I love using photoshop as it can help make the vision come alive. Great tips for using it, thanks for sharing!
I love the way the city nightlife photo with the water reflection could be combined with the sphere to create a crystal ball effect. Thank you for taking the time to share these tips!
Thank you so much for this awesome advice/tutorial ♥!