

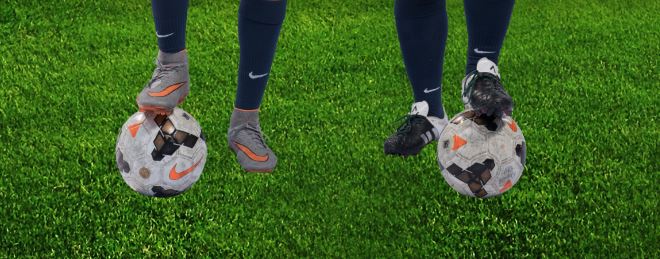
In my previous article https://improvephotography.com/40962/creating-a-good-sports-composite/ I discuss making sports composites. Whenever you mention composite images to a client they immediately ask “they aren't going to look fake?” I am not sure how or why this is the first reaction but I think it has to do with what is chosen as the background and feet. Why do feet make composites so difficult? Simply pasting an extracted image of the full body of a person onto a background makes them look like they are floating. When the people look like they are floating it just makes the image unappealing to the eye. This makes using full body images in composites a bit more difficult.
I myself still struggle with this part of composite images but over the last few months I have learned a lot about Photoshop and how to address this issue. I am by no means a master at this subject but I wanted to pass along and share what I have learned. The most important piece I have learned so far is the basic task of addressing realism in composites is that technically it is not very difficult. It is the artistic part of applying the technique that takes a lot more practice.
Posing Players
When working a photo shoot it is important that you keep the final layout in mind. I will take 5 pictures of each player during a shoot for compositing. One – straight on, One – Facing Right, One – Facing Left and the final two I allow the players to do something to show their personality. I will give them a prop such as a ball or bat or helmet or glove just something to do with their sport. I tell them to “show me what your favorite pose” and most athletes have a pretty good idea of what they like from seeing their favorite players. Once I have captured all the different poses I now have something from each player that provides a lot of flexibility when laying out the final composite.
Building the Composite
Before we can get the players to float on the image we have to know what is the final design objective. Are we making a team banner? A solo banner to highlight a Senior or Captain? My style is more of a stadium look so I always try to start with some kind of background that includes a realish surface (grass, basketball/gym floor) and lights. I am not a fan of all the fire and lightning types of backgrounds but that is just a personal preference and each person has their own style that works for their studio. It probably has more to do with my abilities with Photoshop to make these types of backgrounds look as good as the sample images.
When building a composite image with 2 or more people it is important to understand who is the key person(s) in the group. There are a lot of design theories and guidelines around placing individuals in groups and all of them have a common idea – make sure key people are placed in a prominent position in the image. There are also a couple ways to place groups from the ‘V' formation to a ‘U' or a ‘W' layouts. Placing the players in a straight line is not very pleasing to the eye so that should be avoided whenever possible.
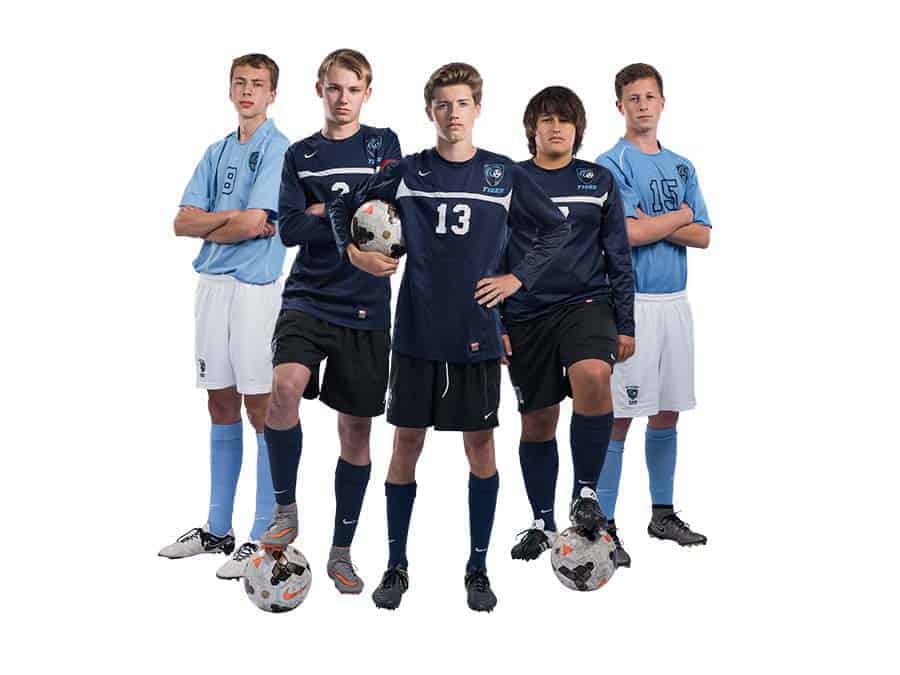
A V shaped layout is great when you have a single person such as a captain to stand out in the image. The key person is the focal point at the bottom of the V making them front and center.
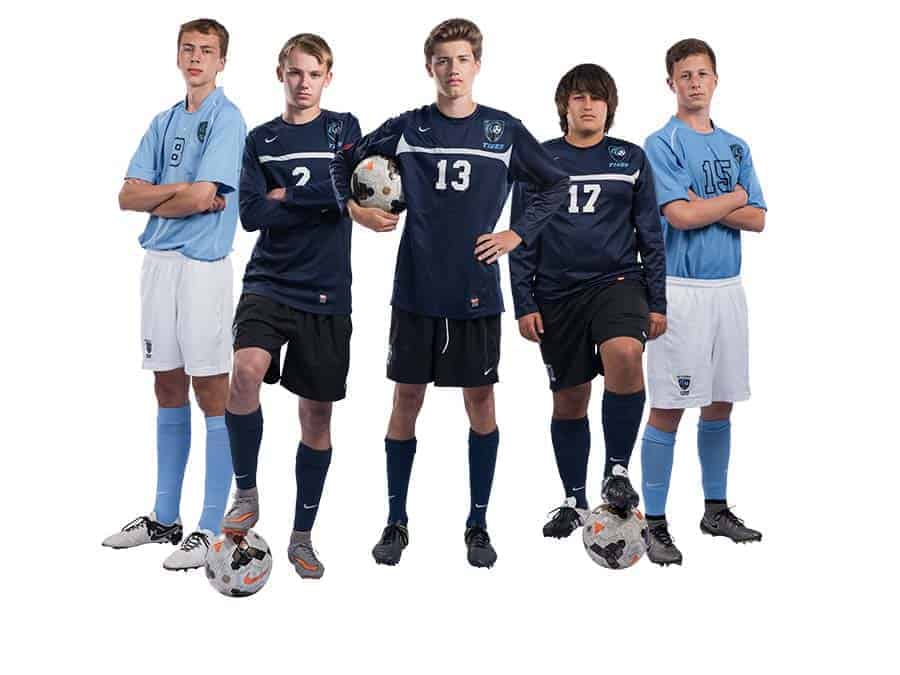
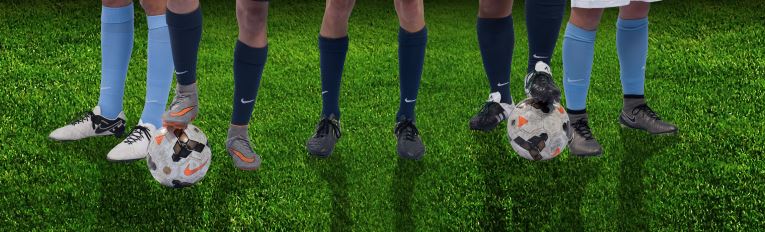
A U shaped layout is better for multiple key people. A good example would be a team with multiple captains or seniors. If you look at the above example you can see the 3 players in dark blue are placed in such a manner that not only does their uniform show they are equals but no one is specifically highlighted as “The Key Person.” The players in the light uniforms are part of the program but obviously not as key as the three players forming the base of the ‘U'.
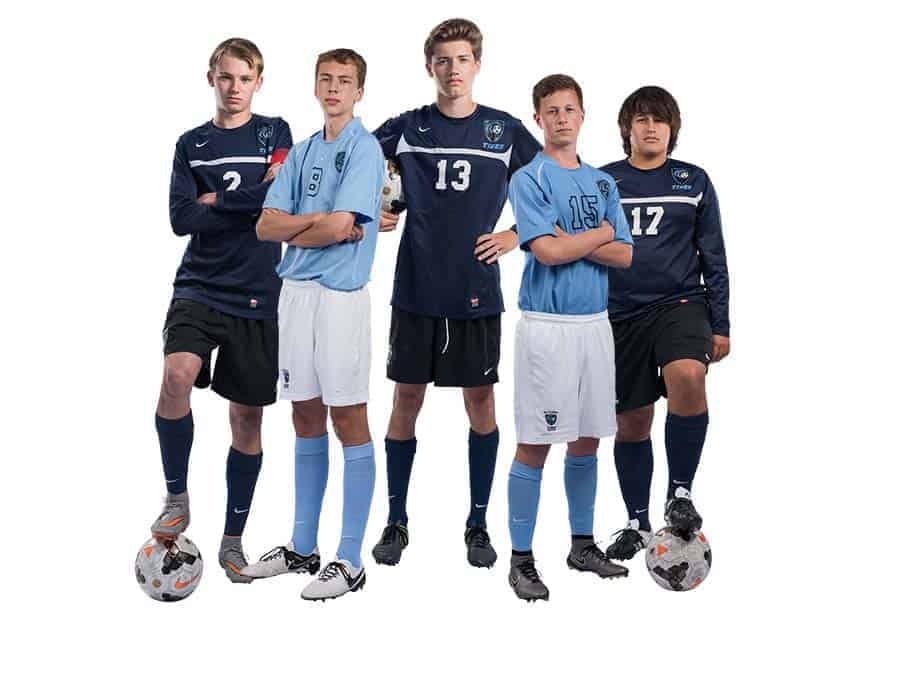
The W layout is perfect for showing a group with 2 key people. The example above you can see that the two lighter blue uniformed players are the key players to be highlighted and the dark blue uniformed players are part of the group but not key people.
Drop Shadows and Effects
We have the players placed the way we want for the final image and we have the background selected. Now the players need to be placed on the background and made to look as realistic as possible. The players need to look like they are connected to the ground and not floating about the ground. To connect the players to the ground we need to fill the “space” between the feet and the background's surface. The most natural method is to create shadows or Drop Shadows as it is called in the industry. There are some great resources on how this to create drop shadows in Photoshop. Simply Bing/Google “Photoshop drop shadows” and you will pull up 100's of video tutorials. I found the tutorial from Easy Digitals to be the most helpful when I was learning the technical part of creating drop shadows.
If the drop shadow is still not helping to fill in the space between the feet and the surface of the background then adding other effects such as fog can also help “hide” the space. Other ideas include blurring the shadows and the ground a little. If you have text such as a title it could be placed over part of the feet as well.
Outsourcing
Making composites can be fun but daunting in the beginning. Practicing on your own is a great way to learn the techniques but when the first couple of paying customers come along it can sometimes feel overwhelming. The actual final image for a paying customer must be perfect and sometimes we just aren't there yet. There is nothing wrong with outsourcing the project and in fact you may be pleasantly surprised at the cost for such a service. I wanted to offer composites as part of my business and in the beginning I was not confident enough in my abilities so I would outsource to Rebooku. They offer a design service that allows you to supply a background and the people to be placed then they will do the extraction and placement on the background plus all the drop shadows and effects needed for the design. I highly recommend them if you have been wanting to add this service to your business but still have not mastered the finer points.
As your business in the Team and Individual sports market continues to grow keep adding more composite images to your product line. From individual Senior Banners to team banners to posters, to whatever the clients need, learning these techniques will only help your business continue to grow.
The top image kinda makes the players look like ants, the blades of grass are huge lol the grass looks to be normal size in the images throughout the article.
I like all the images in your other sport composite article with the washington premiere FC at the top of the article