
 Chances are, you think that Photoshop blend modes are for blending images to create double exposure effects or to add a texture to your photos. After all, that is what the name seems to imply. Perhaps you've never noticed the blend modes tab and have no idea what I'm even talking about, in which case I am about to blow your mind and change how you work in Photoshop forever. Make no mistake, blend modes are an extremely powerful tool that can save you loads of time, open worlds of creative possibility and improve your photo editing by leaps and bounds.
Blend modes use algorithms and math to do a bunch of technical stuff that is of zero interest to me, so if you are looking for THAT kind of article, then you are about to be disappointed. What does interest me about blend modes is the ever-increasing number of ways that I have learned to use them in order to accomplish my creative vision more easily. Now that I have an understanding of what the modes do, I am constantly dreaming up new ways to use them to ease my editing tasks.
What are “blend modes”?
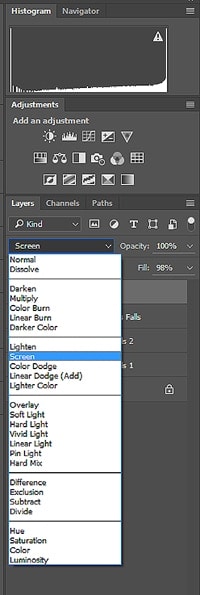
Blend modes are a set of effects that change how a layer interacts with the layer below it. If you are familiar with using layers in Photoshop (and you should be, the concept of layers is the foundation of everything in Photoshop and understanding how to use them is essential. If you haven't grasped Photoshop basics yet, the Photoshop 101 course available through Improve Photography Plus is an awesome resource at a very affordable price!), then you will understand that the default setting for your layers is “normal”, meaning that whatever layer is on top is the layer that will show. If that layer has transparent parts, like a layer that you add to perform cloning upon then the image beneath shows through, except for where you have done your cloning. If you add a fill layer or another image, those will show, rather than whatever is beneath them, unless you adjust the fill or opacity, OR use a blend mode. Blend modes are found in a drop down list, at the top of the layers panel, to the left of the fill and opacity sliders.
Blend modes make the layer they are applied to less opaque (semitransparent) and each one affects how the pixels in the top layer play with the pixels in the layer below it just a little bit differently. I'm not going to go into a detailed description of every blend mode in this article, but rather give an overview of the ones that I have found to be most useful and some examples of how they can be added to your workflow.
Let's start with the obvious.
Double Exposures
Back in the film days, you made a double exposure by declining to wind the film in between images, exposing the same part of the negative twice. Some of us did it quite by accident or had really cheap cameras that didn't always spool the film properly, causing images to overlap each other and occasionally, we may have gotten some pretty cool effects as a result. Others, (certainly not me) planned their double exposures, for example taking the first image of a silhouette and then taking a second exposure to fill in that silhouette with a completely different scene. You can use blend modes to create just that effect in Photoshop. It works best if you start with a fairly dark image with a strong shape, then add your second image using the lighten or screen blend modes, et voilà a double exposure.
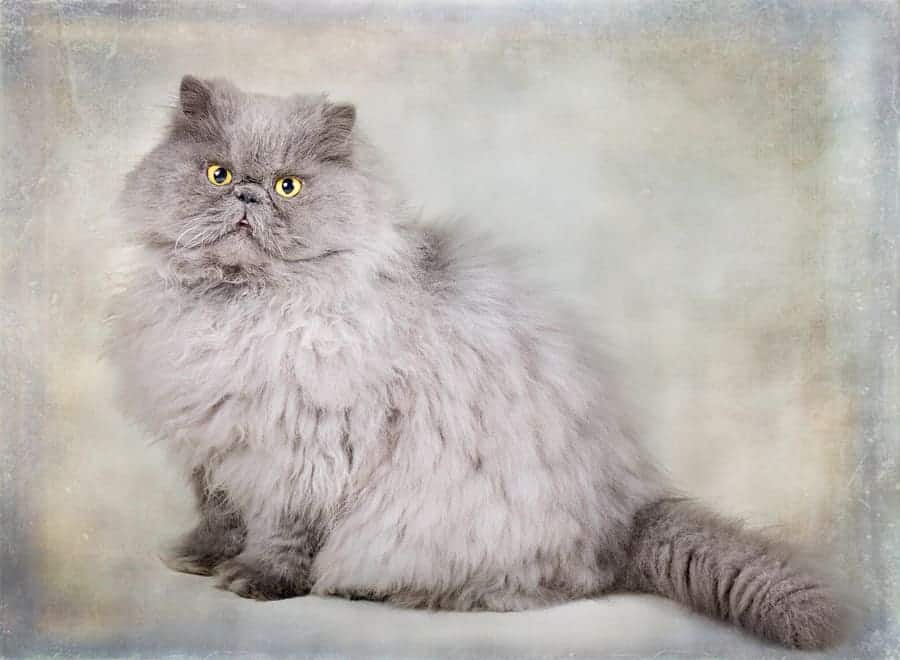
Adding Textures
Have you ever seen those photos that somehow look like paintings, even though they don't have any brush strokes or painterly filters applied? Oftentimes, the photographer has added layers of texture to the photo, lending a more classic, artistic mood. Textures can also transform your photos taken on plain, seamless paper backgrounds and can be used to hide wrinkles and creases (or pet hair, paw prints, and bits of dog treats) on your muslins. You can play around a bit and see how your texture looks with different blend modes, but you will probably find yourself using screen to add a lighter texture to a darker background and multiply to add a darker texture to a lighter background. The other two blend modes that I use most frequently for texturizing are overlay and soft light, which I often find most suitable for applying a second layer of texture over the first. Once you've applied your texture layer and selected the blend mode you like best, you can play with the opacity and fill sliders to make the effect more subtle. With some blend modes, opacity and fill will give you different results, so try both and see which one looks better to you. Depending on your subject and the look you are trying to achieve, you may want to remove the texture from some parts of the photo (for example, someone's face), in which case you can just apply a layer mask and brush some of the texture away with a soft brush. You won't have to be too fussy about masking around edges, as it will look most natural if there is some faint overlap.
Now, some uses you may not have thought of.
Sky Replacement
I can remember my early days of using Photoshop, trying to mask perfectly around trees or hair to do a sky replacement. I was such a chump back then! Now I let blend modes and gradients do most of that work for me. If you want (or need) an in-depth lesson on doing sky replacements, check out Nick Page's tutorial, here. Here's the abridged version:
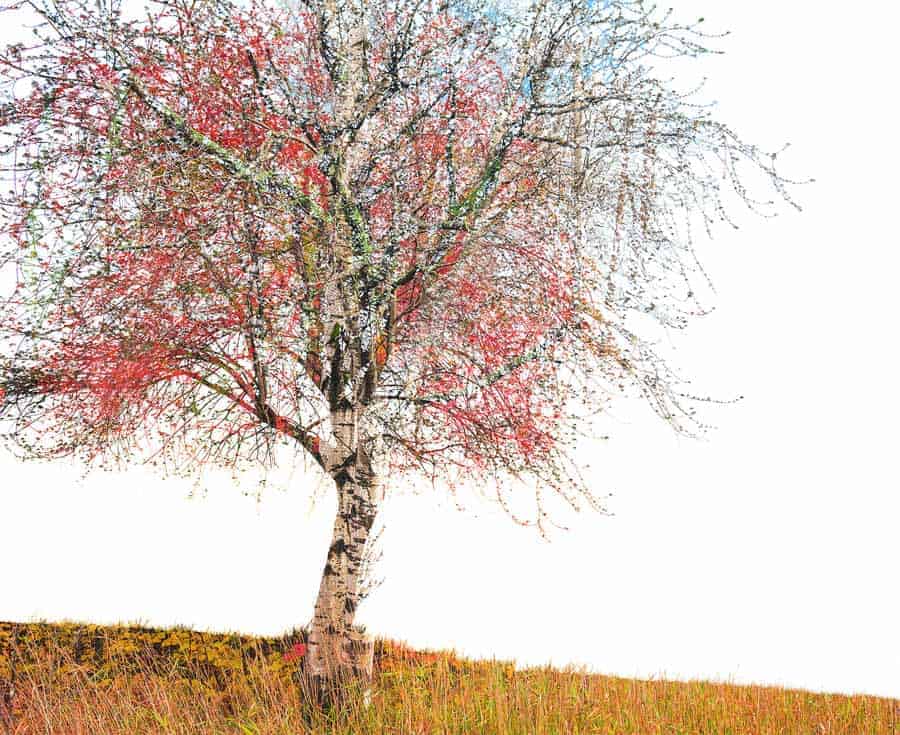
If you have a blown out sky and you want to replace it, rather than trying to recover it, just let it be blown out, encourage it to be blown out even – the lighter, the better. Now, add your preferred sky on a new layer. Set the blend mode to multiply (or sometimes darken), add a black mask (ALT or OPTION + mask), and paint a white gradient from around the middle of the sky to the horizon. Now, you may need to paint black on the mask with a soft brush to remove it from some trees or buildings, but once again it is usually unnecessary to be very detailed about it because the gradient and blend mode will have made it faint and it won't even touch most of your foreground.
Another sky hack using blend modes – add the moon to a night sky or white clouds to a solid blue sky by setting the blend mode to lighten or screen. If those results only get you part way there, but look weird, then apply your cloud or moon layer a second time with the blend mode on normal and a black mask, then just paint white in the middle of the clouds or moon, as long as you don't go over the edges it will blend in naturally with the layer beneath.
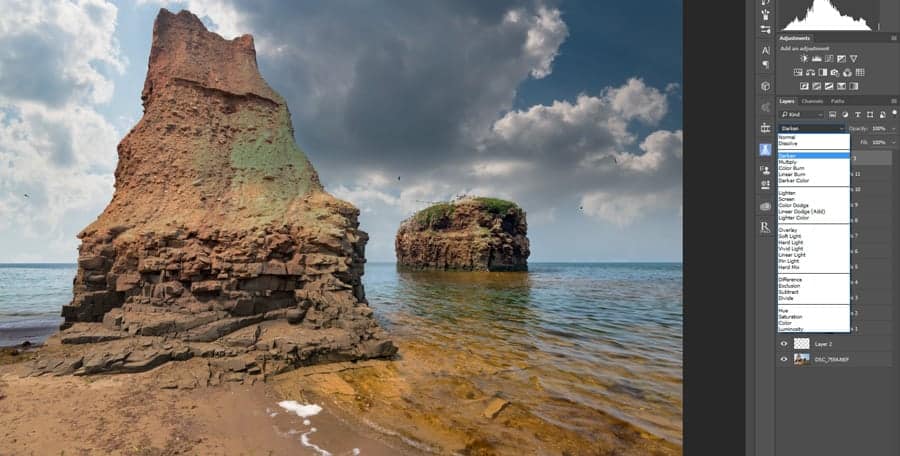
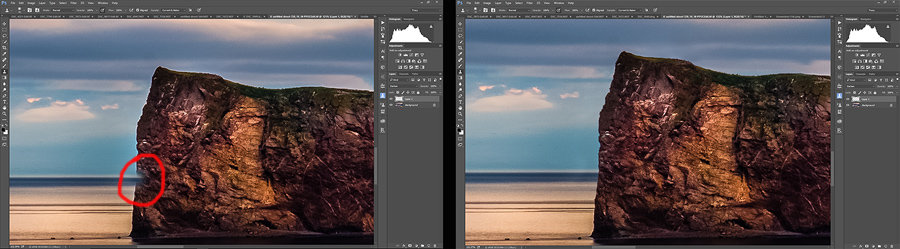
Removing halos from HDR or backlighting
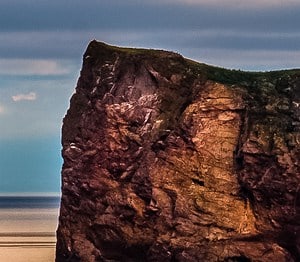
If you've ever done any sort of image blending, using HDR software or even sometimes when using luminosity masks, then you have probably been frustrated by halos. These are brighter parts around the edges, usually of something that was backlit (like a tree or mountain in front of a sunset). Halos make it really obvious that you have been up to some exposure blending and the more you try to darken them with curves or levels layers, the more you end up darkening the foreground object in front and making things even worse. Instead, try cloning the sky (or water, or whatever the brighter part is composed of) in towards your foreground object with blend mode set to darken. It will only cover those parts of the photo that are lighter than what you are painting with and will stop at the edge of your darker object, without you having to make any complicated selections or masks. Now that's cool!
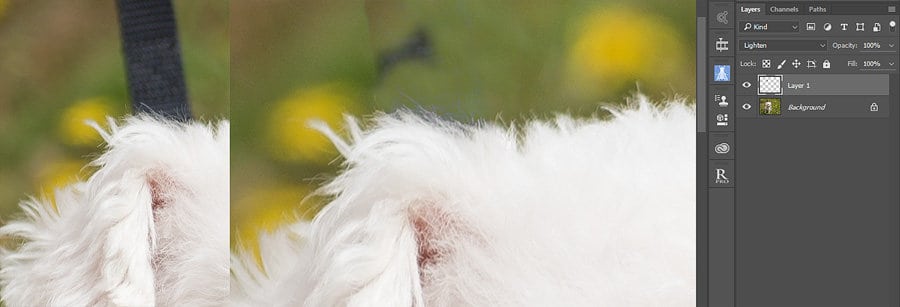
Wow – Are There Any Other Applications For That Cloning Technique?
Why, yes. Yes, there are. The limits are your imagination, but anytime you have an item that you want to clone out and it is either lighter or darker than it's surroundings, well then you can probably use blend modes to make the job easier. As a pet photographer, I frequently have to remove leashes in photoshop. Masking around the dog's fur can be a major drag, but I rarely need to resort to that because the leash is usually either lighter or darker than the dog, so I can just use a blend mode to do the masking for me.
Dodging and Burning
Dodging and burning is a technique of selectively lightening and darkening parts of your photo in order to sculpt the subject and guide the eye. There are dozens of ways to achieve this in photoshop. Some methods can cause an increase in saturation, which may not be desirable, for example, if you are dodging and burning a face in a portrait and the parts you are burning (darkening) are becoming redder. In these cases, changing the blend mode of the adjustment layer you are working on (this might be a levels layer or a curves layer, in this scenario) to luminosity will make it only affect the brightness and will not change the saturation or colour. Another technique is to add a layer filled with 50% grey and set the blend mode to soft light. Nothing will happen, the photo looks the same, but if you paint on that layer in black or white with a brush set to very low opacity, hey look – you're dodging and burning.
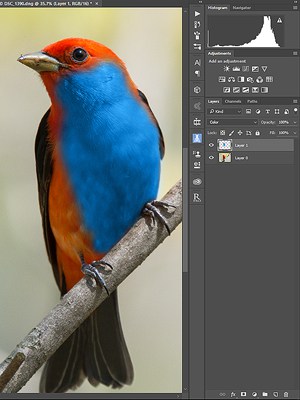
Change Colour But Keep Texture
What if you want to change the colour of an object in your photo, but keep the texture or pattern intact? Another easy fix, using the colour blend mode, just paint the desired colour right over the old one and watch it change before your eyes. Paint a blue car red, or a red bird blue. The sky's the limit, paint it whatever colour you'd like.
Add Glowing Light
Add a glow to street lights or some fairy sparkles to your forest scene by using the linear dodge blend mode. This brightens the part of the image that you apply it to, but in a glowing, semi-opaque way. When applied at full strength, it will be way too bright and blown out, but if you lower the opacity, you'll find it looks really gross. This is one of those occasions where you want to use the fill slider instead and suddenly, you have a beautiful, glowing light.
Use Blend Modes To Help Align Layers
What about those weird looking modes, exclusion and difference? Photoshop's “align layers” function works very well, but sometimes when you're exposure blending, you had something (or someone) move in between frames and PS just doesn't know what to do with that. If you need to manually align layers, using one of these modes can help you see when you've got them lined up properly.
How Do You Use Blend Modes?
This has by no means been a complete or comprehensive list of everything that you can do using blend modes, but I hope that it has given you some ideas that will speed up your workflow. Let us know what I've missed in the comments below – what are your favourite ways to use the Photoshop blend modes?
Great tips! I use textures on some of my photos, so I am familiar with blend modes. But these other applications are great ideas, and I can see very useful.
Thanks, Mary, I love your textured work, but there is so much more that blend modes can do for you!
Thanks Tracy! Lots of great information in your article. Blend modes = another of the million tools in PS that I need to learn more about and use more often. And your article will be really helpful.
I’m glad that you found it helpful, Rusty. Once you start using blend modes, you’ll think up ways to use them all the time.
That cloning around difficult edges like the rock and dog hair?! Mind blown. Yep, you did it! These are great. Saving this for future reference
Thanks, Jolyn – not to brag, but I kind of blew my own mind when I figured out that little trick!
Great job Tracy. The pixel priority blending using darken or lighten is probably the best thing most people will get from this great article. I was half asleep one night editing an image that had a halo and totally forgot about this tip. Next morning I recalled it. Lol. So great to have in the digital tool bag 🙂
For sure, Brian. Thanks!
Thanks for the nice article! I have a question about the dog leash trick…do you “select” the leash in a new layer and just hit “Lighten”?
Hi Nicole, sorry, I just saw your question now. I would create a new layer, set the blend mode to lighten or darken, depending on whether I’m removing a dark leash from a light background or vice versa and then I would just clone over it. Often, making a selection of the leash is unnecessary – that’s the whole point of using the blend mode. Sometimes, if the dog is in the same tonal range as the leash then I might make a loose selection around it, using the lasso tool. It won’t work in every scenario, but this technique gets me most of the way there about 85% of the time.
Awesome article and gorgeous photos Tracy! Inspiring me to play around more in PS.
so so amazing facts…
Really imaginations are all our limit
Thank you for explaining how to use blending modes in plain terms. Better give them a go!
I do a lot of animals, paying clients and volunteer animal shelter work. I replace a lot of background and use textures to make the portraits. Your blend mode technique dealing with animal leashes, fine hair, and background noise will help my workflow. Thank you for the tips.