

Processing your digital images is a source of major enjoyment to some. To others, it is a painful task. Whatever the case may be, we can all agree that adding the “little extra” that post processing affords can really spruce up your digital images.
Below are 5 techniques and a few tips that can make your images come to life. Try them out and you will be very surprised just how much they really can add to your digital processing workflow.
1 – Dodge and Burn with 50% Layer(s)
Dodging and burning is a term that has been carried over from the old film days that is simply lightening and darkening portions of the image. In lightroom, this is done with an adjustment brush and you can alter the lightness (or darkness) values with the sliders within the Adjustment Brush panel. It works well and many choose to use this technique for its super simple and straightforward operation. There is exposure, highlights, shadows, whites, blacks, etc that can be altered within the adjustment brush.
Photoshop has it’s own set of dodge and burn tools built right into the application and they are in the tools panel and have been for many years. These two options let you select specific tonal regions (highs, mids, shadows) from within the options in the tool itself. This method is also a fairly straight forward technique and one that works well. Many like to use Photoshop for editing over Lightroom because it simply works smoother and you have many more tools at your disposal. It is considered an “old school” technique because it was and has been a tool inside of Photoshop for many years. Unfortunately It is also a destructive way of editing because you are working on a pixel based layer and that means you are actually altering those pixels instead of having a non destructive edit which can easily be altered or simply taken away if you decide the changes aren’t what you want.
There is a more advanced method of dodging and burning in Photoshop that allows you to change blend modes to get different looks from dodging and burning with the brush tool. The ability to alter the brush tips and angles of the tip is a feature in Photoshop that is not available Lightroom. Here is how to make these 50% grey dodge and burn layers.
- Create a New Layer by hitting CMD/CTRL+SHIFT+N
- Name this layer DODGE & BURN
- Choose “Overlay” for the blend mode and check the box to Fill with 50% Grey
This creates a layer that is fully grey but since it is in the “Overlay” blend mode, it appears as a transparent layer. When you apply brush strokes to this layer using the “B”rush tool, a white brush will brighten the pixels under this layer and a black brush will darken the pixels. These colors can be changed also. This allows you to dodge and burn in color, perhaps using the color picker tool (easily accessed while using the brush tool by holding down ALT/OPT when brush is being used) to grab colors from within the image. This can really be helpful when adding highlights to a scene and you want to take colors already in that image such as a golden hour photo.
You can also use the “Softlight” blend mode to get a similar effect but the dodging and burning isn’t as contrast rich as the “Overlay” mode. It is a more flat, evened out lighting and darkening of the pixels. It works best with darker colors as the blacks can sometime “block up” and create undesirable effects in the shadow area. Using Softlight blend mode lessens the contrast and gives you a more flat adjustment. These adjustments are EXTREMELY powerful when used in conjunction with selections that are based on luminosity values. Dodge and Burn methods that use luminosity selections can create some fantastic images.

Many people who use this technique, myself included, use two separate layers for Dodge and Burn. The Dodge layer set to “Overlay Mode” and the Burn layer set to “Softlight Mode” work very well. Experiment with this and make sure to use a brush with a low opacity or flow so that you are gradually adding the alteration in subtle strokes. A little goes a long way and can and will really change how an image looks.
If you make an error, there is a simple way to paint back the 50% grey on the later. Go to the layer and click the eyeball for that layer while holding down OPT/ALT. It will reveal this grey layer. Simply using the brush tool, press OPT/ALT to choose an area of 50% grey and now use this brush to paint back over the area you want to fix. A very simple way to repair these 50% grey layers. Click here for quick video!
2 – Luminosity selection
You may have heard the term “Luminosity” many times since getting into digital photography. It is a big word for tonal value – light – dark. There are 256 luminosity levels in any image within Photoshop. In the levels adjustment dialog box, you will see 0 is pure black while 255 is pure white. All the tones in between will be various shades of grey from very dark grey to extremely light. The Channels panel in Photoshop shows these values when selections are saved here along with the primary Red, Green and Blue Channels that make up all RGB images.
Many people learning Photoshop shy away from the Channels panel and that is a mistake. It is a place where the maximum control and benefit of photoshop truly lie. You may have heard the term “Luminosity Masks” in your photographic journey. It is simply a selection based on luminosity levels in the channels panel and then applied as a layer mask usually by brushing the selection in on a layer mask. They are used for an almost countless amount of ultra powerful adjustments from exposure blending, skin retouching, dodging and burning, hue and saturation, curves, etc – and on and on.
Do not let yourself think this is only for the “ADVANCED USERS” – it is not! Here is how you can make selections based on Luminosity values.
- In the Channels Panel, CMD/CTRL click on the RGB Channel.
- Go down to the “Save Selection As Channel” Icon and click!
Bingo! There is your “Luminosity Selection” which you can use as a mask. This is referred to by many using luminosity masks as a “Lights” layer. Why? When you make a channel based selection from the RGB Channel (Or RED, GREEN, BLUE) you are getting a “POSITIVE” of the image – simply meaning the lighter tones are selected more hence you see them as more WHITE in the selection. Remember, White is selected and black isn’t in the world of Photoshop. “White reveals and black conceals” is another popular way to recall this. Grey shows partially selected pixels – the darker the pixels the less selected while the brighter, the more they are selected.
But this is just a simple selection which isn’t much use. How do we make more of these selections? Simple. CMD/CTRL click on this new channel and you now have that selected. Holding CMD/CTRL+ALT/OPT+SHIFT while hovering over this selection will produce a little “X” which means “Intersect” selection. CMD+Shift Adds to selection. CMD+Option subtracts from selection. You want to “Intersect” the selection as it will taper in greater to even a more selected area of the brightest pixels.
You can now go down to the Save selection icon again and you will now have a more restrictive “Lights Mask.” This is best seen in a video so please click on the video link below. Jimmy does a fantastic job explaining this procedure.
I wanted to make sure as many people as possible who may read this page will get the benefit from these selections as they took my workflow quickly to a new level! SEE VIDEO HERE.
You will quickly see using ACTIONS in Photoshop is the way to go with creating these selections. Remember, Channels add to the size of an image and they can get REALLY large very quickly. If you are done with the selections you have made, make sure to delete them before saving file unless you wish to retain them for future edits. This is another reason why having actions to create these selections in Photoshop is a must. Jimmy McIntyre offers a free Panel that will create these selections.
Once you have these tonal selections available to you, you are able to make a countless amount of adjustments to your images in very selective ways. You will never work in Photoshop the same again once you experiment with these powerful selections.
3 – Frequency Seperation Retouching
Frequency Seperation in Photoshop is a super cool technique used by many retouchers in the world of digital editing and retouching. It is most known for the ability to correct blotchy issues with a persons skin and also to remove wrinkles, fine lines and imperfections on a persons face. It is very easy to go too far with this technique but you can get amazing results very quickly when utilizing this method. It can also be used in other types of photography such as landscape work. What it does is seperate the texture layer from the color layer and leaves you with the ability to edit the colors and textures without affecting each other. Really very useful. Here is how it works:
- Make two copies of the base layer you are working on.
- Shut off the top layer and select the middle layer.
- On this layer, go to Filters>Blur>Gaussian Blur. Select a blur that is enough to just eliminate details from someones face but not as to totally blur someone’s face out (Or the details in whatever image may be). You will have to experiment with this but the Radius setting shouldn’t be very high. This depends on your image resolution so there isn’t a set number.
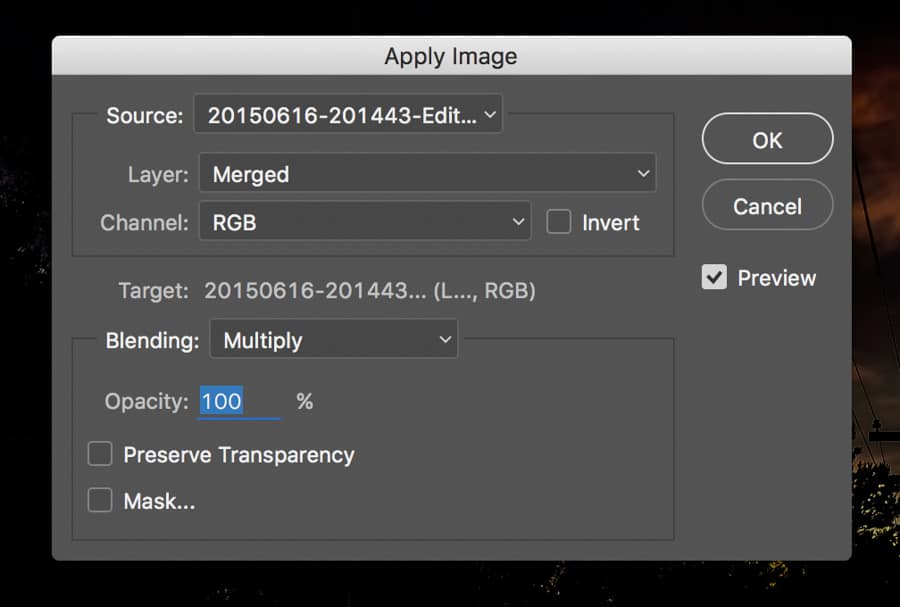
- Now go to the top layer and go to IMAGE>Apply Image.
- Once here, make sure to have the layer set to the COLOR layer since we are subtracting that layer out. Blending mode in this apply image box should be on SUBTRACT. Scale should be set to 2 and Offset at 128. Don’t ask – it’s just the way it is. Hit OK.
- You now can change the Texture group to “Linear Light” blend mode in the layers panel.
Now you have your color and texture layers separate. You can use various methods once here but one I and other like is using a lasso tool and selecting an area and then applying a Gaussian blur to that area. This will remove blotchy areas and leave skin smooth but with pores and textures in tact. This is done on the COLOR Layer.

When on the texture layer, you can remove things like fine lines and cracks in skin using the (S) clone stamp tool. Just make sure you have it set to “Current Layer” in the tool menu or it will select from underlying layers and you DO NOT want that in this case. CLICK HERE for an excellent video on this topic.
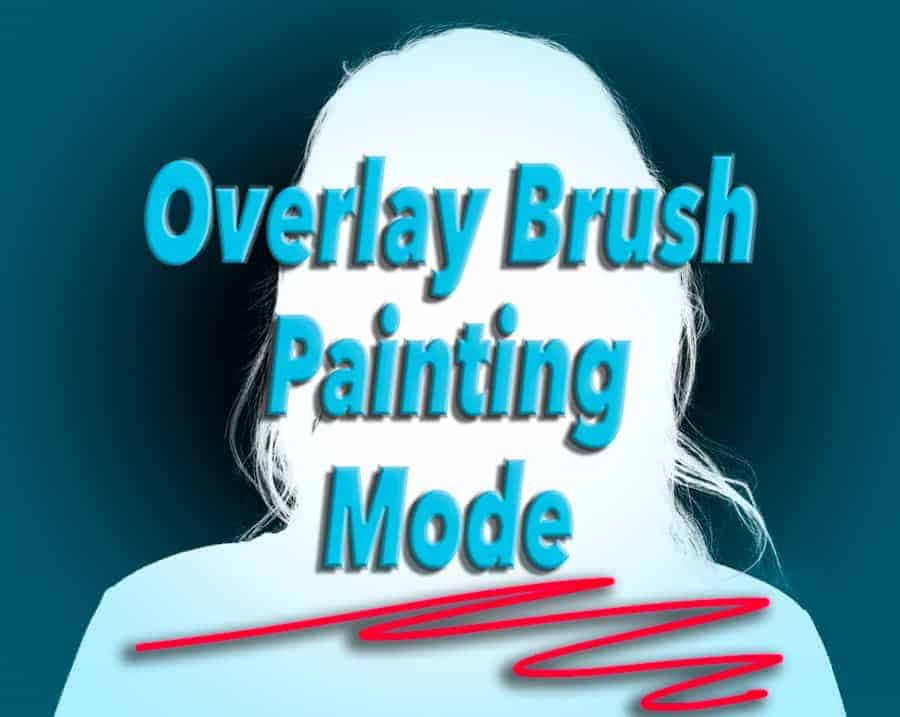
4 – Overlay/Softlight Painting selections or masks
When trying to get really nice masks/selections made, we often use the black and white paintbrush to refine our selections. Using the Brush tool in either overlay or softlight BLEND mode (in the Brush tool menu) is a great way to restrict the brush from affecting the opposite tone. White brush will only brush on white areas and black will only affect black areas. This is great when creating alpha channels in the Channels panel to make extremely precise selections – assisting in making a perfect selection even with fine hairs! See video here!
If you are not aware of this technique, it will totally change the way you work inside of Photoshop layer masks. You will love it!
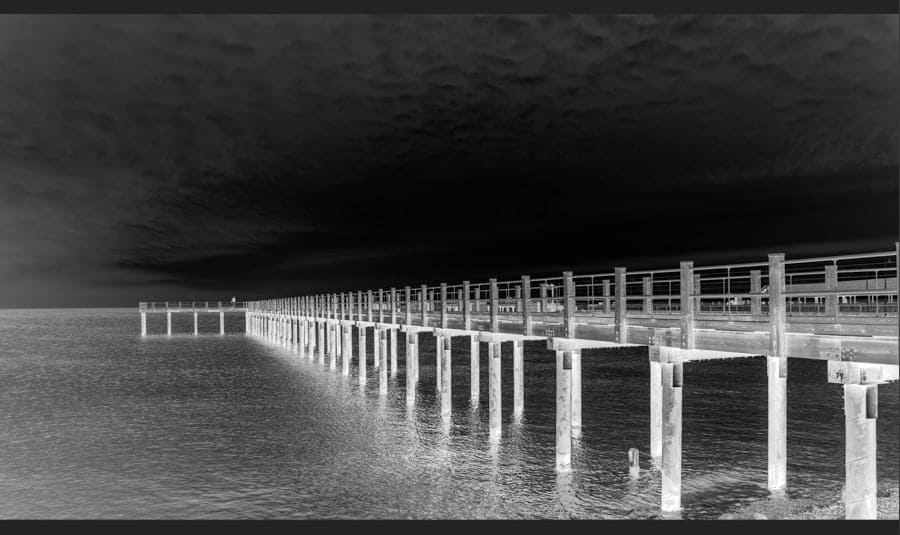
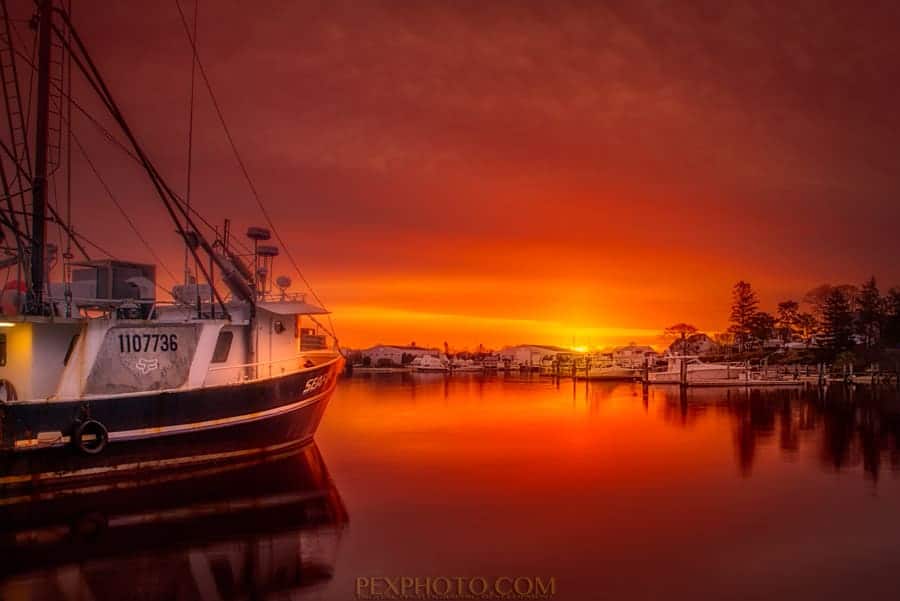
5 – The Orton Effect
The Orton Effect is a term many people into digital photography may or may not know from where it originated. Here is a link in case you are interested in learning more. To make it simple, the Orton effect today is a digital process in Photoshop that allows us to add a blur or glow to our images and it really adds some feel and mood to the overall image. It is best done selectively by masking in certain areas or making out areas in which you do not want the effect applied.
As with many post processing techniques, the Orton effect is over used and over done in many cases. Please don't let this stop you from trying this wonderful technique. I have included another link HERE.
There are many different methods people use in Photoshop to achieve these looks. Do some research and you will see that it is almost endless how many different methods are utilized. I personally like this method:
- Duplicate Background or Merged copy in the layers panel.
- Go to Image>Apply Image (use above settings)
- Change the Blend Mode to “Screen” in the layers panel
- Go to Filters>Blur>Gaussian Blur
Set your radius depending on image size and taste.
In the video I linked to, he used another Apply Image method on the layer mask but I prefer to apply a Luminosity Mask as mentioned above to constrain the effect to only certain tones of the image. I then like to GROUP that layer with itself and then apply a layer mask on the group. You can then mask out (or in) how you want the effect to alter the feel of your image.
Experiment with these and other techniques inside Photoshop; It is all so very GREAT!
Your posts are always a great post-processing education, Brian!
I just got into dodging and burning this past weekend, but so far, I’m using what I call the curves-and-layer mask method. I think the 50% method would give you greater control over the amount of brightening/darkening, though (but that’s just my untested theory).
Luminosity masks are next on my list of Photoshop techniques to learn.
Great article Brian.
For dodging and burning, I always use an empty layer with the softlight blend mode and painted black or white on it. I was unaware of varying ways contrast was affected by using 50% gray and overlay mode. Now I have another tool in the bag.
The grey layer really lets you see your affected areas much like a layer mask – especially when painting thru the layer when a selection is active such as a luminosity selection. You could then put a white layer mask on this grey layer and paint on that to alter the appearance of the adjustments on this said layer. There are just so many ways to work in Photoshop that it is just cool when you come across something you haven’t yet done yet and then implement it in your workflow 😉
Nice and interesting post.. thanks for share
Thanks for your nice comment Martin – appreciated 🙂
Brian, you add a lot to the community. I enjoy your enthusiasm and passion. Keep up the good work
Great write up Brian, cant wait to get home and try some of these out.
You have shared extra ordinary tricks all time. That’s really very effective and working. You are boss Brian. Keep up your writing and share with us so that we can know these special tips. Thank you.