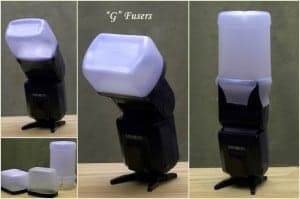
When using a flash the light produced is very hard (let's just call it what it is–ugly) without a lighting modifier. We have written before about what each lighting modifier does differently to impact the quality of light, but I still get a lot of questions about what little on-flash diffusers do to impact the light quality.
These small (usually hard plastic) diffusers are intended to spread light, make the light source slightly larger, and get a slightly softer light quality.
There are DOZENS (hundreds?) of different simple flash diffusers for sale in all different shapes and sizes. Some of them, like the Gary Fong Lightsphere, are expensive and don't do any better than Tupperware. My point in that article was simply to show that I see no difference in the resulting photo when using an expensive specialized light diffuser when compared to any old simple chunk of plastic. The light quality in my testing is the same.
So I have written before with some great home-made options for simple lighting diffusers, but this idea is absolutely free! Before showing you how to do it, I have to credit Ed Cord. Ed Cord is one of the most active (and helpful!) readers who (like a few other readers) is kind enough to answer all of your photography questions on the Facebook page. If you are a part of the Improve Photography Facebook group, you probably already know Ed.
Anyway, let's get down to business. How do you make this amazing little flash diffuser for free?
Step #1: Take a simple frosted plastic container that is no longer in use. Many different types of container can work for this. Ed has used a 16 oz. rubbing alcohol bottle, a relish bottle, and a vinegar bottle.
Step #2: Cut around the edges of the container to get it to about the right size for a flash diffuser (see picture for an approximate)
Step #3: Glue on a simple strip of velcro around the edge of the container that you can also connect to your flash if you want to keep it ultra secure. I've found that it often stays on just fine without even putting the other velcro side onto the flash, but your results may vary.
Step #4: Shoot some photos! It's just enough to take the edge off the flash and make it look much nicer than the bare flash. For samples of what adding a simple flash diffuser can do, check out the Tupperware vs. Lightsphere comparison.
If you are new to flash photography and want to learn how it all works and how you can get amazing results with inexpensive flash photography gear, you should really take a look at our 30-day online portrait photography class, where flash photography is a main focus of the course.

Comments are closed.