
Check out 17 essential tips on how to make better selfies with the iPhone!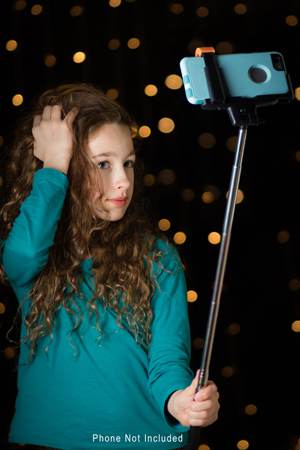 These days, selfies are everywhere. They populate the feeds of every social media platform around — from Facebook to Instagram to Twitter.
Some people are self-confessed selfie addicts, while others have never taken a single selfie.
Perhaps, you’re in the latter group: You've never snapped a selfie before, but you’re considering giving it a try. Or you’ve snapped a few selfies with your iPhone, but you really want to learn how to make them shine.
Either way, the list below will help you produce stunning selfies that you’re eager to share with family and friends.
1. FLIP THE CAMERA LENS
Turn the camera lens around so you can see yourself in the iPhone screen. In other words, click on the little camera icon in the top right corner to switch to the front-facing camera.
2. LOOK AT THE CAMERA LENS
When you snap a selfie, remember to look at the camera lens itself, not the camera app screen where you see a live view of yourself. (That is, unless you are intentionally looking away from the camera to create a different look.)
3. SHOOT IN SQUARE MODE
If you nearly always post your selfies to Instagram, shoot in square mode instead of photo, which will eliminate one step in the editing process. (When you click on the camera app, you can select the square mode at the bottom of the screen.)
4. USE BURST MODE
Simply hold down the shutter release button and your iPhone will take ten photos per second. When you’re content with the number of selfies you’ve shot, pull your finger off the button. If you have one of the newer iPhones, the camera app will then suggest which one(s) you might like best. Choose your favorite(s), then delete the rest.
Want to share all of your burst selfie photos? Check out the apps, PHHHOTO and Flipagram where you can make a fun looping GIF that you can share on any social platform.
5. USE SELF-TIMER + BURST MODE
You can easily set the self-timer for three seconds or ten seconds by clicking on the clock icon at the top of the camera app. To start the self-timer, simply click on the shutter release button. After 3 or 10 seconds have elapsed, your iPhone will automatically take a burst of 10 photos.
6. HOLD YOUR PHONE WITH TWO HANDS
As with any camera, it’s important to keep your iPhone steady when you’re shooting to avoid blur in your photos. Holding the iPhone with two hands, and keeping your arms in close to your body will help to limit camera shake.
7. USE YOUR EARPODS
Did you know you can snap a photo using your Apple EarPods? It’s true! With the iPhone 6, all you need to do is connect the EarPods to your phone, open the camera app, and press the volume button (only found on the EarPods that include a mic). In the alternative, you can use your phone’s volume buttons – both up and down– to snap photos.
8. TRY A SELFIE STICK
Selfie sticks are very popular right now, and for good reason. They allow you to snap photos of large groups of people or include more of the setting in a traditional selfie shot.
Selfies look A LOT better with a selfie stick so that you can cut out the “my arms are reaching out to the camera” look. It just looks more natural. This is the selfie stick that we like best on Amazon 🙂 And the good news is that it's wireless!
9. SET UP A MINI-TRIPOD
If a selfie stick isn’t your style, try a mini-tripod instead. This really high-quality mini-tripod from Amazon is lightweight, bendable, and compatible with the iPhone.
If you don’t have a mini-tripod on hand, get creative! Prop your iPhone up against a wall or place it inside an object. Some selfie takers have been known to use the heel of their shoe to prop up their phone, while others like to use Play Doh to hold their phone in place.
10. TRY CAM ME OR SELFIE MATIC APPS
CamMe is a free app that allows you to take selfies from a distance without holding your phone. How does it work? You simply set up your phone — either propped up on against something or mounted on a mini-tripod — and open Cam Me. Then, take a few steps back from the iPhone, pretend to click a camera button with your hand, and the app snaps a selfie. This app is particularly helpful for those who enjoy taking selfies of their outfits.
Selfie Matic is also a free app that allows you to take a selfie without clicking a single button. Selfie Matic uses motion sensing and face detection to capture your best selfie. It's almost like having your own personal photographer because it gives you audio and visual cues for how to position your face and body.
11. ADJUST THE EXPOSURE MANUALLY
The iPhone camera app has a new exposure feature, enabling you to control the exposure of your photos before you snap them. (Previously, you had to use an app such as Camera+ to select the focus and exposure points separately.) When you open the camera app, first tap on the place where you’d like the camera to focus. (The yellow square will move to that spot, and you’ll see a sun appear.) If you feel your photo is too bright or too dark, you can easily adjust the exposure by moving your finger up or down anywhere on the screen. Swiping up will make the image brighter; swiping down will make it darker.
12. HOLD YOUR CAMERA HIGHER THAN EYE LEVEL
Raising your arm(s) up slightly above your face will ensure that you don’t have a double chin in your selfie. However, don’t lift your camera up too high because then it’s likely that you will appear too small in the photo. As we all know, angles MATTER.
13. CHECK THE CAMERA LENS
Periodically, check your camera lens to make sure it is clean. If you see any dust or dirt on it, use a lens cleaning tissue. If you want something to clean your DSLR and your phone, check out this absolutely amazing cleaning kit on Amazon. Also make sure as you are holding the phone, you don't get your thumb or a finger in front of the lens.
14. USE AN APP TO PROCESS YOUR SELFIE
It’s no surprise, given the popularity of selfies, that there are a plethora of apps available to help you look amazing in your selfie photos. Here are four popular options.
Face Tune is a portrait photo editor that is used and loved by many selfie-takers. Why? Because with Face Tune, you can apply filters to a specific area of your photo rather than the whole image. For example, you can make blemishes disappear, remove flyaway hairs, and even raise your cheekbones. Face Tune is available through iTunes for $3.99.
Perfect 365 is a free app, which offers a full makeover — everything from removing dark circles to contouring your face to shaping your eyebrows. You can also try on different eye shadow and lipstick shades in Perfect 365.
YouCam Perfect, a free app, is both a selfie camera and photo editor. Using this app, you can make yourself look taller and skinnier in seconds, and enhance the appearance of your face. With the new eye brighten tool, you can instantly make the whites of your eyes look brighter.
15. EXPERIMENT WITH HDR
What is HDR? HDR stands for high dynamic range. Basically, HDR is a mode that takes three photos–an overexposed photo (too bright), an underexposed photo (too dark), and a third photo that is somewhere in between—and then automatically merges them into one photo. Oftentimes, HDR photos have more depth of field and better color than a standard photo.
HDR, though, has its limitations. It isn’t great for all situations, but it is usually helpful with outdoor photos. If you haven’t already done so, I’d recommending turning on Auto HDR and keeping it on the majority of the time. In this mode, the camera app will switch to HDR when it senses that the time is right.
You can easily turn on Auto HDR at the top of the camera app, and you also have the option of saving the normally exposed photo to your camera roll in addition to the HDR version. To select this option, go to Settings, then click on Photos & Camera, and at the bottom, you can turn on “Keep Normal Photo.”
16. USE THE CAMERA GRID
I find that having lines on the screen of the camera app makes it easier to compose photos – selfies or otherwise. And if the horizon is in your selfie shot, or you want to be precise about using the rule of thirds, you'll definitely want to use the camera gridlines. To turn the gridlines on, go to Settings and scroll down to Camera, then toggle on the grid.
17. USE THE EDITING TOOLS
With the latest iOS update, you can now make manual adjustments to your photos right in the photo app! When you tap the edit button, you are given a plethora of options. You can adjust the exposure of a photo. But you can also alter the shadows, highlights, and contrast of the selfies you snap.
And there you have it: Seventeen ways to take better selfies. But before you begin snapping away, I’d like to mention two things you’ll definitely want to avoid when taking selfies: Zoom and flash.
1. ZOOM
When you zoom in – even slightly — and then snap a photo, the quality of your image will be compromised. In other words, your photo will be noticeably soft and also noisy (grainy). What can you do to avoid this? Either move in closer to your subject — if that’s possible — or take the picture from further away, and then crop and zoom in later using the full size image.
2. FLASH
Using the flash on your iPhone is generally not a good idea, but especially when taking selfies. As you know, the flash overexposes your images and washes out the detail. When possible, always try to use natural light when shooting selfies.
Disclaimer: Improve Photography is a participant in the Amazon Services LLC Associates Program, an affiliate advertising program designed to provide a means for sites to earn advertising fees by advertising and linking to Amazon.com
About the Author
Jennie Harless is a hobbyist photographer who loves capturing life through her lens. Her favorite subject is her 3-year-old son whom she and her husband adopted at birth. Jennie and her family make their home in Northern California, but love to travel to places all over the United States. Her photography and writing can be found at The Life and Times of Jennie Rose and Jennie’s Journey.
How come the selfie pic shot from iPhone7+ The fac Is too bigger than take it from SAMSUNG device ?
How to adjust big face/as closer look to smaller that it could be?!
Very good info, thanks!
My iphone does not do zoom on selfies (SE). After a video selfie (or any video), is there a way to crop like a photo so you only get the center square and eliminate the sides, top, bottom? Is the only option just to hold the camera closer to my face (to only get the mouth area, I’m recording teeth) which means I can no longer see the screen?