
Check out these 14 tips to shooting stunning silhouettes!
There’s something about a stunning silhouette photograph that grabs my attention and has me oohing and aahing every time.
Maybe it’s the contrast of the dark and light.
The simplicity.
The mystery.
The beauty.
The drama.
Perhaps, it’s all of the above.
Up until recently, I’d never tried my hand at shooting a silhouette because, to be honest, it looked difficult. I knew the subject needed to be back lit (in other words, the sun needed to be behind the subject), but I wasn’t quite sure how to shoot the subject so that he or she was completely dark.
In addition, I felt like I had to be at the right place at the right time to really capture a clear silhouette. And that is partly true: Location and time of day matter. But where you place your subject, how you pose them, what angle you shoot from, and what camera settings you use are equally as important. And now that I’ve shot a few silhouettes, I can say with confidence that it’s not nearly as difficult as I had once thought.
Want to try taking a silhouette photograph?
Here are 14 tips for capturing stunning silhouettes.
#1 | SHOOT EARLY OR LATE IN THE DAY
In order to capture a clear silhouette, you’ll need the background to be brighter than your subject. The best way to do this is to shoot at the beginning or the end of the day. The optimum time to shoot a silhouette is when the sun is low in the sky – either when it is rising or setting. Sunsets are a favorite among photographers who regularly create spectacular silhouettes, but you can also shoot a decent silhouette against a blue sky.
#2 | SEEK OUT OPEN SPACE
Location matters when it comes to capturing a striking silhouette. I’ve found that open space works best: a flat, grassy field, a beach along the ocean, or a river bank. Make sure, though, that the area isn’t cluttered with distracting elements – cars, trees, buildings – that would easily take the viewer’s attention away from the subject.
Interested in finding open spaces in your community to take good silhouettes? Ask your local photographer friends, reach out to photographers in your area via Facebook or Meetup, or check with your local Flickr group.
#3 | POSITION YOURSELF FIRST, THEN THE SUBJECT
Once you’re facing the sun, ask your subject to stand between you and the sun. The subject does NOT have to be right in front of the sun, blocking it with his or her body, unless that is the look you prefer.

#4 | POSE YOUR SUBJECT
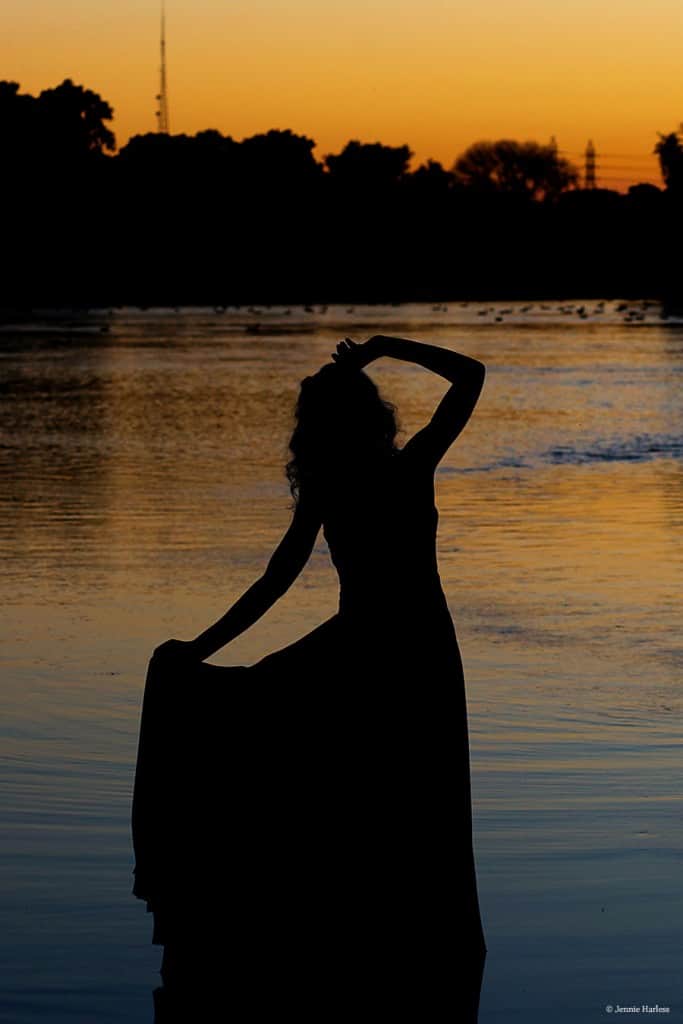
Once your subject is standing in the optimum spot, you’ll need to pose your subject so that they truly stand out from the background – and the viewer can clearly see who or what is in the photograph – just by looking at its outline and shape. You may also need to walk around your subject, crouch down, or stand on a step stool to find the angle that best captures the outline of your subject.
To successfully shoot any silhouette photo – whether you’re shooting one subject or six — you’ll need to create space, definition and separation.
Here are some specific poses that might be helpful:
If you’re shooting a close-up headshot, ask the subject to turn her head to the side, so you can capture her profile.
If you’re taking a full-body shot, focus on creating distinct lines and separation between the subjects’ arms and legs.
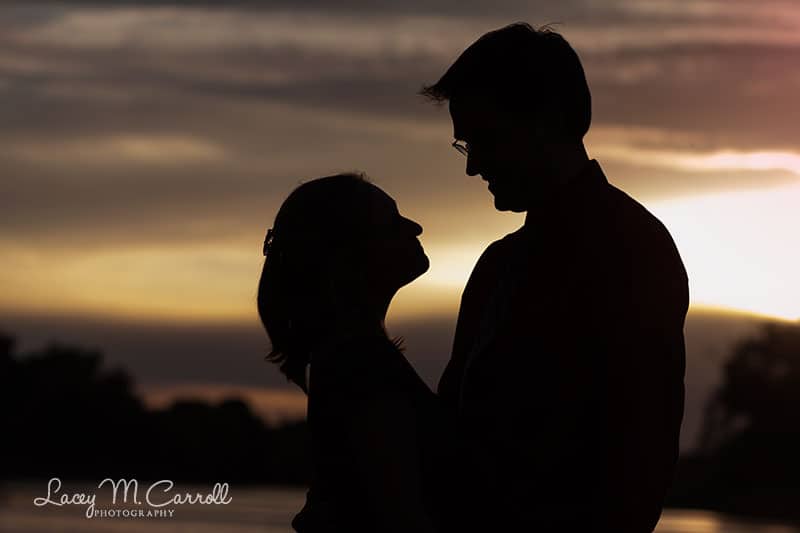
Encourage couples to hold hands or kiss or slowly dance, but make sure there is some space between them.
If the couple is going to kiss, ask them to turn toward one other and bring their faces close together –nearly touching – but not quite kissing. Shoot that moment where you can see both of their profiles.
If you’re photographing a newly-married couple on their wedding day, ask them to hold hands and put their other arms straight up in the air in celebration. And if the bride has her bouquet nearby, encourage her to raise it up.
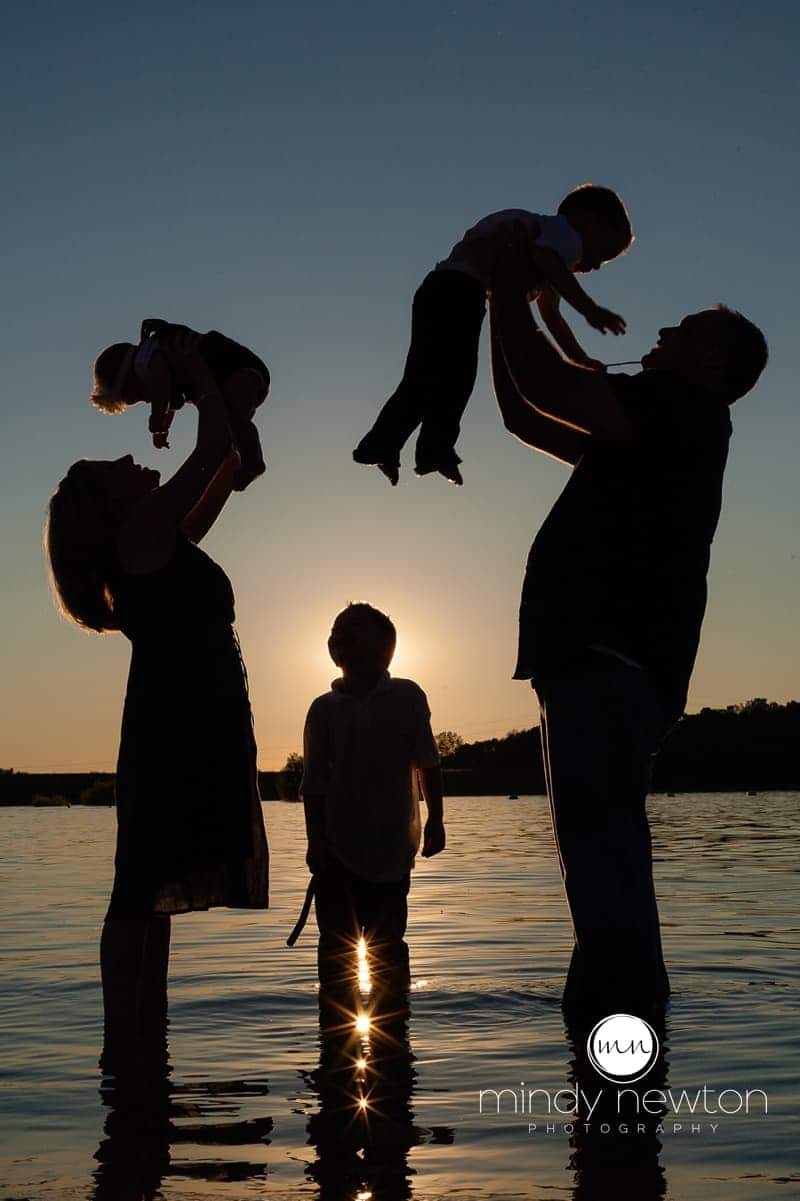
If you’re photographing a family, encourage them to stand along an imaginary line, then spread out so they can hold hands with their elbows slightly bent. They can be looking at you or standing with their backs to you – whichever is more aesthetically pleasing to you. What matters most is that there is space between them. Then, ask the mom and dad to kiss while the kids look over at them.
If there is a young child in the family, ask mom or dad to hold the baby above their head and smile up at him or her.
If there are two young children, ask the mom and dad to stand nearly back-to-back but with some space between them for the sun to come through. Mom holds one child up in the air, and dad raises the second child up above his head. Both mom and dad look up at the child they are holding.
 #5 | CAPTURE THE ACTION

When I think of silhouette photos, what first comes to mind are people posing, usually standing, with little-to-no movement. But silhouette action shots can be successful, too.
Here are a few ideas:
- Encourage dad or mom to throw their young child up in the air. (Increase your shutter speed to at least 1/250 to freeze the action.)
- Capture a child jumping off a sand dune onto the beach.
- Take a photo of your child swinging at the park. (You may have to lie down on the ground to capture this shot.)
- Ask a child to jump up high on a trampoline.
- Have a group of kids jump off the end of a dock into the water.
- Your family or friends riding the swings at the county fair.
- A golfer swinging his club.
- A cheerleader jumping up into the air, pom-poms in hand.
#6 | THINK BEYOND PEOPLE
While people work well in silhouette photos, inanimate objects are fair game, too. For instance, you could photograph the silhouette of a tree, the rides at a county or state fair, the skyline of your favorite major city, a lifeguard stand on a beach, cattle standing in a field, a bridge or a windmill.
#7 | SHOOT IN MANUAL
To obtain the clearest silhouette photo, you’ll want to ideally shoot in manual, so you can choose the aperture, shutter speed, and ISO – not the camera.
If you’re intimidated by manual mode and not quite sure which settings to use, here are some suggestions to get you started.
- Set your aperture (f-stop) for 8.0 or higher for two reasons: 1) You want a large depth of field, so that all of the details are in focus; 2) To reduce the amount of chromatic aberration that often comes with shooting into the sun.
- Increase your shutter speed. The basic premise of a silhouette is that you want to underexpose your subject. (I don’t know about you, but for a long time, I got underexposure and overexposure mixed up. The way I remember which is which is to think about the word, under, in underexposure. In this case, under means not enough So underexposed = too dark and overexposed = too bright. If you increase your shutter speed and your photo is still not dark enough, raise it even more. (Start at 1/125 if the subject is still and 1/250 if the subject is moving, and go up from there to darken your photo.)
- Keep your ISO as low as possible. As the sun sets, you might be tempted to increase your ISO. It’s okay to raise it slightly, but keep in mind that if you raise it too high, you might find that your photographs have too much noise (or grain) in them. And it will be really obvious with all the black in your images. Having said that, it really depends on your camera: with some cameras, you’ll see noise at an ISO of 800; others don’t show any noise until you get up to an ISO of 2500 or more. If you’re not sure how your camera will perform, keep your ISO as low as possible.
#8 | TRICK YOUR CAMERA
Because you want to shoot a silhouette, you’ll need to trick your camera by metering off the sky, not the subject. Start by pointing your camera at the brightest part of your frame – but not directly into the sun – and press the shutter halfway down. Then, while you’re holding the shutter halfway down, recompose your image and take the photo.

#9 | CHANGE YOUR METERING MODE
Speaking of metering, most digital cameras have different metering modes you can choose from. The best modes for silhouettes are ‘spot’ or ‘centered’ metering modes. By selecting one of these modes, you are telling the camera which individual metering point you want it to use to set the exposure.
#10 | ENLIST THE HELP OF EXPOSURE COMPENSATION
If after adjusting the aperture, shutter speed and ISO, your subject is still not dark enough, try using the exposure compensation feature on your camera. In a nutshell, exposure compensation gives you the ability to tell the camera to allow more light in or less light in. Generally, when shooting silhouettes you’ll want to dial in a setting of between -1 to -3 EV (exposure value), but you’ll need to experiment with the value to see what works best for the situation.
#11 | USE THE BEAUTY OF BRACKETING
What is bracketing? Bracketing is when your camera takes a series of photos (generally three): the shot you’ve metered for, one shot that’s one stop over what you’ve metered for, and one shot that’s one stop under what you’ve metered for. In other words, it’s taking the shot you dialed in, a shot that’s slightly underexposed, and a shot that’s slightly overexposed. (Refer to your camera manual for how to access bracketing on your particular camera. Generally, you can select bracketing through your camera menus, but it also might be set up as a button on the back of your camera.)
Bracketing is really helpful, particularly when taking a silhouette shot, because it gives you three options to choose from. Chances are good that one of the three shots will produce a nearly total silhouette (meaning the subject is almost black), and the other shots may be partial silhouettes where some of the detail of your subject is visible. (Some people actually prefer partial silhouettes because they can see some of the details of the subject.)
#12 | NAIL YOUR FOCUS
Although you’ll be exposing for the background, you’ll want to place your focus point on your subject. Lock the focus on your subject, not the background. On my Canon 5D Mark III, I use automatic, back-button focus (by placing the center focus point on my subject and then holding down the AE-Lock button or the * button) while I recompose the shot. When I’m ready to snap the image, I push down on the shutter release button.
#13 | SKIP THE FLASH
Using a flash, either the one on your camera or an external flash, is not recommended for silhouette photography. If you usually shoot in automatic, it’s likely that your camera will automatically fire the flash. To make sure this doesn’t happen, switch to P mode (program mode), A mode (aperture priority), S mode (shutter priority), or M mode (manual).
#14 | POLISH IN POST PROCESSING
Do your best to capture the best silhouette you can from behind the lens, but keep in mind that most photographers perfect their silhouettes in Lightroom, Photoshop or both.
In post processing, it’s generally helpful to boost the contrast in your image, add more saturation, and increase the blacks slightly.
Some photographers use the Burn tool in Photoshop to darken their subject. Depending on the photo, you might want to also adjust the shadows and highlights.
Now that you know how to snap a silhouette and polish it in an editing program, grab your camera, recruit a friend or family member, find a sunset, and shoot away. Then, repeat as often as possible, trying out different camera settings, shooting angles and subject poses. In no time, you’ll be rocking your silhouette shots!
Thanks to Mindy Newton and Lacey Carroll for sharing their silhouette photos.