
This is a guest post by a reader of Improve Photography.
If you’re like me, it’s easy to get caught up in looking at the specs of the latest and greatest camera out there. When I took the dive and purchased my first DSLR, I spent my hard-earned cash on the newest Canon Rebel and a good quality zoom lens that would give me a lot of options. A while later I found myself eyeing a newer camera body with way better specs than my Rebel. I've heard the warning against falling into the trap of believing that new equipment will magically transform my photography. To a certain degree that's true, but there are a few pieces of equipment that I rely on all the time. While upgrading a camera body brings some nice options, the vast majority of the shots I take and like could realistically be taken on the six-year-old Rebel that doesn't get pulled out much anymore. With that in mind, these are my 5 indispensable pieces of equipment.
#1: A good quality circular polarizing filter
My interest in photography started with landscape photography, and in this endeavor my polarizing filter is indispensable. If you’re like me, you don’t always have the time to shoot during the golden hours of sunrise and sunset. Sometimes my free time lands in the middle of the day, or on a perfectly clear day. I personally don’t like when I have a pretty landscape with a washed out sky or a sky that is too light blue. The polarizing filter brings that deep blue sky into my pictures, adding a pop of color and contrast that otherwise isn’t there. When the weather turns cloudy, I like to head out, and the polarizer helps cut through hazy skies or damp rocks and leaves. In a pinch, it acts as a 1-stop neutral density filter, which once helped me capture one of my favorite lightning shots because I was able to slow a 15 second exposure to 30 seconds.
Both the images below were shot near midday, a couple days apart, during a summer vacation in Mexico. I didn't really have a choice when I took the photos. On the left I didn't have my polarizer. I was able to pull some deeper blue into the sky on the left during post processing, but not as much as I desired. On the right, the polarizer gave me the deep blue skies that I wanted to bring an interesting background for my photo.


#2: A wide aperture lens
A high quality zoom lens with a wide aperture can set you back thousands of dollars. But you don’t need that kind of cash to shoot with a wide aperture. The 50mm 1.8 lens is one of the cheapest lenses you can buy (around $100), but don’t confuse that with poor image quality. There are other options, but in my opinion, this little lens gives you the best options for your dollar of any piece of photography equipment out there. If you shoot wide open at f/1.8, you can get several stops more light into your camera than even top-of-the-line zoom lenses. The wide apertures will give a very shallow depth of field which brings a lot of artistic options that aren’t available at smaller apertures.  This shallow depth of field can also help hide an undesirable background. At higher apertures, even a low end prime lens is very sharp. I took the photo above with my aperture all the way open at f/1.8. Since I was very close to my subject, very little of the photo was in focus, which was what I wanted. Shot with a zoom lens, I think I would have had a nice snapshot of hands and newspaper that would ultimately be uninteresting.
#3: Photoshop Lightroom

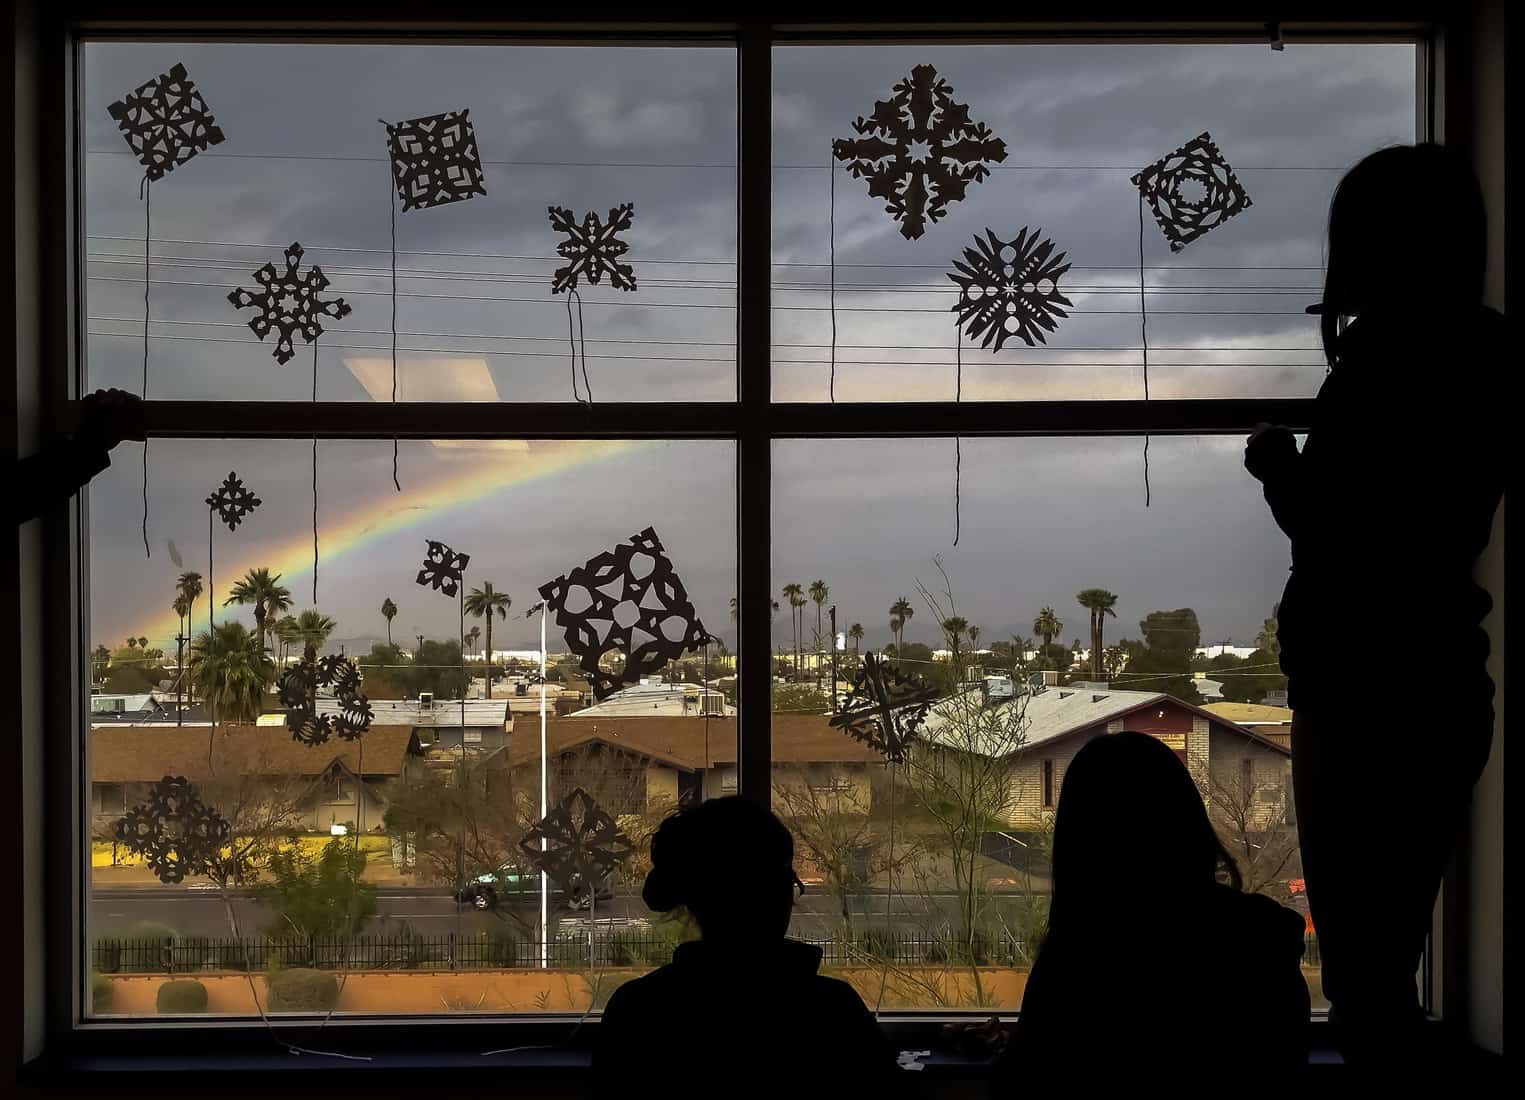
Ok, maybe this doesn't qualify as “equipment,” but if you haven’t taken the dive to learn Lightroom, I hope this will encourage you to do so. I had nothing but an iPhone when I saw this photo opportunity. I snapped off a couple of shots, and as you can see from the original, I had a washed out rainbow with a flat boring sky. The phone was trying to do its best with a dark interior and relatively bright exterior. I really had no way to correct it until I processed it in Lightroom. I thought the outcome was pretty amazing considering where I started.
Last Christmas I bought Lightroom for my mother, who enjoys taking pictures, but probably wouldn't call herself a “photographer.” While it can seem daunting at first, I find that doing basic adjustments to exposure alone will dramatically improve most photos. As you get more and more comfortable, you can explore some of the more in-depth options that Lightroom provides. Some of my favorites are the Hue/Saturation/Luminance sliders which allow me to make adjustments to a particular color, and the graduated filter. Also, while I had a hard time adjusting to managing my photos in Lightroom, I now can't imagine how I was able to keep track of my photos without it.
#4: A strobe
I have to admit that early in my exploration of photography, I didn’t get the point of a big external flash. Looking at the cost of a speedlight didn’t improve my opinion either, but there are very good third party alternatives out there for much less cost (click here for our recommended flash photography gear). There is a bit of a learning curve when you first dive into to using a strobe, but it’s a good learning curve. When I first started shooting with a speedlight, it was the first time I really started to think about light in my photography. This exploration alone was worth its weight in gold, but it isn’t the only benefit of buying a strobe. I used to say I wanted to shoot more, but I often found the light was bad when I had free time. My speedlight allowed me to create light when I was available, and from any direction I wanted. A long ETTL cable, or the ability to remotely shoot flash off camera, allows for creative control of light that is otherwise impossible. This exploration helped me to not only shoot with the strobe, but to see and understand natural light in a way I didn't before.
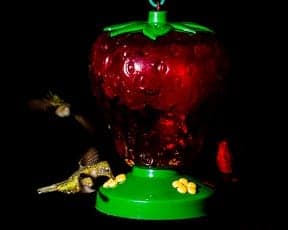 The shot to the right is impossible without a strobe. The local hummingbirds were constantly swarming this feeder, but the background was boring, and there wasn’t enough light to freeze (more like slow down) the action. By using the speedlight as my main light source I was able to black out the distracting background and only provide light to my camera during the short amount of time the light flashed. This helped me to almost freeze the birds' wings.
5. A tripod
Ok, I know this maybe be obvious, but it’s a must have piece of equipment and I skimped on my first one. My photos were sharp enough for my purposes, but a 12-year-old’s curiosity ended the life of that little tripod with just a little bit of pressure in the wrong spot. I was a little less cheap next time around. I also had a pan and tilt head on that first tripod, but opted for a ball head the second time around. The ball head allows me to drop the legs and get my camera level very quickly. The pan and tilt was better for panoramas, but in most cases I find the speed of setting up the ball head is my preference. (Click here for some great tripod recommendations.)
While it's always fun to look at the newest piece of gear, when I really start to think about the gear that I use to get a creative shot, my camera body isn't really at the top of my list. If you find yourself hoping for a new camera, but you haven’t tried upgrading elsewhere, consider these other options which could all be purchased for less than the cost of a new camera, and in my opinion provide a lot of creative options. What are your thoughts? Do you have indispensable pieces of gear that help you get the shot without breaking the bank?
Nice article and I agree with all 5. (not sure if the list was prioritized or not?)
I believe Light Room IS a tool; just equipment on a metaphorical level. I really wish you might have considered mentioning going to shooting raw if you are going to include LR. The power of LR really shows itself in handling raw images and it really does make sense to learn to shoot raw (in conjunction with jpeg if only for a little while?).
Again, great article.
I bought the latest version of Lightroom and am LOST! Any recommendations on a good place to start on YouTube to self-teach? I’ve viewed a few of them, but I still don’t know how to get through the basics.
buy scott kelby’s books. look on amazon for best price. all geared towards photographers,great for a beginner. tells you how to set up lightroom. you will be found. 🙂
what version were you using Collen before lightroom 5 or is this your first time with Lightroom?
Hi Colleen
If you are not a “read the manual” person,
you could try Laura Shoe’s Lightroom course or Phil Steele who also has a great online Lightroom course.I can vouch for both of these.
Funny it’s like you and I talked. I JUST bought a Nikon D3100 body because my D40 wasn’t cutting the mustard, as they say.
Heading out to a newborn shoot. Hoping this brings me what I have been missing. PS – It didn’t break the bank.
This is a great post for those of us just getting started in photography. So often we read about the latest and greatest and get discouraged because we can’t even manage what we already have! I’m appreciative of the suggestions for practical equipment that will serve me well but won’t break the bank. Thank you, thank you, thank you!
Wow!!! you read my mind!! I was going to call in and ask if you guys thought it was ok to start my small photography business with my d5100, 50mm 1.8, and 55-300. I think I will make it work until I can buy more gear….Thanks Jim
What is the difference between Lightroom and CS5
or is there any?
CS5 is a general purpose image editing program. It is tremendously powerful, but very complex.
Lightroom is designed specifically for photographers. It lets you quickly organize, classify and process your photos. It is a lot simpler and easier to learn.
CS5 stands for Creative Suite 5 and is a collection of programs including Photoshop, Lightroom, Illustrator, etc.
The difference between Photoshop CS5 and Lightroom CS5 is that Photoshop is mainly used to manipulated, add, and layer photos with additional elements.
Lightroom can be thought-of like a digital lightroom where you take (ideally) a RAW image file and make postprocess edits like adjusting highlights, shadows, contrast, and other elements of a photo.
Many rely on Lightroom for initial edits, even though you can do similar edits in Photoshop, because in Lightroom the entire setup is geared towards processing batches of photos without needing to replicate the work over and over.
I normally start in Lightroom then move to Photoshop once I’m ready to do touch-ups or extreme editing.
Hope that helped.
I agree with all 5, but especially appreciate the filter. Way under-rated tool that has drastically improved my photography, especially in mid-day harsh lighting. It’s a fairly inexpensive investment that will improve many different shoots!
http://photoclasses.com/product/lightroom-class/
Buy Scott Kelby’s books from half.ebay.com. I got a $50 book(used, like new) for 75 cents…. 🙂