
What is it?
Chromatic aberration as it relates to photography is also known as fringing. The cause and effect of chromatic aberration deals directly with the scientific engineering of the lens that you're using on your camera. But first, here is a photo with chromatic aberration:

At first glance, you can't even tell that this photo is being affected by chromatic aberration around the high contrast edges of the photo. Let's take a closer look at what we have going on here.
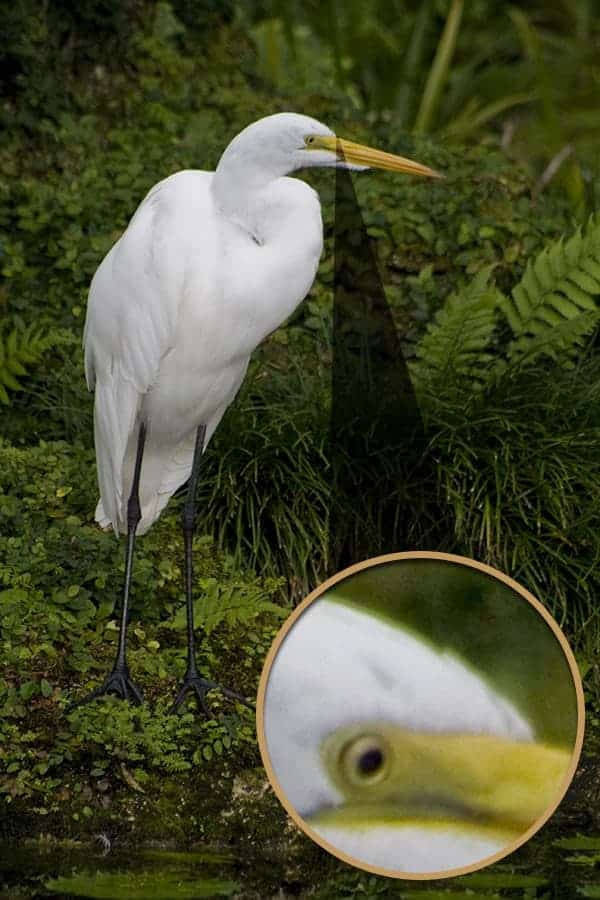
If your photos do by chance have chromatic aberration, the good news is that more often than not you won't even notice that you have it. The downside to having chromatic aberration in your photos is that you do loose a little bit of image quality in the photo. Since your lens is having a difficult time separating color in high contrast areas, those edges will inherently become softer than they should be. If you are printing your photo with chromatic aberration, you will want to correct this so that you don't see it in the print. Obviously when it's enlarged we are able to see the fringed edges.
How to fix it!
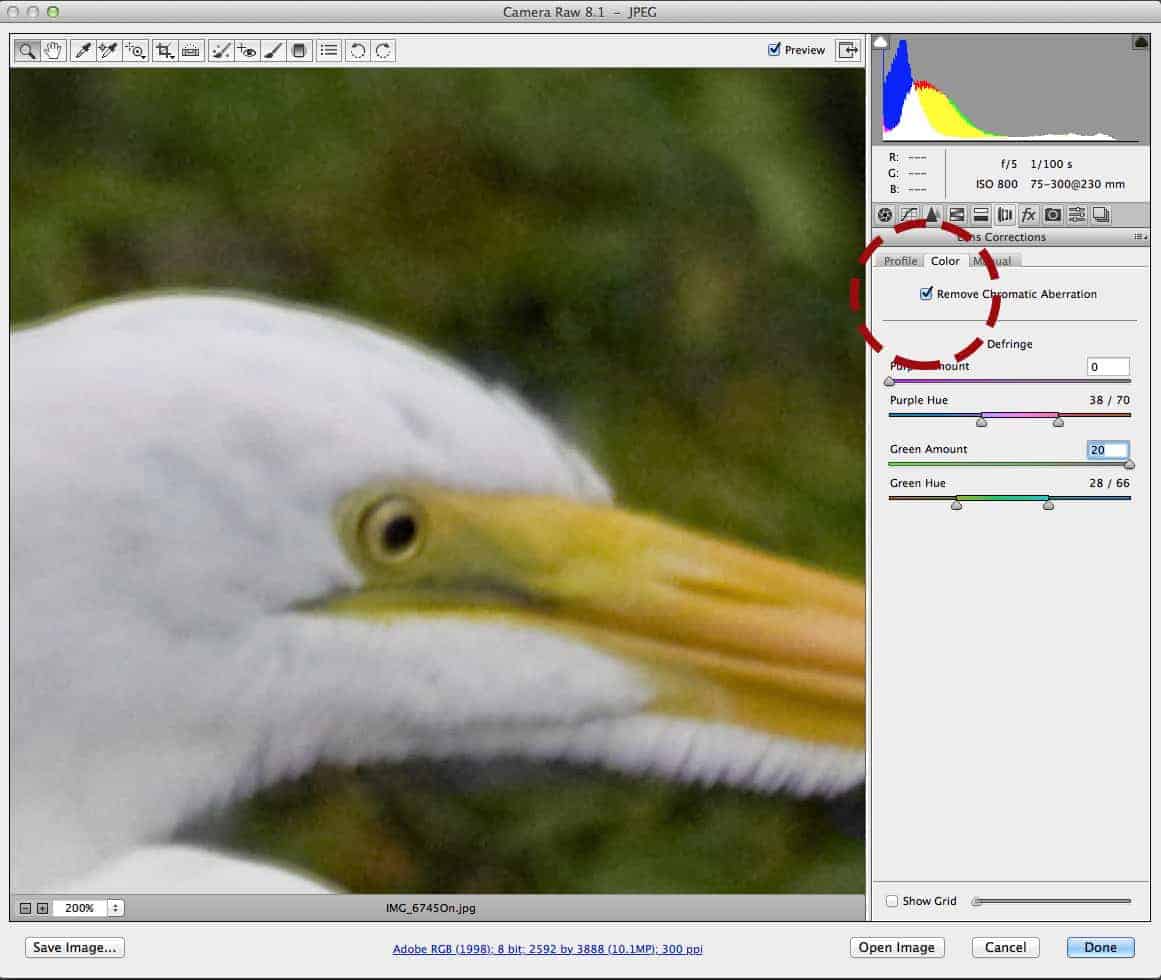
There are a few ways that you can fix chromatic aberration in your photos. However, I suggest you use these two options because they are the absolute easiest when it comes to doing this.
1. CameraRaw Plugin – Click to enlarge.
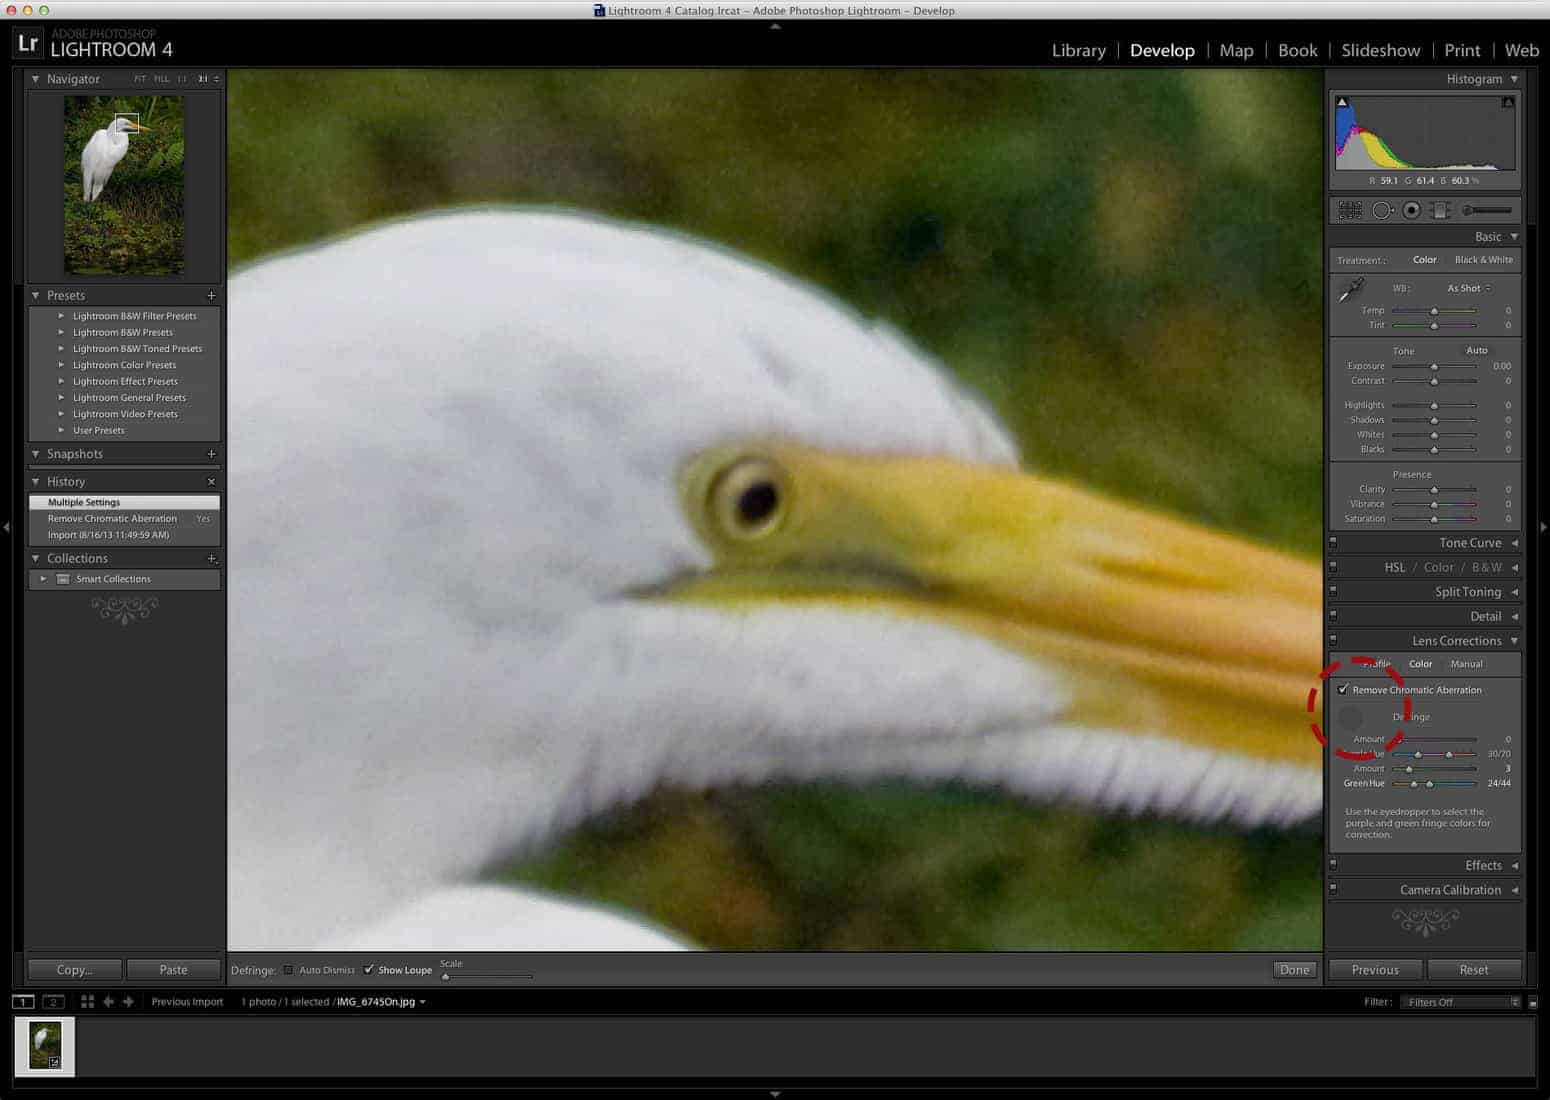
2. Lightroom – Click to enlarge.
The scientific reasoning
In case you have been losing sleep at night over this, here is a basic understanding of how this infamous fringing happens in photos.
Light waves are comprised of three basic colors: Red, blue, and green. As these light waves pass through the lens of the camera, the wavelengths will change slightly before reaching the sensor in the camera because of the glass on the front of the lens. The more that the wavelength of light changes, the harder it becomes for the individual colors of light to stay together and render sharp, crisp, detail between different colors in our photos.
Chromatic aberration occurs in our photos when there is a dramatic change in wavelengths of light passing through the glass on our lenses. The quality of glass placed in your lens will greatly determine the frequency of finding any fringing in your photos.
On a personal note: I stopped seeing fringing in my photos when I started to spend money on lenses with higher rated glass. It's no wonder seasoned photographers suggest spending your money on “glass” because it really will make all the difference in your photos.
If you would like to learn the scientific nature of how chromatic aberration occurs in more detail, please click here.
Hi Dustin, great article. I have experienced chromatic aberration on a few of my photos. My question is: where do you find ratings on “glass”? I always try to purchase the best I could afford, do you mean it is best to purchase Canon or Nikon lenses?
Thank you!